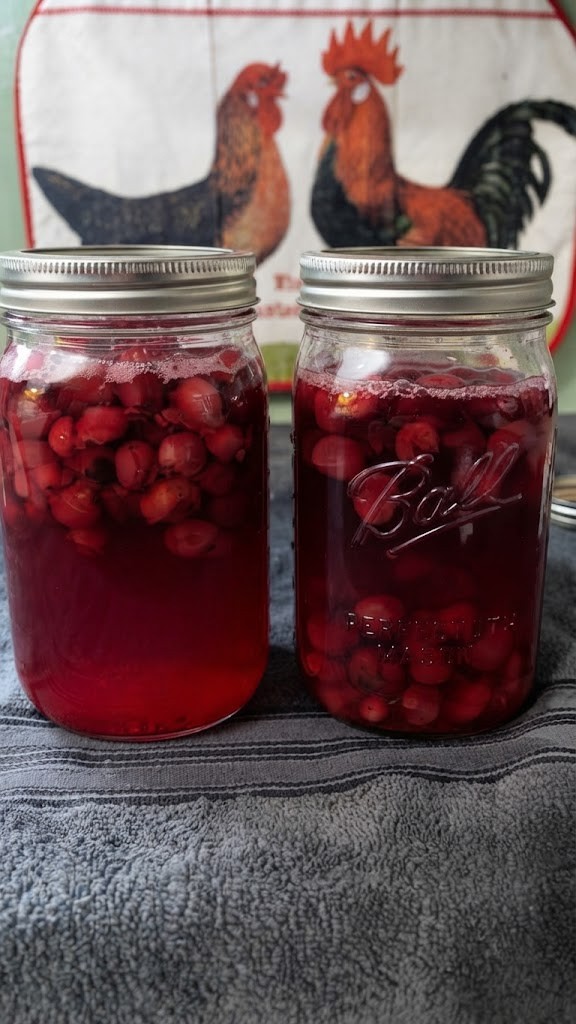
Canned Cranberry Juice

  • Prep Time: 20 minutes

  • Boiling Water Bath Processing Time: 25 minutes

  • Infusion / Rest Time: 4 to 6 weeks (for optimal flavor extraction)

  • Shelf Life: Up to 18–24 months when stored in a cool, dark pantry

Ingredients & Equipment

Ingredients

  • 4 cups fresh or frozen whole cranberries (1 cup per quart jar; pick through to remove any soft or bruised berries)

  • 1 to 2 cups granulated sugar (1/4 to 1/2 cup per quart jar, adjusted to your taste preference)

  • Boiling water (approximately 3.5 to 4 quarts)

Pro Tip on Sweetness: Whole cranberries are naturally high in quinic and malic acids, giving them a sharp, tart edge. Using 1/3 cup of sugar per quart creates a balanced, semi-sweet juice similar to artisanal shop blends. If you prefer unsweetened juice, omit the sugar entirely during canning and sweeten individual glasses with honey or simple syrup right before serving.

Equipment Needed

  • Water bath canner with an interior rack

  • 4 Mason jars (quart size) with new canning lids and rings

  • Jar lifter and bubble debubbler (or clean silicone spatula)

  • Canning funnel and magnetic lid wand (optional)

  • Clean kitchen towels

Step-by-Step Instructions

1.Prep Equipment & Heat Water:10 minutes.

Inspect your quart jars for any chips or cracks. Wash jars, lids, and rings in warm, soapy water and rinse thoroughly. Place your jars into the water bath canner, fill with enough water to submerge them, and bring to a gentle simmer (180°F). Keep the jars hot until ready to pack to prevent thermal shock. Bring a separate large kettle or pot of fresh water to a rolling boil.

2.Pack the Jars:5 minutes.

Carefully lift one hot jar at a time using your jar lifter. Place a canning funnel over the top of the jar. Add 1 cup of whole cranberries directly into the hot jar, followed by 1/4 to 1/2 cup of granulated sugar poured right over the berries.

3.Pour Boiling Water & Set Headspace:5 minutes.

Ladle boiling water into the jar, leaving exactly 1/2 inch of headspace (the distance between the liquid level and the top rim of the jar). Run a non-metallic bubble remover around the inside wall of the jar to release trapped air bubbles. Re-check the headspace and adjust liquid level to 1/2 inch if necessary.

4.Seal and Process:25 minutes.

Wipe the rim of the jar with a clean, damp cloth to eliminate any sugar residue. Place a clean lid on top and screw the metal band down until fingertip-tight (do not force or overtighten). Lower the packed jars into the boiling water bath canner, ensuring the water level covers the tops of the jars by at least 1 to 2 inches. Cover with the canner lid, bring to a full rolling boil, and process for 25 minutes (adjust for altitude if above 1,000 feet).

5.Cool, Test Seals, & Age:24 hours prep + 4-6 weeks rest.

Turn off the heat, remove the canner lid, and let the jars rest in the hot water for 5 minutes. Carefully transfer the jars to a towel-lined counter using a jar lifter. Leave them undisturbed for 12–24 hours until fully cooled. Listen for the distinct “ping!” sound as the lids pull down and seal. Press the center of each lid to confirm the seal. Store sealed jars in a dark pantry for 4 to 6 weeks before opening to allow the fruit to fully infuse the liquid.


How to Serve Your Home-Canned Juice

When your juice has finished aging and you are ready to drink it:

  1. Strain: Pour the contents of the quart jar through a fine-mesh strainer into a glass pitcher to separate the spent berries from the clear ruby juice. (Don’t throw away the leftover berries — fold them into oatmeal, bake them into quick breads, or blend them into fruit smoothies!)

  2. Chill & Dilute: Serve over ice. If the juice feels too concentrated, dilute it with a splash of cold water or chilled sparkling water.

  3. Mix: Use it as a vibrant base for holiday mocktails, festive spritzers, or classic cocktails like Cosmopolitans and Cranberry-Gins.

Processing Time Adjustments for Altitude

Higher elevations lower the boiling point of water. Adjust boiling water bath processing times based on your elevation:

Elevation (Feet) Additional Time Total Processing Time (Quarts)
0 – 1,000 ft Standard 25 minutes
1,001 – 3,000 ft + 5 minutes 30 minutes
3,001 – 6,000 ft + 10 minutes 35 minutes
6,001 – 8,000 ft + 15 minutes 40 minutes
8,001 – 10,000 ft + 20 minutes 45 minutes

Nutrition Information

The nutritional breakdown per 8 oz serving (calculated using 1/3 cup sugar per quart jar):

Nutrient Amount per 8 oz Serving % Daily Value (DV)
Calories 85 kcal *
Total Fat 0 g 0%
Sodium 2 mg 0%
Total Carbohydrates 22 g 8%
Dietary Fiber 1 g 4%
Total Sugars 20 g *
Added Sugars 16 g 32%
Protein 0.2 g 0%
Vitamin C 14 mg 15%
Calcium 7 mg 1%
Potassium 42 mg 1%

Similar Posts

  • Tomato Feta Soup

    Prep Time: 15 minutes Cook Time: 45 minutes Total Time: 1 hour Difficulty Level: Easy Servings: 6 Ingredients For the Soup 2 pounds (900 g) ripe tomatoes, halved 1 medium onion, quartered 6 garlic cloves, peeled 2 tablespoons olive oil 1 teaspoon salt ½ teaspoon freshly ground black pepper 1 teaspoon dried oregano 1 teaspoon…

  • Stuffed Rigatoni Pie

    Introduction: Stuffed Rigatoni Pie is a delightful twist on a classic Italian pasta dish, offering the comfort of a baked pasta casserole while showcasing the rich and savory flavors of a homemade tomato sauce, stuffed rigatoni, creamy ricotta cheese, and melting mozzarella. This dish is ideal for a family dinner, weekend gatherings, or special occasions…

  • .pizza burger

    Preparation Time: 15 minutesCooking Time: 15 minutesTotal Time: 30 minutesServings: 4 Introduction: If you’re a fan of both pizza and burgers, then this recipe will be your new go-to comfort food. The Pizza Burger combines the flavors of a classic pizza with the juicy, savory goodness of a burger. It’s an easy and creative twist…

  • Chicken tikka masala

    Prep Time: 30 minutes (plus 2-24 hours marinating) Cook Time: 30 minutes Total Time: 1 hour (plus marinating) Difficulty: Intermediate Servings: 4-6 Author: [Your Website/Blog Name] A Taste of Comfort Chicken Tikka Masala is a beloved dish that needs no introduction. While its origins are a subject of delicious debate, its status as a global comfort food is undeniable. This recipe…

  • Homemade tomato soup

    Description: This Homemade Tomato Soup is rich, creamy, and comforting, made from fresh or canned tomatoes and simple ingredients that highlight the natural sweetness and acidity of the tomatoes. Perfect for a cozy lunch or dinner, this soup pairs wonderfully with a grilled cheese sandwich or fresh crusty bread. Ingredients: 2 tablespoons olive oil 1…

Leave a Reply

Your email address will not be published. Required fields are marked *