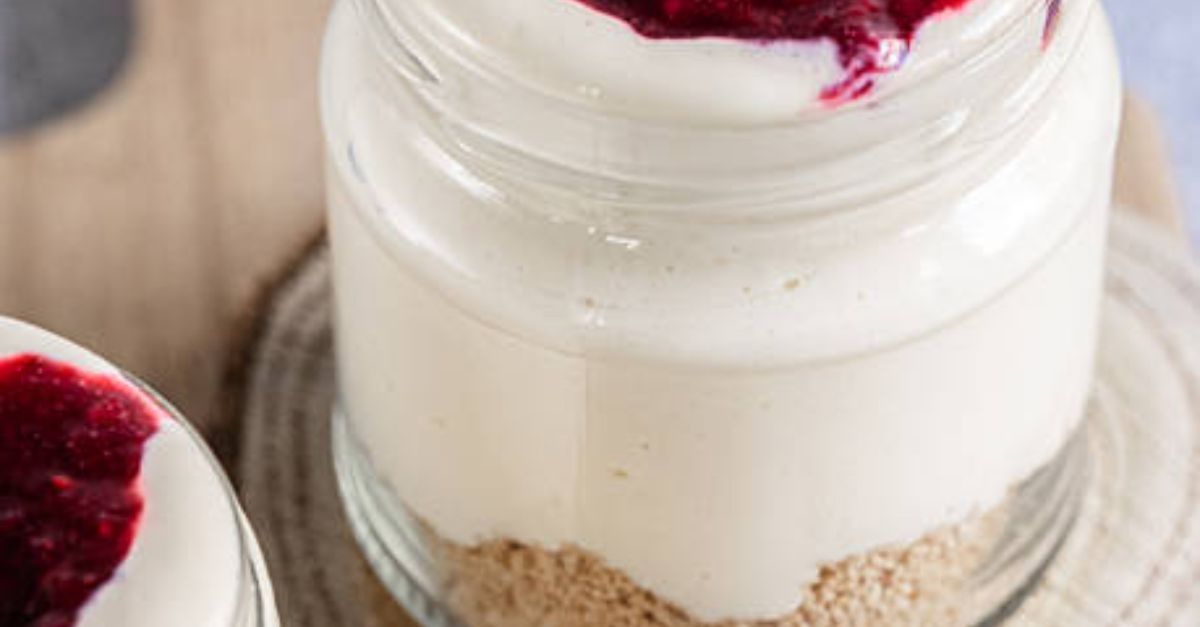
High protien cheesecake jar
Prep Time: 15 minutes
Chill Time: 2 hours (minimum)
Total Time: 2 hours 15 minutes
Difficulty: ★☆☆☆☆ (Easy)
Intensity: Low (No mixing equipment required – just a bowl and a whisk)
Servings: 4 jars (8 oz each)
Storage: Keeps in fridge for up to 5 days (do not freeze)
Why You’ll Love This Recipe
These High-Protein Cheesecake Jars are the perfect solution for a healthy dessert, post-workout snack, or even a quick breakfast on the go. Each jar packs over 25 grams of protein with a fraction of the sugar and fat found in traditional cheesecake.
No water baths. No cracking. No guilt. Just creamy, dreamy cheesecake layered over a crunchy, high-fiber crust.
Nutrition Facts (Per Jar – 8 oz)
| Nutrient | Amount |
|---|---|
| Calories | 285 kcal |
| Protein | 27 g |
| Carbohydrates | 22 g |
| Fiber | 4 g |
| Sugars | 9 g (no added sugar) |
| Fat | 11 g |
| Saturated Fat | 3.5 g |
| Sodium | 310 mg |
| Calcium | 22% DV |
*DV = Daily Value based on a 2,000-calorie diet.*
Ingredients
For the Crust (4 jars)
-
60 g (1 cup) rolled oats (or crushed high-protein cereal)
-
30 g vanilla whey or plant protein powder
-
1 tbsp coconut oil, melted
-
1 tbsp water
-
1 tsp cinnamon
-
Pinch of salt
For the Cheesecake Filling
-
500 g (about 2 cups) 0% Greek yogurt (plain)
-
200 g (¾ cup) low-fat cottage cheese
-
60 g (2 scoops) vanilla or cheesecake-flavored protein powder
-
1 tbsp lemon juice
-
1 tsp vanilla extract
-
2 tbsp powdered erythritol or monk fruit sweetener (optional; adjust to taste)
-
2 tbsp unsweetened almond milk (for thinning if needed)
Optional Toppings (per jar)
-
1 tbsp sugar-free fruit compote (e.g., mixed berries)
-
1 tsp dark chocolate shavings (85%+ cocoa)
-
Crushed almonds or walnuts
Equipment Needed
-
4 glass jars (8 oz / 250 ml each) with lids
-
Mixing bowl (medium)
-
Whisk or silicone spatula
-
Food processor (optional – for crust only)
-
Spoon or piping bag (for clean layers)
Instructions
Intensity Level: Very Low
No baking. No electric mixer required. Only light whisking and pressing.
Step 1 – Make the Crust (Active time: 5 minutes)
In a food processor, pulse the rolled oats, protein powder, cinnamon, and salt until fine crumbs form. (No food processor? Place oats in a zip-top bag and crush with a rolling pin.)
Transfer to a bowl. Add melted coconut oil and 1 tbsp water. Mix with a fork until the texture resembles wet sand. It should clump when pressed.
Pro tip: For a firmer crust, press mixture into the bottom of each jar immediately. For a looser, granola-like texture, don’t press too hard.
Step 2 – Prepare the Cheesecake Filling (Active time: 7 minutes)
In a medium mixing bowl, combine Greek yogurt and cottage cheese. Whisk until smooth. (For an ultra-smooth texture, blend the cottage cheese alone first in a blender for 30 seconds.)
Add protein powder, lemon juice, vanilla extract, and sweetener (if using). Whisk vigorously for 1 minute until thick and glossy. If the mixture feels too stiff, add almond milk 1 tsp at a time. You want a thick, spreadable pudding consistency.
Intensity note: This step requires moderate wrist action for 1 minute. No heavy lifting or complex techniques.
Step 3 – Layer the Jars (Active time: 3 minutes)
Divide the crust mixture evenly among 4 jars (about 2 tbsp per jar). Gently press down with the back of a spoon.
Spoon or pipe the cheesecake filling on top of the crust, filling each jar to about ¾ full. Smooth the top with a spatula.
Step 4 – Chill (Inactive time: 2 hours)
Screw on the lids and place jars in the refrigerator for at least 2 hours. Do not skip this step – chilling sets the texture and allows the protein powder to fully hydrate, eliminating any gritty feel.
Step 5 – Add Toppings & Serve (Active time: 1 minute)
Just before serving, add your favorite toppings. For the nutrition stats shown above, use 1 tbsp sugar-free berry compote and a sprinkle of crushed almonds.
Intensity & Timing Summary Table
| Stage | Time | Physical Intensity | Mental Intensity |
|---|---|---|---|
| Crust prep | 5 min | Low (pressing/pulsing) | Very low |
| Filling mixing | 7 min | Low-moderate (whisking) | Low |
| Layering | 3 min | Very low | Very low |
| Chilling | 2 hours | None (waiting) | None |
| Topping/serving | 1 min | Very low | Very low |
Overall difficulty: 1/5 – Anyone can make this, including kids and beginner cooks.
Recipe Variations (Keep Protein High)
-
Chocolate Peanut Butter – Use chocolate protein powder in filling + 1 tbsp powdered peanut butter. Add 1 tsp cocoa powder to crust.
-
Lemon Blueberry – Add zest of 1 lemon to filling. Layer with fresh blueberries.
-
Vegan Version – Replace Greek yogurt with unsweetened coconut yogurt (protein will be lower – approx. 12g per jar). Use pea protein isolate and a plant-based cottage cheese alternative.
-
Lower Carb – Replace oats with almond flour + crushed pecans. Net carbs drop to ~6g per jar.
Storage & Meal Prep
-
In the fridge: Keep jars sealed. They remain fresh for up to 5 days. The crust may soften slightly – this is normal and desirable.
-
In the freezer: Not recommended for this recipe. Thawed cheesecake jars become watery and grainy.
-
On the go: Perfect for lunchboxes, gym bags, or office desks. Stays cold for hours with an ice pack.
Expert Tips for Best Results
-
Don’t over-thin the filling. It should be thicker than traditional cheesecake batter. This structure comes from the protein powder and Greek yogurt.
-
Use cold ingredients. Straight from the fridge yields a firmer, more cheesecake-like texture.
-
Let jars sit after chilling. For the true cheesecake mouthfeel, remove from fridge 10 minutes before eating.
-
Sweeten carefully. Different protein powders have different sweetness levels. Taste your filling before adding extra sweetener.
Final Notes from the Kitchen
These High-Protein Cheesecake Jars have become a staple in my weekly meal prep. They solve the classic diet dilemma: “I want dessert, but I also want to hit my protein goals.” The texture is remarkably close to real baked cheesecake – creamy, dense, and satisfying – without the cream cheese, refined sugar, or baking time.
Whether you’re a gym enthusiast, a busy parent, or just someone who loves a healthy sweet treat, this recipe delivers. And because each jar is individually portioned, portion control happens automatically.