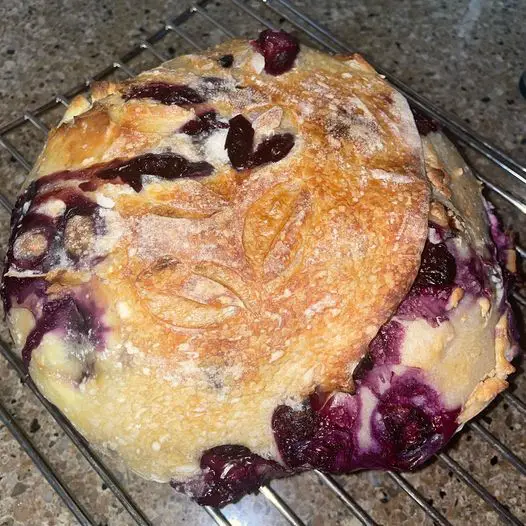
homemade crusty rolls
Golden, crackly crust on the outside, soft and airy inside — these classic rolls are a must-bake for bread lovers.
Recipe Overview
-
Prep Time: 25 minutes (plus rising)
-
First Rise: 1.5 hours
-
Second Rise: 30 minutes
-
Bake Time: 20–25 minutes
-
Total Time: 2.5–3 hours
-
Difficulty: ★★☆☆☆ (Easy to Intermediate)
-
Yields: 8 large rolls or 10–12 medium rolls
-
Cuisine: European / Artisan Bread
-
Best Served: Fresh from the oven, or within 2 days
What Makes a Crusty Roll?
Crusty rolls are small artisan breads with a crisp, crackly crust and a soft, fluffy crumb. They’re common in European bakeries — think German Brötchen, French petits pains, or Italian pane rustico.
They require minimal ingredients, but the secret to success is in:
-
High-hydration dough for open crumb
-
Steam during baking for a golden crust
-
Proper fermentation for flavor and structure
Ingredients
Simple ingredients, big flavor. Use quality flour and fresh yeast for best results.
For the Dough:
-
3 3/4 cups (500g) bread flour or all-purpose flour (see tips below)
-
1 1/4 cups (300 ml) lukewarm water
-
1 packet (2 1/4 tsp or 7g) instant yeast
-
1 1/2 tsp salt
-
1 tsp sugar (optional — helps with browning)
-
2 tbsp olive oil (optional — for softer interior)
Optional Finishing Touch:
-
Extra flour for dusting
-
Melted butter or olive oil for brushing (if a softer crust is desired)
Step-by-Step Instructions
Step 1: Activate the Yeast (if needed)
If using active dry yeast instead of instant:
-
Combine yeast, sugar, and warm water in a bowl.
-
Let sit for 5–10 minutes until foamy.
-
If using instant yeast, you can skip this step and add it directly to the flour.
Step 2: Mix the Dough
-
In a large bowl, combine flour, salt, and instant yeast.
-
Gradually pour in the water (and oil if using), mixing with a spoon or your hands until a shaggy dough forms.
-
Knead by hand on a floured surface for 10–12 minutes, or use a stand mixer with a dough hook on low for 8–9 minutes, until the dough is smooth and elastic.
The dough will be slightly sticky — that’s okay! Avoid over-flouring, which makes dense rolls.
Step 3: First Rise
-
Place dough in a lightly oiled bowl.
-
Cover with plastic wrap or a damp towel.
-
Let rise in a warm, draft-free area for 1.5 to 2 hours, or until doubled in size.
Step 4: Shape the Rolls
-
Punch down the dough gently.
-
Divide into 8–12 equal portions, depending on desired size.
-
Shape each piece into a round ball or oval. To do this:
-
Flatten slightly
-
Fold edges inward
-
Pinch seam closed
-
Flip and roll into a smooth shape
-
-
Place on a parchment-lined baking sheet, leaving space between each roll.
Step 5: Second Rise
-
Cover rolls loosely with a kitchen towel or plastic wrap.
-
Let rise again for 30–40 minutes, until puffy.
Pro Tip: During this rise, preheat your oven to 450°F (230°C) and place a metal baking tray or cast iron skillet on the bottom rack (you’ll use this to create steam).
Step 6: Prepare for Baking
-
Dust the tops of rolls lightly with flour (optional rustic look).
-
Score the tops with a sharp knife or razor blade — a small “X” or slash helps the rolls expand and gives that artisan look.
Step 7: Bake with Steam
-
Place the rolls in the oven on the middle rack.
-
Immediately pour 1 cup of hot water into the empty preheated tray on the bottom rack and quickly shut the door.
Steam helps the crust develop beautifully and prevents early hardening.
-
Bake for 20–25 minutes, until rolls are deep golden and sound hollow when tapped.
Step 8: Cool
-
Transfer to a wire rack and let cool for at least 20 minutes before slicing.
Storage & Reheating
| Method | Instructions |
|---|---|
| Room Temp | Store in a paper bag or bread box for 2 days |
| Freeze | Freeze in airtight bags for up to 3 months |
| Reheat | Sprinkle with water and warm in a 350°F oven for 5–7 minutes |
Nutrition (Per Medium Roll – Approx.)
| Nutrient | Amount |
|---|---|
| Calories | ~180 kcal |
| Carbohydrates | 32 g |
| Protein | 5 g |
| Fat | 2 g (if oil used) |
| Fiber | 1 g |
| Sodium | 220 mg |
Values will vary depending on size and ingredients used.
Serving Ideas
These crusty rolls are incredibly versatile:
With Meals:
-
Perfect alongside soups, stews, and pastas
-
Ideal for sopping up olive oil, balsamic, or sauce
As Sandwiches:
-
Cut and stuff with cold cuts, cheese, grilled veggies, or pulled meats
-
Serve as mini sliders for parties or potlucks
For Breakfast:
-
Split and toast with butter and jam
-
Use as a base for breakfast sandwiches with egg and bacon
Recipe Variations
| Variation | Description |
|---|---|
| Whole Wheat Rolls | Substitute up to 50% of the flour with whole wheat |
| Cheesy Topping | Sprinkle grated Parmesan or cheddar before baking |
| Seeded Rolls | Top with sesame, poppy, or flax seeds |
| Garlic Herb | Add 1 tsp dried herbs and 2 minced garlic cloves to the dough |
| Mini Baguettes | Shape into longer ovals and score lengthwise |
Tips for the Best Crusty Rolls
-
Use Bread Flour: It gives better gluten structure and chew.
-
Don’t Over-Flour: A stickier dough means better texture and open crumb.
-
Steam Is Crucial: It’s the secret to that crackling crust — don’t skip it!
-
Use a Baking Stone or Steel (optional): This helps the rolls bake evenly with a strong rise.
-
Rest Before Eating: Let rolls cool at least 15–20 minutes after baking to finish cooking inside.
FAQs
Q: Can I use all-purpose flour instead of bread flour?
Yes! The rolls will be slightly less chewy but still excellent.
Q: Can I let the dough rise overnight?
Absolutely. Cover tightly and refrigerate after shaping. Let come to room temp before baking.
Q: Why didn’t my crust get crispy?
Two common reasons:
-
Not enough steam
-
Oven not hot enough — preheat fully before baking.
Q: Can I add sourdough starter?
Yes! You can substitute part of the yeast with 100g active starter and extend rise time accordingly.
Final Thoughts
Making homemade crusty rolls might seem intimidating, but with a few simple techniques — and a little steam — you’ll get bakery-quality results at home. There’s nothing like the sound of that first crackle when they come out of the oven.