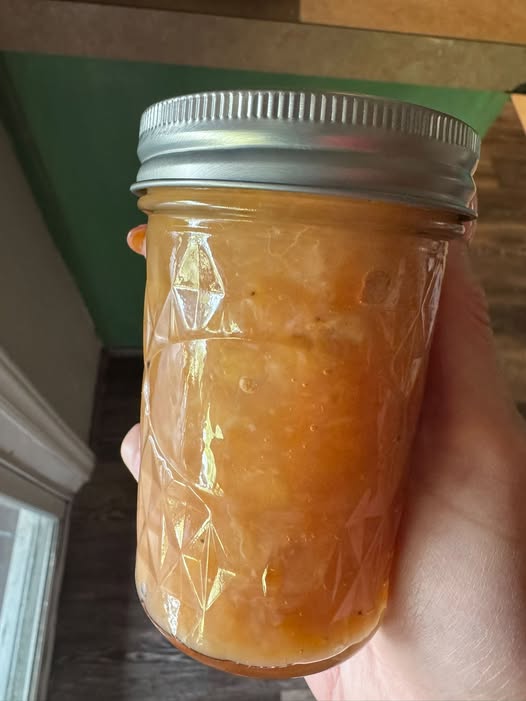
Homemade Peach Jam
- Prep Time: 30 minutes
- Cook Time: 30 minutes
- Processing Time (Optional Water Bath Canning): 10 minutes
- Total Time: Approximately 1 hour 10 minutes
Difficulty Level: Easy
Yield: About 6 half-pint (8-ounce) jars
Ingredients
- 4 pounds ripe peaches (about 10–12 medium peaches)
- 5 cups granulated sugar
- 3 tablespoons fresh lemon juice
- 1 teaspoon lemon zest (optional)
- 1 packet (1.75 ounces) powdered fruit pectin (optional, for a firmer set)
- ½ teaspoon unsalted butter (optional, helps reduce foam)
Equipment You’ll Need
- Large stockpot
- Sharp knife
- Cutting board
- Vegetable peeler (optional)
- Potato masher
- Wooden spoon
- Candy or instant-read thermometer (optional)
- Water bath canner (for shelf-stable storage)
- 6 sterilized half-pint canning jars
- New lids and bands
- Jar lifter
- Funnel
- Ladle
How to Peel Peaches Easily
Bring a large pot of water to a boil. Score a small “X” on the bottom of each peach and carefully lower them into the boiling water for 30–60 seconds. Transfer immediately to an ice bath for another minute. The skins should slip off easily with your fingers or a small knife.
Instructions
Step 1: Prepare the Peaches
Peel the peaches, remove the pits, and chop the fruit into small pieces. If you prefer a smoother jam, lightly mash the peaches with a potato masher. Leave a few small chunks if you enjoy a more rustic texture.
Step 2: Combine Ingredients
In a large stockpot, combine the chopped peaches, sugar, lemon juice, lemon zest (if using), and butter. Stir well until the sugar begins to dissolve.
If using powdered pectin, follow the package directions. Many brands recommend mixing the pectin with the fruit before adding the sugar.
Step 3: Cook the Jam
Place the pot over medium-high heat (approximately 375°F / 190°C stovetop equivalent). Stir frequently as the mixture heats. Once it reaches a full rolling boil that cannot be stirred down, continue boiling for 8–12 minutes, stirring often to prevent scorching.
As the jam cooks, it will thicken and become glossy.
Step 4: Check for Doneness
To test the jam, place a small plate in the freezer for a few minutes. Spoon a little jam onto the cold plate and let it sit for 30 seconds. Push it gently with your finger. If the surface wrinkles and holds its shape, the jam is ready.
Alternatively, use a thermometer. The jam should reach 220°F (104°C) at sea level.
Step 5: Skim the Foam
If foam forms on the surface, skim it off with a spoon. This helps produce clear, attractive jars of jam.
Step 6: Fill the Jars
Using a funnel and ladle, carefully fill the sterilized jars, leaving ¼ inch of headspace. Wipe the jar rims clean with a damp cloth, place the lids on top, and screw on the bands until fingertip tight.
Step 7: Process the Jars (Optional)
For shelf-stable storage, place the filled jars into a boiling water bath canner, ensuring they are covered by at least 1 inch of water. Process for 10 minutes (adjust for altitude if necessary).
Remove the jars and let them cool undisturbed for 12–24 hours. Check that each lid has sealed properly before storing.
If you are not canning the jam, let it cool and refrigerate it immediately.
Cooking Time and Heat Intensity
| Step | Time | Heat Intensity |
|---|---|---|
| Preparing peaches | 20–30 minutes | None |
| Mixing ingredients | 5 minutes | None |
| Cooking jam | 20–30 minutes | Medium-high heat |
| Rolling boil | 8–12 minutes | High |
| Water bath processing | 10 minutes | Boiling |
| Cooling jars | 12–24 hours | Room temperature |
Tips for the Best Peach Jam
- Use ripe but firm peaches for the best flavor and natural pectin.
- Stir frequently to prevent sticking or burning.
- Fresh lemon juice brightens the flavor and helps the jam set.
- Avoid overcooking, as it can produce a thick, overly stiff jam.
- Sterilize jars and use new lids for safe canning.
- Label each jar with the preparation date.
Delicious Variations
Vanilla Peach Jam
Add 1 teaspoon pure vanilla extract after removing the jam from the heat.
Peach Cinnamon Jam
Stir in ½ teaspoon ground cinnamon for a warm, comforting flavor.
Peach Ginger Jam
Add 1 tablespoon freshly grated ginger while cooking for a subtle spicy kick.
Peach Bourbon Jam
Stir in 2 tablespoons bourbon after cooking for a rich, sophisticated flavor.
Honey Peach Jam
Replace up to one cup of sugar with mild honey for a naturally sweet variation.
Serving Suggestions
Homemade peach jam is incredibly versatile. Enjoy it with:
- Toast or English muffins
- Homemade biscuits
- Scones
- Croissants
- Pancakes and waffles
- Yogurt parfaits
- Oatmeal
- Cheesecake topping
- Ice cream
- Thumbprint cookies
- Cake fillings
- Peanut butter sandwiches
- Charcuterie boards with cheese
Storage
Refrigerator
Store unopened refrigerated jam for up to 3 weeks.
Freezer
Freeze in freezer-safe containers for up to 12 months, leaving room for expansion.
Shelf-Stable Canned Jam
Properly processed and sealed jars can be stored in a cool, dark pantry for up to 12–18 months. Once opened, refrigerate and use within 3 weeks.
Common Mistakes to Avoid
- Using underripe or overripe peaches with poor flavor.
- Skipping the lemon juice, which helps with flavor and setting.
- Overfilling jars without leaving proper headspace.
- Underprocessing jars during canning.
- Cooking the jam too long, resulting in a tough texture.
- Neglecting to stir frequently, which may cause scorching.
Frequently Asked Questions
Can I make peach jam without pectin?
Yes. Peaches naturally contain some pectin, and the combination of sugar and lemon juice can create a good set, though the jam may be slightly softer.
Do I need to peel the peaches?
Peeling is recommended for a smoother texture, but you can leave the skins on if you don’t mind a more rustic jam.
How do I know if my jars sealed?
After cooling, press the center of each lid. If it does not flex up and down, the jar is properly sealed.
Can I reduce the sugar?
Sugar contributes to the jam’s texture and preservation. For lower-sugar versions, use a pectin specifically designed for reduced-sugar recipes and follow the manufacturer’s instructions.
Nutrition Information (Approximate Per Tablespoon)
- Calories: 45
- Protein: 0 g
- Carbohydrates: 12 g
- Fat: 0 g
- Saturated Fat: 0 g
- Cholesterol: 0 mg
- Sodium: 0 mg
- Potassium: 25 mg
- Fiber: 0.3 g
- Sugar: 11 g
- Vitamin C: 3% Daily Value
- Calcium: 1% Daily Value
- Iron: 1% Daily Value