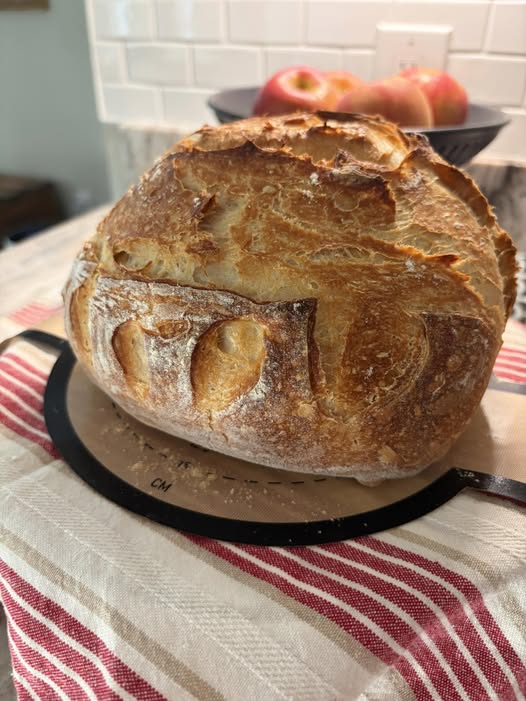
sourdough boule
| Prepare Ingredients | 10 minutes | Easy |
| Autolyse | 45 minutes | Easy |
| Mix Dough | 10 minutes | Easy |
| Stretch and Fold | 2 hours | Moderate |
| Bulk Fermentation | 4–6 hours | Easy |
| Shape Dough | 15 minutes | Moderate |
| Cold Proof | 8–12 hours | Easy |
| Bake | 45 minutes | Easy |
| Cooling | 1–2 hours | Easy |
| Total Time | 17–23 Hours | Moderate |
Ingredients
For the Dough
- 500 grams bread flour
- 350 grams filtered water, room temperature
- 100 grams active sourdough starter
- 10 grams fine sea salt
For Dusting
- Rice flour or bread flour as needed
Equipment
- Large mixing bowl
- Digital kitchen scale
- Dough scraper
- Banneton basket or bowl lined with a towel
- Dutch oven with lid
- Bread lame or sharp knife
- Cooling rack
Step 1: Prepare the Starter
Time: 4–6 hours before mixing
Intensity: Easy
Feed your sourdough starter several hours before beginning the recipe.
The starter should:
- Double in size
- Look bubbly and active
- Smell pleasantly tangy
- Float in water when tested
An active starter ensures a strong rise and excellent flavor development.
Step 2: Mix Flour and Water (Autolyse)
Time: 5 minutes preparation + 45 minutes rest
Intensity: Easy
In a large mixing bowl, combine:
- 500 grams bread flour
- 350 grams water
Mix until all dry flour is hydrated.
The dough will appear rough and shaggy.
Cover and let rest for 45 minutes.
Why Autolyse Matters
Autolyse improves:
- Gluten development
- Dough extensibility
- Crumb structure
- Overall flavor
This simple resting period makes the dough easier to handle later.
Step 3: Add Starter and Salt
Time: 10 minutes
Intensity: Easy
Add:
- 100 grams active sourdough starter
- 10 grams sea salt
Mix thoroughly using your hands.
Pinch and fold the dough repeatedly until everything is evenly incorporated.
The dough may feel sticky, but it will strengthen as fermentation progresses.
Step 4: Begin Bulk Fermentation
Time: 4–6 hours total
Intensity: Moderate
Cover the dough and allow it to ferment at room temperature.
Ideal room temperature:
75–78°F (24–26°C)
During the first two hours, perform four rounds of stretch and folds.
Stretch and Fold #1
Time: 30 minutes after mixing
Intensity: Moderate
Wet your hands slightly.
Grab one side of the dough, stretch upward, and fold toward the center.
Rotate the bowl and repeat four times.
Cover and rest.
Stretch and Fold #2
Time: 60 minutes after mixing
Intensity: Moderate
Repeat the process.
The dough should already feel smoother and stronger.
Stretch and Fold #3
Time: 90 minutes after mixing
Intensity: Moderate
Continue stretching and folding.
You’ll notice increased elasticity and strength.
Stretch and Fold #4
Time: 120 minutes after mixing
Intensity: Moderate
Perform the final fold.
The dough should now hold its shape much better.
Step 5: Finish Bulk Fermentation
Time: Additional 2–4 hours
Intensity: Easy
Allow the dough to ferment undisturbed until it:
- Increases in volume by approximately 50%
- Shows bubbles on the surface
- Feels airy and elastic
Fermentation times vary depending on room temperature and starter activity.
Avoid overproofing, which can weaken the dough structure.
Step 6: Pre-Shape the Dough
Time: 10 minutes
Intensity: Moderate
Turn the dough onto a lightly floured surface.
Using a bench scraper, gently shape it into a loose round.
Allow the dough to rest uncovered for 20 minutes.
This rest period relaxes the gluten and makes final shaping easier.
Step 7: Final Shape
Time: 5 minutes
Intensity: Moderate
Flip the dough over.
Fold the edges toward the center while creating tension on the outer surface.
Turn the dough seam-side up.
Place it into a floured banneton basket.
A properly shaped boule helps create excellent oven spring and a beautiful round loaf.
Step 8: Cold Proof
Time: 8–12 hours
Intensity: Easy
Cover the basket with plastic wrap or a reusable cover.
Place in the refrigerator overnight.
Cold fermentation:
- Deepens flavor
- Improves scoring
- Strengthens structure
- Creates a more open crumb
This step is highly recommended for artisan-quality results.
Step 9: Preheat the Oven
Time: 45 minutes
Intensity: Easy
Place a Dutch oven inside your oven.
Preheat to:
475°F (245°C)
Allow the Dutch oven to heat thoroughly.
A hot Dutch oven creates steam that helps develop a crisp crust.
Step 10: Score the Dough
Time: 2 minutes
Intensity: Moderate
Remove the dough from the refrigerator.
Carefully invert it onto parchment paper.
Using a bread lame or sharp knife, score the surface with one long slash approximately ½ inch deep.
Scoring controls how the loaf expands during baking.
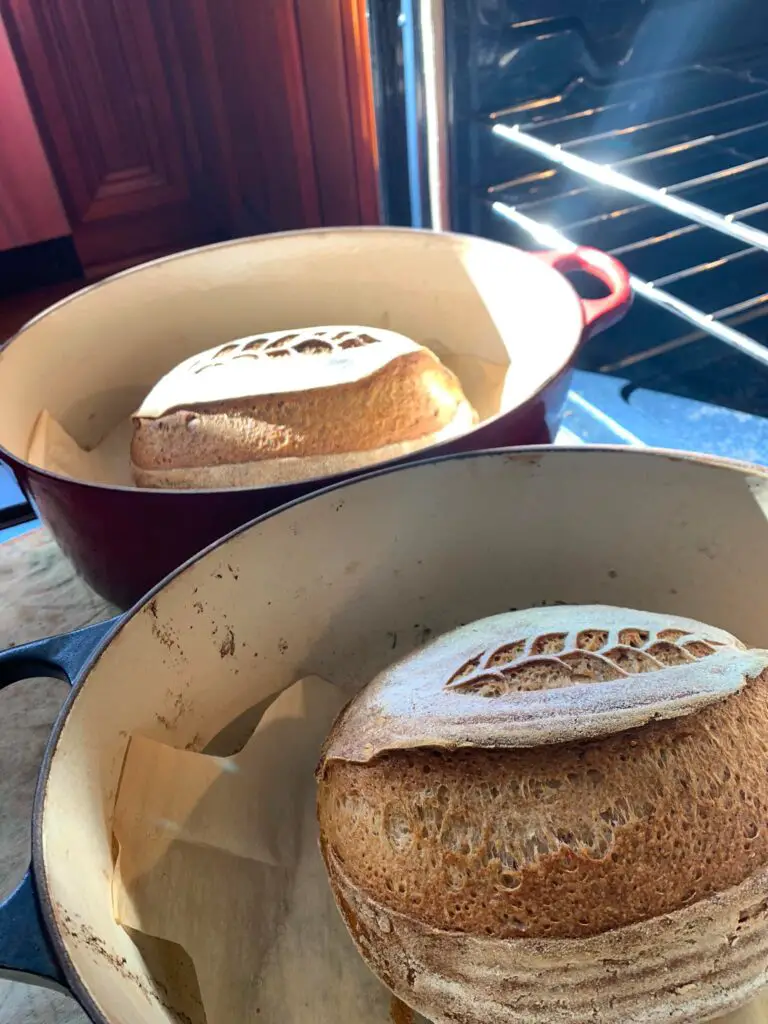
Step 11: Bake Covered
Time: 20 minutes
Intensity: Easy
Transfer the dough into the preheated Dutch oven.
Cover with the lid.
Bake at:
475°F (245°C)
for 20 minutes.
The enclosed steam encourages maximum oven spring and crust formation.
Step 12: Bake Uncovered
Time: 20–25 minutes
Intensity: Easy
Remove the lid.
Reduce oven temperature to:
450°F (232°C)
Bake for another 20–25 minutes.
The loaf should become:
- Deep golden brown
- Crisp and crackly
- Fully cooked through
The internal temperature should reach 205–210°F (96–99°C).
Step 13: Cool Completely
Time: 1–2 hours
Intensity: Easy
Transfer the loaf to a wire cooling rack.
Allow it to cool completely before slicing.
Cutting hot bread releases steam too quickly and may result in a gummy interior.
Patience rewards you with the best texture.
Expert Baking Tips
Use Strong Bread Flour
Higher protein flour helps build structure and creates a better crumb.
Keep a Consistent Temperature
Stable room temperatures improve fermentation consistency.
Avoid Excess Flour
Too much flour during shaping can prevent proper sealing.
Don’t Rush the Process
Sourdough develops flavor through slow fermentation.
Weigh Ingredients
A digital scale provides the most accurate and repeatable results.
Serving Suggestions
Enjoy sourdough boule with:
- Salted butter
- Olive oil and balsamic vinegar
- Artisan cheeses
- Soups and stews
- Sandwich fillings
- Avocado toast
- Bruschetta toppings
Its sturdy structure makes it ideal for both everyday meals and special occasions.
Storage Instructions
Room Temperature
Store in a paper bag, bread box, or wrapped in a clean kitchen towel for up to 3 days.
Refrigerator
Not recommended, as refrigeration can dry out bread.
Freezer
Slice and freeze in an airtight bag for up to 3 months.
Toast slices directly from frozen.
Nutrition Information
Per Slice (Based on 10 Slices Per Loaf)
| Nutrient | Amount |
|---|---|
| Calories | 165 |
| Protein | 6g |
| Carbohydrates | 33g |
| Fat | 1g |
| Saturated Fat | 0g |
| Cholesterol | 0mg |
| Sodium | 230mg |
| Fiber | 2g |
| Sugar | 0g |
| Calcium | 10mg |
| Iron | 2mg |
| Potassium | 65mg |