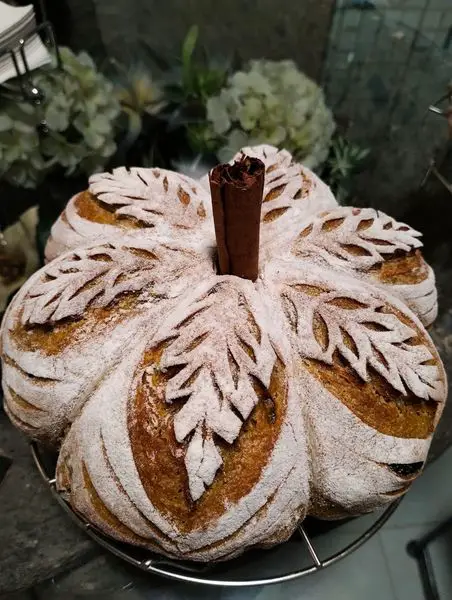
Sourdough Bunny Loaf
- Prep Time: 40 minutes
- First Rise (Bulk Fermentation): 4–6 hours
- Second Rise (Proofing): 2–3 hours
- Bake Time: 40–45 minutes
- Cooling Time: 1 hour
- Total Time: Approximately 9–11 hours
- Yield: 1 bunny-shaped loaf (10–12 servings)
- Difficulty: Intermediate
Ingredients
For the Dough
- 500 grams bread flour
- 350 grams water, room temperature
- 100 grams active sourdough starter
- 10 grams fine sea salt
For Decoration
- 1 tablespoon milk (optional, for brushing)
- 2 raisins or whole peppercorns for eyes
- Small dough ball for the bunny tail
- Sesame or poppy seeds (optional)
- Rice flour for dusting
Equipment Needed
- Large mixing bowl
- Digital kitchen scale
- Dough scraper
- Banneton basket or bowl lined with a towel
- Dutch oven or baking stone
- Sharp bread lame or razor blade
- Parchment paper
- Cooling rack
Instructions
Step 1: Mix the Dough
In a large mixing bowl, combine the water and active sourdough starter until well blended. Add the bread flour and mix until no dry flour remains. Cover and allow the dough to rest for 30 minutes (autolyse).
Sprinkle the salt over the dough and mix thoroughly until incorporated.
Step 2: Bulk Fermentation
Cover the bowl and allow the dough to ferment at room temperature for 4–6 hours.
During the first two hours, perform a set of stretch-and-folds every 30 minutes. This strengthens the gluten and helps develop the dough’s structure.
The dough is ready when it has expanded noticeably and feels airy.
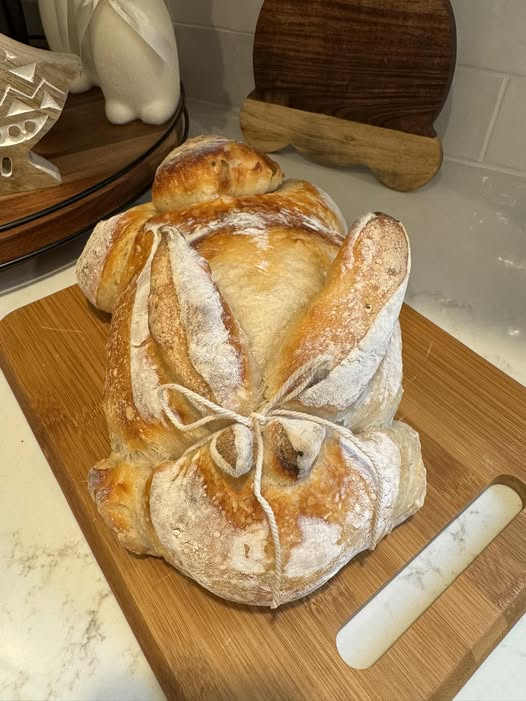
Step 3: Shape the Bunny
Turn the dough onto a lightly floured work surface.
Shape the largest portion into an oval for the bunny’s body.
Reserve small pieces of dough to create:
- Two long ears
- One round tail
- Small paws (optional)
Arrange the pieces together on parchment paper, gently pinching the joints so they stay attached during baking.
Use a raisin or peppercorn for the eye and score simple facial details with a bread lame.
Step 4: Proof
Cover the shaped loaf loosely with a clean towel.
Allow it to proof for 2–3 hours, or until the dough has risen and springs back slowly when gently pressed.
Step 5: Prepare the Oven
About 45 minutes before baking, preheat your oven to 475°F (245°C) with a Dutch oven inside.
If using a baking stone, place a tray of hot water on the lower rack to create steam.
Step 6: Bake
Carefully transfer the loaf into the preheated Dutch oven using the parchment paper.
Cover with the lid and bake for 25 minutes.
Remove the lid and continue baking for 15–20 minutes, or until the crust becomes a deep golden brown and the internal temperature reaches approximately 205°F (96°C).
Step 7: Cool
Transfer the loaf to a cooling rack.
Allow it to cool completely for at least 1 hour before slicing. This helps the crumb finish setting and preserves the bread’s texture.
Baker’s Tips
- Use a bubbly, active sourdough starter for the best rise.
- Avoid adding too much flour while shaping.
- Keep the bunny ears slightly thicker than you think, as they will expand during baking.
- Rice flour creates beautiful contrast for decorative scoring.
- Let the loaf cool fully before slicing to avoid a gummy interior.
Creative Variations
Whole Wheat Bunny Loaf
Replace up to 30% of the bread flour with whole wheat flour for a nuttier flavor.
Herb Sourdough
Mix chopped rosemary, thyme, or chives into the dough before fermentation.
Cheese Bunny Loaf
Fold shredded cheddar or Parmesan into the dough during the first stretch-and-fold.
Seeded Crust
Brush lightly with water and sprinkle sesame, sunflower, flax, or pumpkin seeds over the loaf before baking.
Sweet Cinnamon Bunny
Add cinnamon, raisins, and a touch of honey to create a lightly sweet breakfast bread.
Serving Suggestions
This festive loaf pairs wonderfully with:
- Butter and fruit preserves
- Honey
- Cream cheese
- Soft cheeses
- Soup or stew
- Fresh spring salads
- Scrambled eggs
- Smoked salmon
- Herb-infused olive oil for dipping
It’s also perfect for sandwiches or toasted the next day.
Storage Instructions
Store the cooled loaf in a bread bag, paper bag, or wrapped in a clean kitchen towel at room temperature for up to 3 days.
Avoid storing sourdough bread in the refrigerator, as it can dry out more quickly.
For longer storage, slice the loaf and freeze it in an airtight freezer bag for up to 3 months.
Reheating Instructions
- Room Temperature: Enjoy as is.
- Toaster: Toast individual slices until lightly crisp.
- Oven: Warm the whole loaf at 350°F (175°C) for 10–12 minutes.
- Frozen Slices: Toast directly from frozen.
Common Mistakes to Avoid
- Using an inactive sourdough starter, which may result in a dense loaf.
- Underproofing the dough, leading to limited oven spring.
- Overproofing, which can cause the bunny shape to spread too much.
- Skipping the cooling period before slicing.
- Adding excessive flour during shaping, making the loaf dry.
Frequently Asked Questions
Can I prepare the dough overnight?
Yes. After shaping, refrigerate the dough overnight and bake the following day for enhanced flavor.
Can I make this without a Dutch oven?
Yes. Bake on a baking stone or baking sheet while adding steam to the oven during the first part of baking.
Why didn’t my bunny ears hold their shape?
They may have been too thin or the dough may have overproofed. Make the ears slightly thicker and ensure proper proofing.
Can I use all-purpose flour?
Yes, though bread flour provides a chewier texture and stronger gluten structure.
Is sourdough healthier than regular bread?
Many people find naturally fermented sourdough easier to digest, and the fermentation process may improve flavor and mineral availability. Individual nutritional needs vary.
Nutrition Information (Per Serving)
- Calories: 185
- Protein: 6g
- Carbohydrates: 37g
- Fat: 1g
- Saturated Fat: 0g
- Fiber: 2g
- Sugar: 0g
- Sodium: 230mg
- Cholesterol: 0mg
- Potassium: 70mg
- Calcium: 10mg
- Iron: 2mg