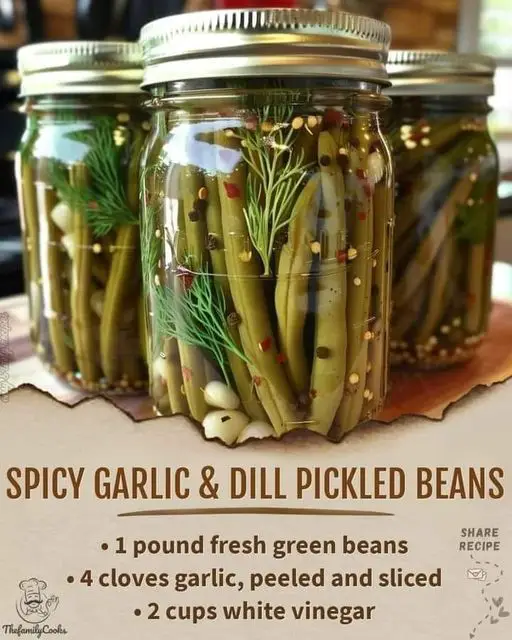
Spicy Garlic & Dill Pickled Beans
Description:
Spicy Garlic & Dill Pickled Beans are a crunchy, tangy, and slightly spicy snack that’s perfect as a side dish, appetizer, or even as a garnish for cocktails like Bloody Marys. These pickled beans are packed with flavor from fresh garlic, dill, and a kick of spice from red pepper flakes.
Total Time:
- Preparation Time: 25-30 minutes
- Processing Time: 10 minutes
- Total Time: 35-40 minutes
Ingredients:
- 2 lbs (900g) fresh green beans, trimmed
- 4 cups (950ml) water
- 4 cups (950ml) white vinegar
- 1/4 cup (60g) kosher salt
- 4-6 cloves garlic, peeled and lightly crushed
- 4-6 fresh dill sprigs
- 2 teaspoons red pepper flakes (adjust to taste)
- 1 teaspoon black peppercorns
- 1 teaspoon mustard seeds (optional)
- Optional: 1-2 dried chili peppers for extra heat
Equipment:
- 4-5 pint-sized canning jars with lids and bands
- Large pot for boiling water
- Canning pot or large stockpot with a canning rack
- Jar lifter
- Canning funnel
- Ladle
Instructions:
- Prepare the Beans:
- Wash and trim the ends off the green beans. Cut them to fit the height of your canning jars if necessary.
- Prepare the Jars:
- Wash jars, lids, and bands with warm, soapy water. Rinse well.
- Sterilize the jars by boiling them in a large pot of water for 10 minutes. Keep them warm in the water until ready to use.
- Prepare the Brine:
- In a large pot, combine water, vinegar, and kosher salt.
- Bring the mixture to a boil, stirring until the salt is fully dissolved. Once dissolved, remove from heat and set aside.
- Add Spices to Jars:
- Place 1-2 garlic cloves, 1 sprig of dill, 1/2 teaspoon red pepper flakes, a few black peppercorns, and 1/4 teaspoon mustard seeds (if using) into each sterilized jar.
- Pack the Beans:
- Pack the green beans upright into the jars, ensuring they are tightly packed but not crushed.
- Leave about 1/2 inch of headspace at the top of each jar.
- Add the Brine:
- Pour the hot brine over the beans, ensuring they are fully covered and leaving 1/2 inch headspace.
- Remove Air Bubbles:
- Gently tap the jars on the counter or use a non-metallic utensil to remove any air bubbles. Adjust the headspace if necessary.
- Seal the Jars:
- Wipe the rims of the jars with a clean, damp cloth. Place the lids on top and screw on the bands until fingertip-tight.
- Prepare the Water Bath:
- Fill your canning pot with enough water to cover the jars by at least 1 inch. Bring to a simmer.
- Process the Jars:
- Use a jar lifter to place the jars in the canning pot.
- Bring the water to a full boil and process the jars for 10 minutes (adjust for altitude if necessary).
- Cool and Store:
- After processing, remove the jars with a jar lifter and place them on a towel-lined surface to cool completely.
- After 24 hours, check the seals by pressing the center of each lid. If the lid does not pop back, the jar is sealed. Any unsealed jars should be refrigerated and used within a few weeks.
Storage:
- Store sealed jars in a cool, dark place for up to 1 year. Refrigerate after opening and use within 1-2 weeks.
Notes:
- Spice Level: Adjust the red pepper flakes and add dried chili peppers according to your preferred spice level.
- Serving Suggestions: These pickled beans are great as a snack, in salads, or as a garnish for drinks.
- Beans: Use fresh, crisp green beans for the best texture in your pickled beans.
Enjoy these crunchy, tangy, and spicy pickled beans that are perfect for any occasion!