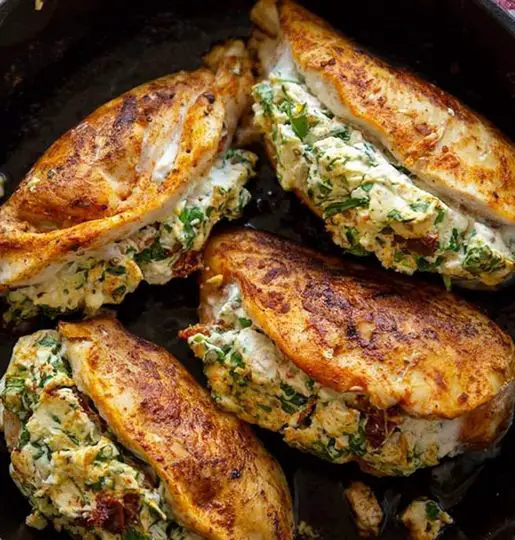
stuffed with cheese and broccoli
Byadmin
Preparation Time: 15 minutes
Cooking Time: 20 minutes
Total Time: 35 minutes
Servings: 4
Ingredients:
- 4 boneless, skinless chicken breasts
- 1 cup broccoli florets, finely chopped
- 1 cup shredded cheddar cheese
- 1/4 cup grated Parmesan cheese
- 2 cloves garlic, minced
- 1 teaspoon dried thyme
- 1 teaspoon dried oregano
- Salt and pepper, to taste
- Olive oil, for brushing
- Cooking spray
Instructions:
- Prepare the Chicken:
- Preheat your air fryer to 375°F (190°C).
- Use a sharp knife to make a pocket in each chicken breast. Be careful not to cut all the way through. Set aside.
- Prepare the Filling:
- In a mixing bowl, combine the chopped broccoli, shredded cheddar cheese, grated Parmesan cheese, minced garlic, dried thyme, dried oregano, salt, and pepper. Mix until well combined.
- Stuff the Chicken:
- Spoon the broccoli and cheese mixture evenly into the pockets of the chicken breasts, pressing gently to secure the filling.
- If necessary, use toothpicks to help keep the pockets closed.
- Cook in the Air Fryer:
- Lightly brush the stuffed chicken breasts with olive oil on both sides.
- Spray the air fryer basket with cooking spray to prevent sticking.
- Place the stuffed chicken breasts in the air fryer basket in a single layer, leaving space between each piece.
- Cook in the preheated air fryer at 375°F (190°C) for 18-20 minutes, or until the chicken is cooked through and the filling is hot and bubbly.
- Serve:
- Once cooked, carefully remove the stuffed chicken breasts from the air fryer basket.
- Allow them to cool for a few minutes before serving.
- Serve the air fryer stuffed chicken with your favorite side dishes, such as roasted vegetables, rice, or salad.
- Enjoy:
- Enjoy this delicious and cheesy stuffed chicken straight from the air fryer!
Feel free to customize the filling with your favorite ingredients, such as spinach, sun-dried tomatoes, or different types of cheese. Adjust the cooking time as needed based on the thickness of your chicken breasts.