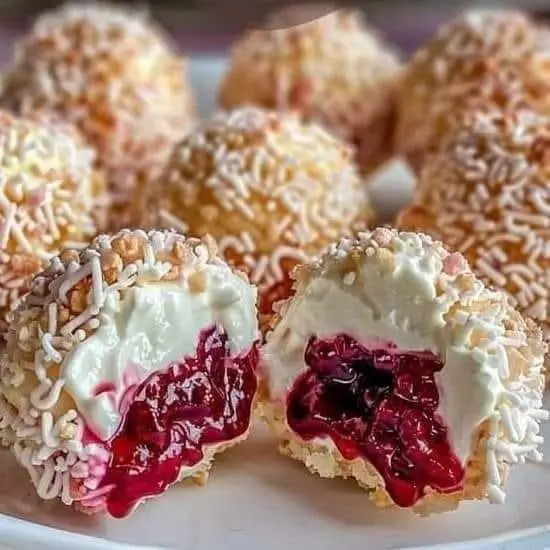
White Chocolate Cherry Truffles
Prep Time: 30 minutes | Cook Time: 5 minutes (plus 2+ hours chilling)
Total Time: 3 hours (mostly inactive)
Yield: Approximately 24 truffles
Difficulty: Easy
Intensity: Low effort, high reward
Category: Dessert / Confectionery / Holiday Treat
Dietary Notes: Can be made gluten-free. Contains dairy.
A Sweet Introduction
Indulge in the perfect bite of elegance with these White Chocolate Cherry Truffles. These no-bake confections combine the creamy, rich flavor of premium white chocolate with the bright, tangy burst of dried cherries and a hint of almond. Encased in a crisp shell of more white chocolate and rolled in festive toppings, they are as beautiful as they are delicious. Surprisingly simple to make, they’re the ideal homemade gift, party favor, or luxurious treat to keep on hand for when a sweet craving strikes. With a soft, fudgy center and endless coating possibilities, this recipe is a canvas for your creativity.
Ingredients
For the Truffle Filling:
-
12 ounces (340g) high-quality white chocolate, finely chopped
-
½ cup (120ml) heavy whipping cream
-
⅓ cup (40g) dried cherries, finely chopped
-
1 tablespoon unsalted butter, at room temperature
-
½ teaspoon pure almond extract (or vanilla extract for a classic flavor)
-
A tiny pinch of fine sea salt
For Coating & Decorating:
-
8 ounces (225g) high-quality white chocolate, finely chopped (for tempering, or use melting wafers for ease)
-
Optional Toppings: Crushed freeze-dried cherries, toasted coconut flakes, crushed pistachios, sanding sugar, cocoa powder, or sprinkles.
Equipment
-
Small saucepan
-
Heatproof bowl (glass or metal)
-
Whisk and spatula
-
Baking sheet lined with parchment or wax paper
-
Small cookie scoop or two teaspoons
-
Fork or truffle dipping tools
-
Small bowls for toppings
Step-by-Step Instructions
Part 1: Infusing & Melting (5 minutes active)
-
Infuse the Cream: Place the finely chopped dried cherries in a small heatproof bowl. In a small saucepan over medium heat, warm the heavy cream until it just begins to simmer (small bubbles form around the edges). Immediately pour the hot cream over the dried cherries. This step softens the cherries and infuses the cream with their flavor. Let it sit for 5 minutes.
-
Melt the Chocolate: After 5 minutes, add the 12 ounces of chopped white chocolate and the tablespoon of butter to the warm cream and cherry mixture. Let it sit for 2-3 minutes to soften, then gently whisk until completely smooth, glossy, and all chocolate is melted. If a few lumps remain, you can place the bowl over a pot of barely simmering water (double boiler) for 10-15 seconds, stirring constantly, to finish melting.
Part 2: Flavoring & Chilling (5 minutes active, 2+ hours inactive)
-
Add Flavor: Whisk in the almond extract and the tiny pinch of salt. The salt is crucial—it balances the sweetness and enhances all the flavors.
-
Initial Set: Cover the bowl with plastic wrap, pressing it directly onto the surface of the chocolate to prevent a skin from forming. Refrigerate for at least 2 hours, or until the mixture is very firm and scoopable. For best results, you can chill it overnight.
Part 3: Shaping the Centers (15 minutes)
-
Scoop: Using a small cookie scoop or two teaspoons, portion out the chilled chocolate mixture. Roll each portion quickly between your palms to form a smooth, round ball. Work swiftly, as the heat from your hands can melt the truffles. If the mixture becomes too soft, return it to the fridge for 15 minutes.
-
Chill Again: Place the shaped balls on the parchment-lined baking sheet. Once all are rolled, return the tray to the freezer for 15-20 minutes. This is a critical step—very cold centers are essential for a clean, smooth chocolate coating.
Part 4: Coating & Decorating (15 minutes)
-
Melt Coating Chocolate: While the centers chill, melt the remaining 8 ounces of white chocolate for coating. You can do this carefully in 20-second bursts in the microwave, stirring well between each, or use a double boiler. If using chocolate bars (not wafers), consider tempering for a snappy, shiny finish, or simply add ½ teaspoon of coconut oil to make it more fluid for dipping.
-
Dip: Remove a few truffle centers from the freezer at a time. Using a fork or dipping tools, submerge each truffle in the melted chocolate, tap off the excess, and return it to the parchment paper.
-
Top Immediately: Before the coating sets, sprinkle with your chosen toppings. If using multiple toppings, decorate a few truffles with one topping before moving to the next.
-
Final Set: Allow the coated truffles to set completely at room temperature (about 1 hour) or in the refrigerator for 15 minutes.
Chef’s Notes & Tips for Success
-
Chocolate Quality is Key: The flavor of these truffles hinges on the quality of your white chocolate. Look for brands with cocoa butter listed as the first fat, not just “palm kernel oil.”
-
Avoid Seizing: Ensure all your equipment is completely dry. Even a drop of water can cause melted chocolate to seize and become grainy.
-
Cherry Variations: For a boozy twist, soak the dried cherries in 1-2 tablespoons of Kirsch (cherry liqueur), brandy, or amaretto for 30 minutes before starting. Drain excess liquid before using.
-
Storage & Shelf Life: Store finished truffles in a single layer in an airtight container in the refrigerator for up to 2 weeks. They can also be frozen for up to 3 months. Let them come to room temperature for about 10 minutes before serving for the best texture and flavor.
Nutrition Information
The following nutritional data is an estimate calculated for one truffle (assuming 24 truffles per batch, using all white chocolate coating, and no additional toppings).
-
Calories: ~130 kcal
-
Total Fat: 8g
-
Saturated Fat: 5g
-
-
Cholesterol: 10mg
-
Sodium: 15mg
-
Total Carbohydrates: 14g
-
Dietary Fiber: 0g
-
Sugars: 13g
-
-
Protein: 1g
Note: Nutritional values will vary based on specific ingredient brands, the amount of coating used, and choice of toppings. This is a rich, decadent treat best enjoyed in moderation.