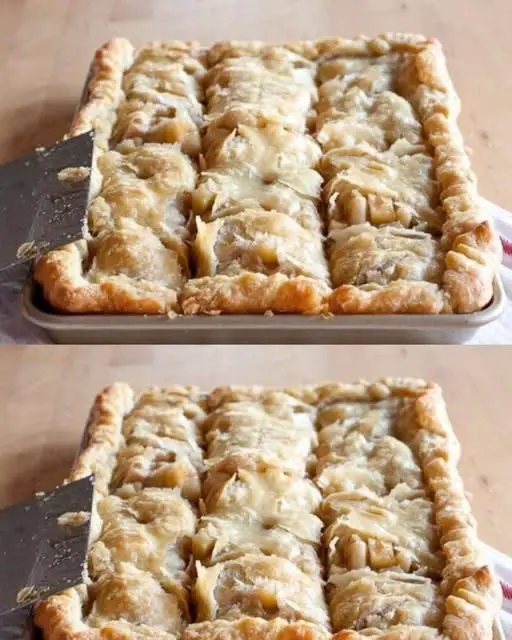
Apple Slab Pie
Introduction
Looking to serve a crowd with minimal fuss and maximum flavor? Enter the Apple Slab Pie — everything you love about classic apple pie, but baked in a sheet pan and perfect for slicing into squares. It’s ideal for holidays, potlucks, bake sales, or any time you want a rustic, delicious dessert that serves a group.
This slab pie features a buttery, flaky crust with a rich cinnamon-apple filling and just the right amount of sweetness. The thinner layers mean more golden crust per bite, and it’s easy to cut and serve — no pie dish needed!
Recipe Overview
-
Prep Time: 30 minutes
-
Cook Time: 45–50 minutes
-
Total Time: 1 hour 20 minutes
-
Servings: 15–20
-
Difficulty: Moderate
-
Type: Dessert
-
Best For: Holidays, gatherings, potlucks, fall baking
Ingredients
For the Crust (Double Batch):
-
3 ¾ cups all-purpose flour
-
1 tablespoon granulated sugar
-
1 ½ teaspoons salt
-
1 ½ cups (3 sticks) cold unsalted butter, cubed
-
½ to ⅔ cup ice water
Tip: Chill your flour and butter beforehand for extra flakiness.
For the Apple Filling:
-
10–12 medium apples, peeled, cored, and thinly sliced
(Use a mix of tart and sweet like Granny Smith + Honeycrisp or Fuji) -
¾ cup granulated sugar
-
½ cup brown sugar
-
¼ cup all-purpose flour
-
1 ½ teaspoons ground cinnamon
-
¼ teaspoon nutmeg
-
2 teaspoons lemon juice
-
1 teaspoon vanilla extract
-
Pinch of salt
For the Topping:
-
1 egg, beaten (for egg wash)
-
1 tablespoon milk (optional, for richer egg wash)
-
2 tablespoons coarse sugar (optional, for sprinkling)
Equipment Needed
-
Rimmed 10×15-inch jelly roll pan or sheet pan
-
Rolling pin
-
Pastry brush
-
Mixing bowls
-
Knife or pastry cutter
-
Parchment paper (optional)
Instructions
Step 1: Make the Crust
-
In a large bowl, mix flour, sugar, and salt.
-
Add cold butter cubes and cut them into the flour using a pastry cutter or your fingers until the mixture resembles coarse crumbs.
-
Gradually add ice water, starting with ½ cup, mixing until the dough comes together. Add more water as needed.
-
Divide the dough into two portions (one slightly larger for the bottom crust), shape into disks, wrap in plastic, and chill for at least 30 minutes.
Step 2: Prepare the Apple Filling
-
In a large mixing bowl, toss sliced apples with:
-
Granulated and brown sugar
-
Flour
-
Cinnamon and nutmeg
-
Lemon juice
-
Vanilla extract
-
Pinch of salt
-
-
Let sit while you roll out the crust. This helps draw out juices.
Step 3: Roll and Assemble
-
On a floured surface, roll out the larger dough disk into a rectangle about 12×17 inches.
-
Gently transfer to your greased or parchment-lined pan, pressing into the edges and trimming any excess.
-
Pour the apple filling evenly over the crust.
-
Roll out the second dough disk into a slightly smaller rectangle and lay it over the apples. Tuck or crimp the edges to seal.
-
Cut a few vent slits in the top crust to allow steam to escape.
Step 4: Bake the Pie
-
Brush the top crust with the egg wash (beaten egg + milk, if using).
-
Sprinkle with coarse sugar for crunch and sparkle.
-
Bake at 375°F (190°C) for 45–50 minutes, or until:
-
The crust is deep golden brown
-
The filling is bubbling through the slits
-
If the crust is browning too quickly, loosely cover with foil during the last 10–15 minutes.
Step 5: Cool and Serve
-
Let the pie cool on a wire rack for at least 30–40 minutes before slicing. This helps the filling set.
-
Slice into squares or rectangles and serve warm or at room temperature.
Serving Suggestions
-
Serve with a scoop of vanilla ice cream or a dollop of whipped cream.
-
Drizzle with caramel sauce or maple glaze for extra indulgence.
-
Perfect as part of a Thanksgiving dessert table or a cozy fall gathering.
Storage & Make-Ahead Tips
-
Room Temp: Store covered for 1 day.
-
Fridge: Keeps well for up to 4 days. Reheat slices in the oven or microwave.
-
Freezer: Freeze unbaked or baked slab pie, tightly wrapped, for up to 2 months.
-
To bake from frozen, cover with foil and bake at 375°F for 60–70 minutes.
-
Nutrition Information (Per Slice – based on 18 servings)
| Nutrient | Amount |
|---|---|
| Calories | 320–360 kcal |
| Carbohydrates | 45g |
| Sugars | 24g |
| Protein | 3g |
| Fat | 16g |
| Saturated Fat | 9g |
| Fiber | 3g |
| Sodium | 160mg |
Nutritional info will vary based on exact ingredients and portion sizes.
Variations
Rustic Crumble Topping
Skip the top crust and use a brown sugar-oat crumble instead for an apple crisp/pie hybrid.
Apple-Pear Slab Pie
Replace 2–3 apples with sliced ripe pears for a soft, fragrant twist.
Apple-Berry Version
Add ½ cup fresh or frozen berries like cranberries, blueberries, or raspberries to the apple filling.
Gluten-Free
Use your favorite gluten-free pie crust recipe and a GF flour blend in the filling.
FAQs
Can I use store-bought crust?
Absolutely! You’ll need two rolled pie crusts or one package of puff pastry sheets. Just roll them to fit the pan.
What’s the best apple variety for pie?
Use a mix for the best flavor and texture. We recommend:
-
Granny Smith (tart and firm)
-
Honeycrisp, Fuji, or Golden Delicious (sweet and juicy)
How do I prevent a soggy bottom?
-
Preheat the oven fully.
-
Don’t skip the flour in the filling — it thickens the juices.
-
Chill the assembled pie for 10 minutes before baking to firm up the crust.
Why You’ll Love This Recipe
-
Feeds a crowd
-
Easier to slice and serve than round pie
-
Freezer-friendly and portable
-
Customizable with fruits, spices, and toppings
-
Classic, cozy apple pie flavor — with more crust per bite!
Final Thoughts
Apple Slab Pie is the kind of recipe that brings people together. It’s easier and more practical than a traditional pie, yet delivers all the nostalgia and flavor we crave — buttery crust, juicy apples, and that irresistible scent of cinnamon in the air.
Whether you’re hosting Thanksgiving, feeding a big family, or looking for a dessert that doubles as breakfast the next day, this slab pie is always a good idea.