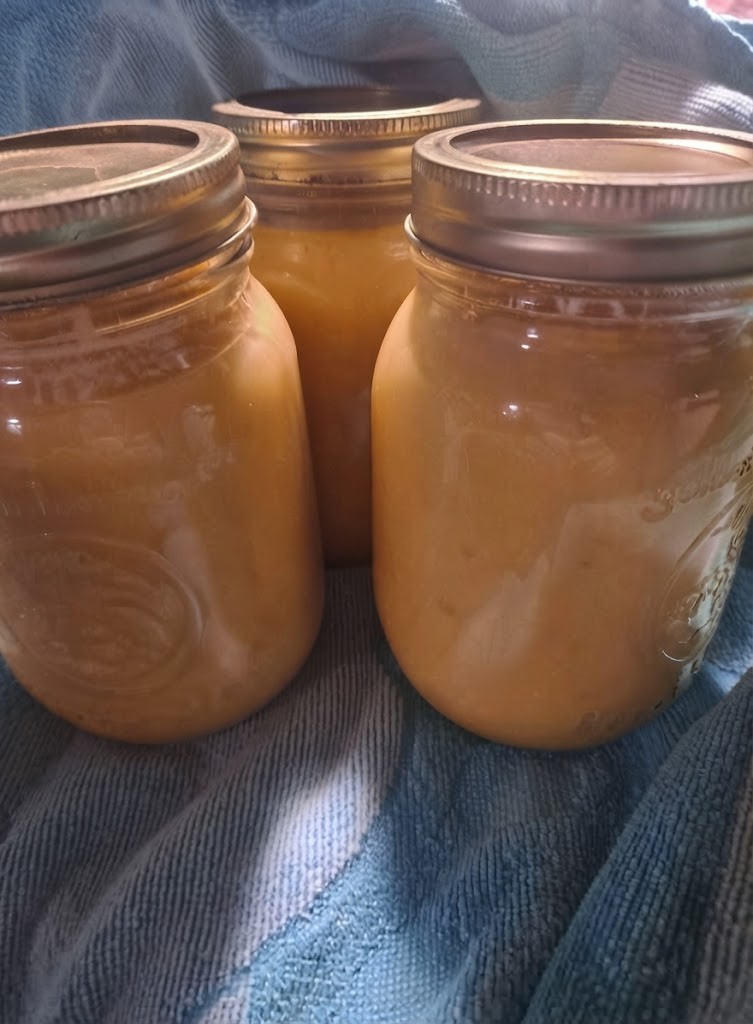
canned applesauce

Prep Time 45 minutes
Cook Time (Simmering) 20 to 25 minutes
Canning Time (Processing) 20 minutes (Pints) / 25 minutes (Quarts)
Total Time ~1 hour 45 minutes
Yield Yields approx. 8 pint jars (or 4 quart jars)
Skill Level / Intensity Intermediate / Moderate Effort

Heat Intensities & Processing Rules

Water-bath canning relies on controlled thermal intensity to safely sterilize the fruit and create a vacuum seal without overcooking the sauce into a dark paste.

  • Softening Phase (Medium Heat): $90^\circ\text{C}$ to $95^\circ\text{C}$ ($195^\circ\text{F}$ to $203^\circ\text{F}$). A gentle simmer breaks down the apple cellular walls while releasing natural starches and juices without scorching the bottom of the stockpot.

  • Hot-Pack Filling Phase (Maintain Warmth): $82^\circ\text{C}$ to $88^\circ\text{C}$ ($180^\circ\text{F}$ to $190^\circ\text{F}$). Ladling hot applesauce into warm jars prevents thermal shock (glass breaking) and reduces trapped air bubbles.

  • Water-Bath Canning Phase (Rolling Boil / High Heat): $100^\circ\text{C}$ ($212^\circ\text{F}$). Maintaining a constant rolling boil throughout the processing time ensures the internal temperature of the jar reaches safe microbial destruction thresholds.

Equipment Needed

  • Water-Bath Canner with Rack (large enough to submerge jars by 1–2 inches of water)

  • 8 Pint Glass Mason Jars with fresh self-sealing lids and screw bands

  • Large Heavy-Bottomed Stockpot (8–10 quart capacity)

  • Food Mill, Immersion Blender, or Potato Masher

  • Jar Lifter Tongs & Canning Funnel

  • Bubble Remover / Headspace Tool

  • Apple Peeler & Corer

Ingredients List

Primary Ingredients

  • 12 lbs (5.5 kg) Fresh Apples (Use a blend of sweet and tart varieties like Gala, Fuji, McIntosh, Honeycrisp, and Granny Smith)

  • 1/2 cup Water or Unfiltered Apple Cider (prevents scorching during initial cook)

  • 3 tbsp Bottled Lemon Juice (Essential for consistent acidity in safe canning; bottled juice guarantees precise pH)

Optional Flavor Enhancers

  • 1/2 to 1 cup Granulated Sugar or Honey (optional; adjust to taste depending on apple sweetness)

  • 1 tsp Ground Cinnamon

  • 1/4 tsp Ground Nutmeg or Allspice

Step-by-Step Canning Instructions

1.Sterilize Jars & Prep Canner:Prep Time: 25 min | Effort: Equipment Setup.

Fill your water-bath canner halfway with water and place it over medium heat to warm up. Wash 8 pint jars in hot, soapy water and keep them warm inside the canner or a low oven ($93^\circ\text{C}$ / $200^\circ\text{F}$) so they do not crack when filled with hot sauce. Place lids in warm (not boiling) water.

2.Peel, Core, and Chop Apples:Prep Time: 20 min | Effort: Knife Work.

Peel, core, and quarter the apples. Cut them into 1-inch uniform chunks. As you work, toss the cut apples with 1 tablespoon of bottled lemon juice to prevent browning.

3.Cook and Soften Fruit:Cook Time: 20 min | Heat Intensity: Medium Simmer.

Transfer the prepared apple chunks into a large heavy-bottomed stockpot along with 1/2 cup of water or apple cider. Cover and bring to a simmer over medium heat. Cook for 15 to 20 minutes, stirring occasionally to prevent sticking, until the apples are fork-tender and begin breaking down naturally.

4.Puree to Desired Texture:Prep Time: 5 min | Labor Intensity: Moderate.

Remove the pot from heat. For a smooth purée, pass the cooked apples through a food mill or blend with an immersion blender. For a rustic, chunky applesauce, mash thoroughly with a potato masher. Stir in the remaining 2 tablespoons of bottled lemon juice, plus sugar and cinnamon if desired. Return the sauce to low heat to keep hot ($85^\circ\text{C}$).

5.Fill Jars & Remove Air Bubbles:Handling Hot Jars | Precision Step.

Carefully remove one hot jar at a time from the canner. Ladle hot applesauce into the jar using a wide-mouth funnel, leaving 1/2 inch of headspace at the top. Slide a non-metallic spatula or bubble tool down the inside edges of the jar to release trapped air bubbles. Adjust headspace if needed.

6.Seal and Process in Water Bath:Process Time: 20 min | Heat Intensity: Rolling Boil (100°C).

Wipe the jar rims clean with a damp paper towel to ensure a clean seal. Place a flat lid on top and screw the band on until fingertip tight. Use jar lifters to lower jars into the boiling water bath. Ensure jars are submerged under at least 1 to 2 inches of water. Cover with the lid and process at a full rolling boil for 20 minutes (adjust for altitude if above 1,000 feet).

7.Cool, Check Seals, and Store:Prep Time: 12-24 hours | Cooling Phase.

Turn off the heat, remove the canner lid, and let jars sit in the hot water for 5 minutes. Carefully remove jars with the jar lifter and place them on a towel-lined counter, leaving 1 inch between jars. Let them cool undisturbed for 12 to 24 hours. Listen for the satisfying “pop” sound indicating a vacuum seal. Press down on the center of each lid—if it flexes up and down, store in the fridge and use within 3 weeks. Sealed jars store in a cool, dark pantry for 12 to 18 months.


Pro Tips for the Best Canned Applesauce

  1. Blend Apple Varieties: Using a single apple variety can lead to a flat flavor profile. Combining sweet apples (Gala, Fuji) with tart apples (Granny Smith, McIntosh) produces a balanced, complex sauce that requires little to no added sugar.

  2. Never Omit the Bottled Lemon Juice: Bottled lemon juice guarantees the precise acid level required to prevent Clostridium botulinum growth in home-canned, low-acid foods. Always use bottled juice rather than fresh lemons, as bottled juice has a standardized pH level.

  3. Respect Headspace: Leaving exactly 1/2 inch of headspace allows the applesauce to expand during the hot boiling process without pushing out under the lid rim, which could compromise the seal.

Nutritional Information

The nutrition facts below are calculated per 1/2 cup (approx. 125 g) serving of unsweetened homemade applesauce.

Nutrient Amount Per Serving % Daily Value*
Calories 70 kcal
Total Fat 0.2 g 0%
Saturated Fat 0 g 0%
Trans Fat 0 g
Cholesterol 0 mg 0%
Sodium 2 mg 0%
Total Carbohydrates 18 g 7%
Dietary Fiber 2.8 g 10%
Sugars 14 g
Protein 0.4 g 1%
Vitamin C 4.2 mg 5%
Calcium 8 mg 1%
Iron 0.2 mg 1%
Potassium 135 mg 3%

Similar Posts

  • Crocker German chocolate cake

    Moist chocolate cake with a gooey, nutty coconut-pecan frosting — made simple with a cake mix.  Preparation Details Prep Time: 20 minutes Bake Time: 25–30 minutes Cooling Time: 1 hour Total Time: About 2 hours Difficulty: Easy to Medium Servings: 12–16 slices  Ingredients Cake: 1 box German chocolate cake mix (like Duncan Hines or Betty…

  • Ham and pea soup

    Prep Time: 15 minutes Cook Time: 1½ to 2 hours (or slow cooker instructions below) Total Time: ~2 hours Difficulty: Easy Servings: 6–8  Ingredients Main Ingredients: 2 tbsp olive oil or butter 1 medium onion, chopped 2 medium carrots, diced 2 celery stalks, diced 2 cloves garlic, minced 1 lb (450g) dried green split peas,…

  • air fryer roast potatoes

    Prep Time: 10 minutes  Cook Time: 20–25 minutes  Total Time: 30–35 minutes  Difficulty: Easy  Servings: 4 Introduction Crispy, golden, and deliciously seasoned, these Air Fryer Roast Potatoes are the perfect side dish for any meal. They’re faster than oven-roasted potatoes and require less oil, making them a lighter but equally satisfying option. With just a…

  • onion bhaji

    Prep Time: 15 minutesCook Time: 20 minutesTotal Time: 35 minutesDifficulty Level: EasyServes: 4Cuisine: IndianCourse: Appetizer / SnackVegan & Gluten-Free Introduction Onion Bhaji, also known as Onion Pakora or Kanda Bhaji, is a classic Indian snack that’s crispy on the outside, soft on the inside, and loaded with aromatic spices. It’s a popular street food and…

  • gumbo fried rice

    Preparation Time & Recipe Details Prep Time: 15 minutes Cook Time: 20 minutes Total Time: 35 minutes Difficulty: Moderate Yield: Serves 4–6  What Is Gumbo Fried Rice? Gumbo Fried Rice takes the savory, spicy flavors of traditional gumbo and pairs them with the satisfying, easy-to-make nature of fried rice. This fusion dish uses classic gumbo…

Leave a Reply

Your email address will not be published. Required fields are marked *