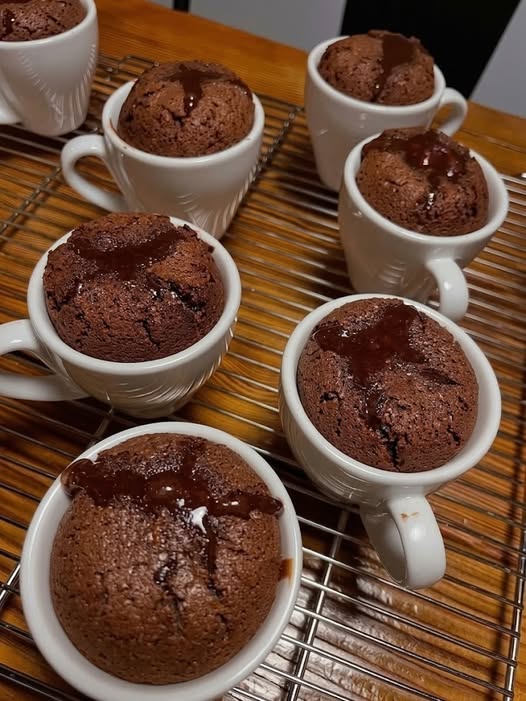
chocolate lava mug cake
- Prep Time: 5 minutes
- Cook Time: 1–2 minutes
- Total Time: 7 minutes
- Servings: 1 large serving
- Difficulty: Easy
Ingredients
- 4 tablespoons all-purpose flour
- 2 tablespoons unsweetened cocoa powder
- 2 tablespoons granulated sugar
- ¼ teaspoon baking powder
- Pinch of salt
- 3 tablespoons milk
- 2 tablespoons vegetable oil or melted butter
- ½ teaspoon vanilla extract
- 1 ounce (about 28 g) dark or milk chocolate, or 2 chocolate squares
- 1 teaspoon chocolate chips (optional, for extra richness)
Optional Toppings
- Vanilla ice cream
- Whipped cream
- Fresh strawberries or raspberries
- Powdered sugar
- Chocolate syrup
- Chopped nuts
- Chocolate shavings
Instructions
Step 1: Mix the Dry Ingredients
Choose a microwave-safe mug that holds at least 12 ounces to prevent overflow.
Add the flour, cocoa powder, sugar, baking powder, and salt directly to the mug. Stir thoroughly with a fork until evenly combined.
Step 2: Add the Wet Ingredients
Pour in the milk, vegetable oil, and vanilla extract.
Mix until a smooth batter forms, making sure there are no dry pockets of flour remaining. Scrape the sides and bottom of the mug to fully incorporate all the ingredients.
Step 3: Create the Lava Center
Place the chocolate square or piece of chocolate into the center of the batter.
Gently press it down so it is mostly covered without reaching the bottom of the mug.
Sprinkle chocolate chips over the batter if using.
Step 4: Microwave
Microwave on High (100% power) for 60–90 seconds, depending on your microwave’s wattage.
The cake should look set around the edges while remaining slightly soft in the center. Avoid overcooking, as this can cause the molten center to firm up.
Step 5: Rest
Allow the mug cake to rest for 1 minute. The cake will continue cooking slightly from the residual heat while keeping the center deliciously molten.
Step 6: Serve
Enjoy directly from the mug or carefully invert onto a dessert plate.
Top with vanilla ice cream, whipped cream, fresh berries, or a drizzle of chocolate sauce for an extra-special treat.
Tips for the Best Chocolate Lava Mug Cake
- Use good-quality chocolate for the richest lava center.
- Do not overmix the batter; stir just until smooth.
- Every microwave cooks differently, so start with 60 seconds and add time in 10-second intervals if needed.
- A larger mug helps prevent spills during cooking.
- Let the cake rest briefly before eating, as the center will be very hot.
Flavor Variations
Double Chocolate
Add 1 tablespoon of chocolate chips directly into the batter for extra bursts of chocolate.
Salted Caramel Lava Cake
Replace the chocolate center with a soft caramel candy and sprinkle a pinch of flaky sea salt on top after cooking.
Peanut Butter Lava
Use a spoonful of peanut butter as the molten filling instead of chocolate.
Espresso Chocolate
Add ½ teaspoon of instant espresso powder to the dry ingredients to intensify the chocolate flavor.
Mint Chocolate
Stir in a drop of peppermint extract and use mint chocolate for the center.
Serving Suggestions
Pair your Chocolate Lava Mug Cake with:
- Vanilla bean ice cream
- Fresh raspberries
- Sliced strawberries
- Whipped cream
- Chocolate curls
- Toasted hazelnuts
- Caramel sauce
- Fresh mint leaves
For a café-style dessert, enjoy it with a cup of coffee, espresso, cappuccino, or hot chocolate.
Storage
This dessert is best enjoyed immediately after cooking while the center is warm and molten.
If necessary, cover and refrigerate leftovers for up to 1 day. The lava center will become firm after chilling.
Reheating
Microwave for 10–15 seconds to gently warm the cake before serving.
Avoid overheating, as the center may lose its gooey texture.
Make-Ahead Tips
Mix the dry ingredients in advance and store them in an airtight container. When you’re ready to enjoy your dessert, simply add the wet ingredients, place the chocolate in the center, and microwave.
This is a great way to prepare quick desserts for busy evenings or unexpected guests.
Why You’ll Love This Recipe
- Ready in under 10 minutes
- No oven required
- One mug means easy cleanup
- Rich, gooey molten chocolate center
- Perfect single-serving dessert
- Uses common pantry ingredients
- Easily customizable with different fillings
- Ideal for satisfying chocolate cravings quickly
Estimated Nutrition (Per Serving)
- Calories: 470
- Protein: 6g
- Carbohydrates: 53g
- Fat: 27g
- Saturated Fat: 9g
- Cholesterol: 2mg
- Sodium: 180mg
- Potassium: 240mg
- Fiber: 4g
- Sugar: 30g
- Calcium: 80mg
- Iron: 3mg