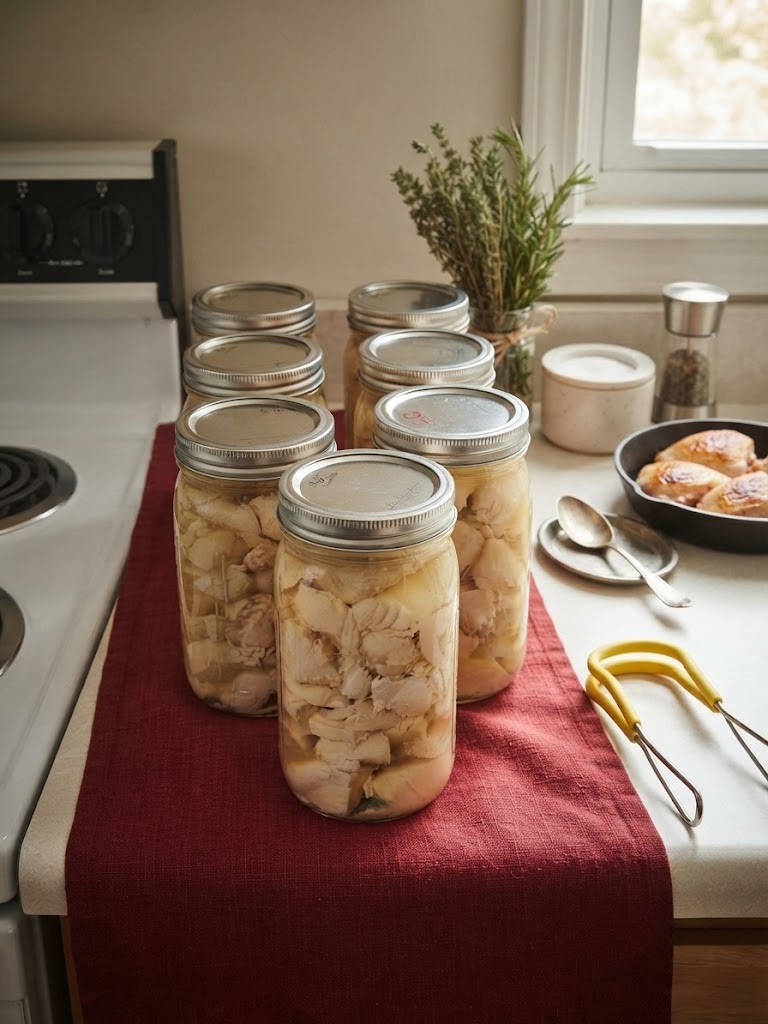
Canned Chicken Breast
Recipe Overview
-
Prep time: 30 minutes
-
Processing time (Cook time): 75 minutes (Pints) / 90 minutes (Quarts)
-
Cooling time: 12 to 24 hours (Uninterrupted)
-
Total time: ~15 hours (Including cooling and sealing)
-
Intensity/Skill Level: Advanced (Requires strict adherence to USDA canning safety guidelines)
-
Yield: 6 Pint Jars or 4 Quart Jars
Introduction
Mastering the art of home canning is one of the most rewarding skills a home cook can develop, and Canned Chicken Breast is an absolute pantry staple. Having jars of tender, perfectly cooked chicken ready at a moment’s notice completely transforms weeknight meal planning. Whether you need a quick protein addition for hearty soups, speedy chicken salads, cheesy casseroles, or effortless tacos, home-canned chicken delivers incredible flavor without the preservatives, excess sodium, or metallic taste often found in commercial store-bought cans.
Because poultry is a low-acid food, safe preservation requires pressure canning rather than a standard boiling water bath. When executed correctly using proper equipment and USDA-approved guidelines, pressure canning locks in fresh flavor and creates a shelf-stable pantry treasure that will nourish your family for months to come.
Equipment and Safety Essentials
-
Pressure Canner: A certified pressure canner with a reliable dial gauge or weighted gauge (Note: A standard boiling water bath canner is unsafe and will not reach the high temperatures required for meat).
-
Glass Canning Jars: Wide-mouth pint or quart jars inspected for nicks or cracks.
-
Canning Lids and Rings: Brand new, flat metal lids (lids cannot be reused for canning safety) and screw bands.
-
Jar Lifter: Specialized canning tongs for safely loading and unloading hot jars.
-
Bubble Remover / Headspace Tool: To measure headspace and release trapped air.
-
Clean Damp Cloth: For wiping rim edges.
Ingredients
-
Bone-in or Boneless Chicken Breasts: 6 to 8 pounds of fresh, high-quality raw chicken breasts (skin removed for better texture and less surface fat).
-
Water or Low-Sodium Broth: For hot packing or raw packing the jars.
-
Canning / Pickling Salt (Optional): 1/2 teaspoon per pint jar (or 1 teaspoon per quart jar) to enhance flavor.
Step-by-Step Instructions
Step 1: Sanitation and Preparation
-
Wash all of your glass canning jars, rings, and new lids in hot, soapy water, then rinse thoroughly. Keep the jars warm until you are ready to fill them.
-
Prepare your pressure canner by placing the rack inside and adding the manufacturer-recommended amount of water (usually about 2 to 3 inches of water). Turn the burner to low heat to preheat the water.
-
Clean and trim your raw chicken breasts, removing any excess fat, cartilage, or bone fragments. Cut the meat into uniform chunks (about 1 to 2 inches) if raw packing, or leave them in large pieces if hot packing.
Step 2: Packing the Jars (Raw Pack Method)
-
Note: Raw packing places raw chicken directly into the jars without pre-cooking, relying on the pressure canning process to cook the meat thoroughly.
-
Place optional canning salt into each clean, warm jar (1/2 teaspoon per pint, 1 teaspoon per quart).
-
Tightly pack the raw chicken pieces into the jars, pressing them down gently to eliminate large air pockets, but leaving 1.25 inches of headspace at the top of each jar.
-
Do not add cooking oil or butter, as fat interferes with the proper vacuum seal of the jar. You can add boiling water or boiling broth over the chicken, maintaining that crucial 1.25-inch headspace.
Step 3: Removing Air Bubbles and Sealing
-
Run a non-metallic bubble remover tool down the inside of each jar to release any trapped air pockets. Check your headspace measurement once more.
-
Dip a clean cloth in warm vinegar or water and meticulously wipe the rim and threads of each jar to remove any stray grease, meat fibers, or salt. Any residue can prevent a secure seal.
-
Place a sanitized flat metal lid onto the jar rim, centering the sealing compound. Screw the band down fingertip-tight (do not over-tighten, as air must be allowed to escape during processing).
Step 4: Pressure Processing
-
Using your jar lifter, place the loaded jars onto the rack inside your preheated pressure canner, ensuring they do not touch one another.
-
Secure the canner lid tightly according to the manufacturer’s specific instructions, leaving the vent pipe open.
-
Turn the heat source to high and allow steam to escape in a steady stream from the vent pipe for a full 10 minutes. This exhausts all air from the canner chamber.
-
Place the weighted gauge on the vent pipe or close the petcock. Watch the pressure dial closely.
-
Once the pressure reaches the correct pounds per square inch (PSI) required for your altitude (typically 10 PSI for weighted gauges, or adjusted for your specific altitude if using a dial gauge—usually 11 PSI for 0–2,000 feet), begin your processing timer.
-
Processing Times:
-
Pint jars: Process for 75 minutes at the correct pressure.
-
Quart jars: Process for 90 minutes at smart, steady pressure.
-
-
Maintain a consistent heat level throughout the processing time. If pressure drops below the required PSI at any point, you must restart the entire processing timer from zero.
Step 5: Depressurization and Cooling
-
Once the processing time is complete, turn off the heat source completely.
-
Allow the pressure canner to depressurize and cool down naturally on its own. Do not force-cool, submerge in water, or open the petcock prematurely, as rapid pressure changes will cause liquid to siphon out of the jars and cause seal failures.
-
Once the pressure gauge reads zero and all pressure has safely dissipated, carefully remove the weighted gauge or open the petcock. Wait another 10 minutes, then unlatch and open the lid away from your face to avoid escaping steam.
-
Use your jar lifter to remove the hot jars, placing them upright on a dry towel or wooden cutting board in a draft-free location. Leave them completely undisturbed for 12 to 24 hours.
Step 6: Testing Seals and Storage
-
After 24 hours, test the seals by pressing down on the center of each lid. If the lid does not flex or pop up, it has successfully sealed.
-
Remove the screw bands (leaving them on can trap moisture and rust the threads during storage), wipe the jars clean, and label them with the date.
-
Store your canned chicken in a cool, dark, and dry pantry. Properly canned meat maintains its highest quality for up to 1 year.
Chef’s Tips for Success
-
Altitude Adjustments: Always verify your local elevation. If you live above 1,000 feet (for weighted gauges) or 2,000 feet (for dial gauges), you must increase your processing PSI to ensure safety. Consult reliable USDA canning charts for precise altitude metrics.
-
Liquid Extraction: It is completely normal to see natural juices and gelatin form inside the jar during processing. This rich broth makes an incredible base for gravies and soups.
-
Checking Spoiled Seals: Before opening any jar of home-canned meat in the future, always inspect the seal, listen for the vacuum release “pop,” and check for any off-odors or unusual discoloration. When in doubt, throw it out.
Nutrition Information
Estimated values per serving (approx. 3 oz / 85g of drained chicken breast):
-
Calories: 140 kcal
-
Carbohydrates: 0 g
-
Sugars: 0 g
-
Fiber: 0 g
-
Sodium: 250 mg (varies if salt is added)
-
Protein: 26 g
-
Fat: 3 g