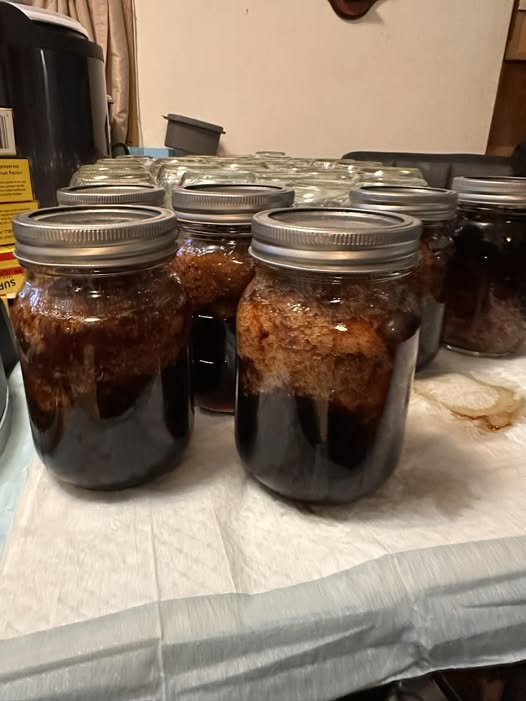
canned meat
- Prep Time: 30 minutes
- Packing Time: 20 minutes
- Processing Time: 75–90 minutes
- Cooling Time: 12–24 hours
- Total Time: Approximately 14–25 hours (including cooling)
- Difficulty Level: Intermediate
- Yield: 7 pint jars
Ingredients
- 5 pounds lean beef, pork, venison, or chicken
- 2 teaspoons canning salt (optional)
- Water, broth, or meat juices (for hot-pack method)
- 7 sterilized pint canning jars
- New canning lids and rings
Optional Seasonings
- Black pepper
- Garlic powder
- Onion powder
- Dried herbs such as thyme or rosemary
Avoid adding flour, dairy products, pasta, rice, or thickening agents before canning.
Equipment Needed
- Pressure canner
- Jar lifter
- Canning funnel
- Bubble remover tool
- Clean towels
- Sharp knife
- Cutting board
- Large stockpot
- Measuring spoons
Choosing the Best Meat
Select fresh, high-quality meat with minimal fat. Excess fat can interfere with proper sealing and shorten shelf life.
Good options include:
- Beef chuck roast
- Sirloin
- Pork shoulder
- Chicken breast
- Turkey breast
- Venison
Trim away:
- Excess fat
- Gristle
- Bruised areas
- Connective tissue
Lean cuts generally produce the best canning results.
Step 1: Prepare the Meat
Wash your hands thoroughly and sanitize all equipment.
Trim excess fat from the meat and cut into approximately 1-inch cubes.
You may choose either:
Raw Pack Method
Pack raw meat directly into jars.
Hot Pack Method
Brown or partially cook the meat before packing.
The hot-pack method often produces better flavor and reduced jar shrinkage.
Preparation Time: 20 minutes
Step 2: Prepare the Jars
Inspect jars carefully for cracks or chips.
Wash jars in hot, soapy water and rinse thoroughly.
Keep jars warm until ready to fill.
Prepare canning lids according to the manufacturer’s instructions.
Preparation Time: 10 minutes
Step 3: Fill the Jars
Using a canning funnel, fill each jar with meat.
Leave:
- 1 inch headspace at the top of each jar
For raw pack:
- Add meat directly
- Do not add liquid
For hot pack:
- Add cooked meat
- Cover with hot broth or water
Add:
- ½ teaspoon canning salt per pint jar (optional)
Remove trapped air bubbles using a bubble remover tool.
Adjust headspace if needed.
Time: 15 minutes
Step 4: Clean and Seal
Wipe jar rims with a clean damp cloth.
Place lids onto jars.
Apply screw bands until fingertip tight.
Do not overtighten.
Proper sealing during processing depends on allowing air to escape from the jars.
Time: 5 minutes
Step 5: Prepare the Pressure Canner
Add the amount of water recommended by your pressure canner manufacturer.
Place filled jars onto the canner rack.
Secure the lid.
Heat the canner until steam flows steadily from the vent.
Allow steam to vent for 10 minutes.
This step removes trapped air and ensures proper pressure levels.
Cooking Intensity: Medium-High Heat
Time: 15 minutes
Step 6: Pressure Can the Meat
After venting:
- Apply the pressure regulator or close the vent according to manufacturer instructions.
Process jars at the pressure recommended for your altitude and canner type.
Typical Processing Times
Pint Jars
- 75 minutes
Quart Jars
- 90 minutes
Pressure Guidelines
Dial-Gauge Canner
- 11 PSI (adjust for altitude)
Weighted-Gauge Canner
- 10 PSI (adjust for altitude if required)
Maintain steady pressure throughout processing.
Cooking Intensity: High Pressure Processing
Processing Time: 75–90 minutes
Step 7: Cool the Canner Naturally
When processing time is complete:
- Turn off heat
- Allow pressure to return to zero naturally
Do not force cool the canner.
Rapid cooling can result in seal failures and unsafe food.
Wait an additional 10 minutes after pressure reaches zero before opening the lid.
Open carefully, directing steam away from your face.
Cooling Time: 30–60 minutes
Step 8: Remove and Cool Jars
Using a jar lifter, carefully remove jars.
Place them on a towel-lined counter.
Leave at least one inch of space between jars.
Allow jars to cool undisturbed for 12–24 hours.
You may hear the characteristic “ping” sound as lids seal.
Cooling Intensity: Room Temperature Resting
Time: 12–24 hours
Step 9: Check Seals
After cooling:
- Remove screw bands
- Press the center of each lid
A properly sealed lid should not flex up and down.
If any jars fail to seal:
- Refrigerate immediately and use within a few days
Label sealed jars with:
- Contents
- Date canned
Store in a cool, dark location.
How to Use Canned Meat
Homemade canned meat is extremely versatile.
Popular uses include:
Soups
Add directly to vegetable, noodle, or bean soups.
Stews
Create hearty meals in minutes.
Tacos
Shred canned beef or pork and season for tacos.
Sandwiches
Mix with barbecue sauce or gravy.
Casseroles
Combine with vegetables and pasta.
Rice Bowls
Serve over rice with sauces and fresh vegetables.
Since the meat is fully cooked, reheating is often all that is required.
Storage Tips
Pantry Storage
Store jars in a cool, dark area between 50°F and 70°F (10°C–21°C).
Shelf Life
For best quality:
- Use within 1–2 years
Properly sealed jars remain safe longer, but flavor and texture may gradually decline.
Avoid Storage Areas
Do not store jars:
- Near furnaces
- In direct sunlight
- In damp basements
- Near heat sources
Common Mistakes to Avoid
Using a Water-Bath Canner
Meat requires pressure canning for safety.
Overfilling Jars
Always maintain proper headspace.
Excess Fat
Too much fat can affect seals.
Skipping Venting
The 10-minute venting step is essential.
Forcing Pressure Release
Allow pressure to drop naturally.
Recipe Variations
Canned Beef
Perfect for stews, chili, and sandwiches.
Canned Chicken
Excellent for soups, casseroles, and salads.
Canned Pork
Ideal for pulled pork-style dishes.
Canned Venison
A favorite among hunters for long-term storage.
Seasoned Meat
Add approved dry seasonings before canning for extra flavor.
Nutritional Benefits
Canned meat provides:
- High-quality protein
- Iron
- Zinc
- Vitamin B12
- Essential amino acids
It is an excellent pantry staple that supports quick meal preparation while delivering important nutrients.
Nutrition Information
Per Serving (Approximate 4-ounce portion of canned beef)
- Calories: 220
- Protein: 28g
- Total Fat: 11g
- Saturated Fat: 4g
- Carbohydrates: 0g
- Fiber: 0g
- Sugar: 0g
- Cholesterol: 85mg
- Sodium: 280mg
- Iron: 15% DV
- Zinc: 35% DV
- Vitamin B12: 40% DV
- Potassium: 320mg