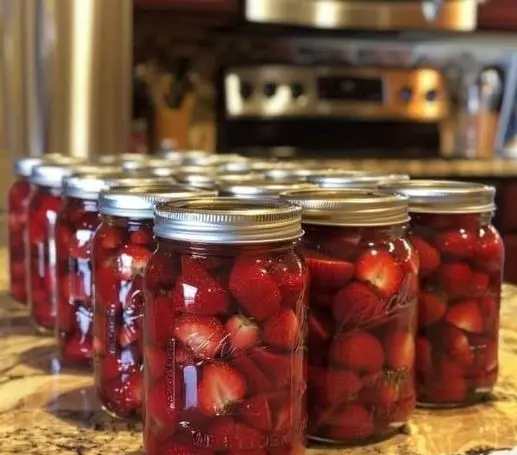
Canning Whole Strawberries
Description:
Canning whole strawberries preserves the sweet and juicy flavor of fresh strawberries, making them available year-round for desserts, toppings, or simply enjoying straight from the jar.
Total Time:
- Preparation Time: 30-40 minutes
- Processing Time: 10-15 minutes
- Total Time: 40-55 minutes
Ingredients:
- 5-6 lbs (2.3-2.7 kg) fresh strawberries, hulled
- 4 cups water
- 2 cups granulated sugar (adjust for desired sweetness)
- 1/4 cup lemon juice (optional, for added tartness)
Equipment:
- Canning jars with lids and bands (pint or quart size)
- Large pot for boiling water
- Canning pot or large stockpot with a canning rack
- Jar lifter
- Canning funnel
- Ladle
- Paring knife
Instructions:
- Prepare the Strawberries:
- Wash and hull the strawberries, removing the green tops.
- Sort through the strawberries, using only firm, ripe berries without any bruises or soft spots.
- Sterilize the Jars:
- Wash jars, lids, and bands with warm, soapy water. Rinse well.
- Sterilize the jars by boiling them in a large pot of water for 10 minutes. Keep them warm in the water until ready to use.
- Prepare the Syrup:
- In a large pot, combine water and sugar.
- Heat over medium-high heat, stirring until the sugar is fully dissolved to create a simple syrup.
- Optional: Add lemon juice to the syrup for a slightly tart flavor.
- Keep the syrup warm but not boiling.
- Pack the Strawberries:
- Gently place the whole strawberries into the sterilized jars, packing them snugly but without crushing the berries. Leave about 1/2 inch of headspace at the top of each jar.
- Add the Syrup:
- Using a ladle and a canning funnel, pour the hot syrup over the strawberries, covering them completely while maintaining the 1/2 inch headspace.
- Remove Air Bubbles:
- Gently tap the jars on the counter or use a non-metallic utensil to remove any air bubbles. Adjust the headspace if necessary.
- Seal the Jars:
- Wipe the rims of the jars with a clean, damp cloth. Place the lids on top and screw on the bands until fingertip-tight.
- Prepare the Water Bath:
- Fill your canning pot with enough water to cover the jars by at least 1 inch. Bring to a simmer.
- Process the Jars:
- Use a jar lifter to place the jars in the canning pot.
- Bring the water to a full boil and process pint jars for 10 minutes and quart jars for 15 minutes (adjust for altitude if necessary).
- Cool and Store:
- After processing, remove the jars with a jar lifter and place them on a towel-lined surface to cool completely.
- After 24 hours, check the seals by pressing the center of each lid. If the lid does not pop back, the jar is sealed. Any unsealed jars should be refrigerated and used within a few weeks.
Storage:
- Store sealed jars in a cool, dark place for up to 1 year. Refrigerate after opening and use within 1-2 weeks.
Notes:
- Syrup Adjustments: You can adjust the sweetness of the syrup by increasing or decreasing the sugar content, or use fruit juice for a natural sweetness.
- Spices: For a flavored variation, add a vanilla bean, cinnamon stick, or lemon zest to each jar before sealing.
- Serving Suggestions: Use the canned strawberries as a topping for pancakes, waffles, ice cream, or incorporate them into desserts like pies and cobblers.
Enjoy the taste of summer strawberries all year long with this simple canning recipe!