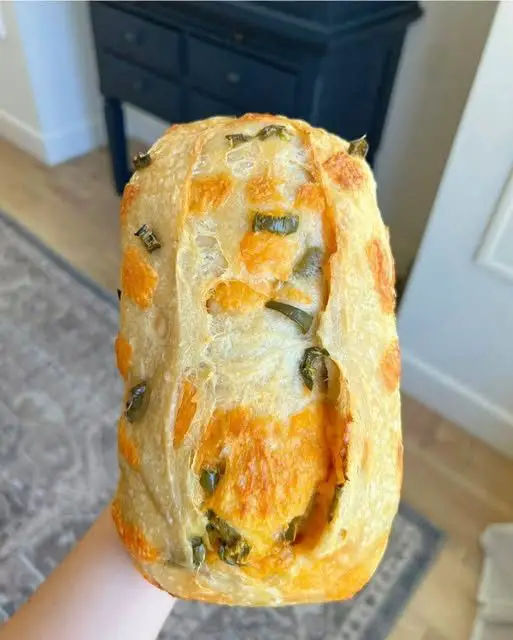
Mastered Crunchy sourdough
-
Active Prep Time: 35 minutes (Mixing & Stretch and Folds)
-
Passive Time (Bulk Fermentation): 4–5 hours (at 72°F/22°C)
-
Shaping & Proofing: 15 minutes active / 10–14 hours passive (in the fridge)
-
Bake Time: 45–50 minutes
Equipment You’ll Need
-
Kitchen scale (for accuracy)
-
Large mixing bowl
-
Dutch Oven (5.5 to 7-quart cast iron pot with lid)
-
Parchment paper
-
Sharp knife, lame, or razor blade (for scoring)
-
Banneton basket or a medium bowl lined with a floured tea towel
-
Plastic wrap or a hot shower cap
-
Cooling rack
Ingredients
-
350g warm water (85°F / 29°C)
-
100g active sourdough starter (100% hydration, bubbly and peaked)
-
500g strong bread flour (preferably high-protein, 12-14%)
-
10g fine sea salt
Note: This recipe uses a baker’s percentage. For best results, weigh your ingredients. If you must use cups, fluff your flour, spoon it into the cup, and level it off—but a scale is highly recommended.
Method: The Path to the Crunch
Stage 1: Autolyse & Mix (Intensity: Low)
Timing: 30 minutes
In a large bowl, combine the 500g bread flour and 350g warm water. Mix with your hands or a stiff spatula until no dry bits remain. It will be a shaggy, rough dough. Cover the bowl with a damp towel or plastic wrap and let it rest for 30 minutes. This autolyse period allows the flour to absorb the water and starts the development of gluten strands naturally.
Stage 2: Incorporate the Starter (Intensity: Medium)
Timing: 5 minutes
After the rest, add the 100g bubbly, active sourdough starter to the top of the dough. Wet your hands slightly to prevent sticking. Using a pinching motion (like you’re giving the dough a deep-tissue massage), squeeze the starter into the dough until it is fully incorporated. The dough will feel very wet and break apart—this is normal.
Cover and let it rest for 15 minutes.
Stage 3: Add the Salt & Mix (Intensity: Medium)
Timing: 5 minutes
Sprinkle the 10g salt over the dough. Again, use wet hands to pinch and fold the dough over itself repeatedly until the salt is dissolved and distributed. You’ll notice the dough starting to tighten up slightly. Cover and rest for 30 minutes.
Stage 4: The Coil Fold Method (Intensity: Medium-High)
Timing: 2 hours total, 4 sets of folds (every 30 mins)
This is the secret to building strength without tearing the delicate dough. Instead of traditional stretch and folds, we use “coil folds.” Wet your hands. Gently reach under the middle of the dough, lift it slightly, and let it fold over itself (like a coil). Rotate the bowl 90 degrees and repeat the motion. You should perform 2-3 coils per set.
Perform a set of coil folds every 30 minutes for the first 2 hours (so, 4 sets total). By the final set, you will feel the dough tightening and holding its shape beautifully. It will be smooth, elastic, and jiggle slightly.
Stage 5: Bulk Fermentation (Intensity: Low)
Timing: 2–3 more hours (until dough is doubled and bubbly)
After the final set of folds, cover the bowl and let it sit at room temperature. This is the bulk rise. You’re looking for the dough to increase in size by about 50-75%, have a few bubbles on the surface, and feel very airy and pillowy. If you poke it with a floured finger, it should spring back slowly, leaving a slight indentation. This usually takes another 2-3 hours depending on your room temperature.
Stage 6: Pre-Shape (Intensity: Medium)
Timing: 1 minute
Lightly flour your work surface (no parchment). Gently tip the dough out onto the surface. It will be soft and supple. Using a bench scraper, gently shape it into a round by tucking the edges under itself. Don’t degas the dough too much; you want to keep those large air bubbles intact. Let this rest, uncovered, for 20 minutes. This is called the bench rest.
Stage 7: Final Shape (Intensity: Medium-High)
Timing: 2 minutes
Flip the dough over so the smooth side is down. To create tension, take the top edge and fold it into the center. Do the same with the bottom edge, then the left and right. Then, roll the dough over so the seam side is down. Using your hands, gently cup the dough and pull it toward you across the unfloured surface to tighten the skin. You should feel it tense up.
Place the dough, seam side up, into a well-floured banneton basket. If you don’t have one, use a bowl lined with a tea towel and dust heavily with rice flour (to prevent sticking).
Stage 8: Cold Proofing (Intensity: Low)
Timing: 10–14 hours
Cover the basket tightly with a plastic bag or shower cap. Place it in the refrigerator immediately. This long, cold fermentation is where the flavor deepens and the crust will get its signature dark color. You can leave it for up to 48 hours for an even tangier result, but the sweet spot is 10-14 hours.
Stage 9: Bake Day (Intensity: High)
Timing: 50 minutes
-
Preheat: Place your Dutch oven (with the lid on) inside your oven. Preheat the oven to 500°F (260°C) for at least 45 minutes. It needs to be screaming hot.
-
Score: Carefully remove the scorching hot Dutch oven. Place a sheet of parchment paper over the top of your banneton and invert the basket to release the dough. Using a lame or sharp knife, score the dough with a swift, confident slash (about 1/2 inch deep). This is the exhaust valve for the bread.
-
Bake Covered: Using the parchment paper as a sling, lower the dough into the Dutch oven. Put the lid on. Return to the oven and immediately reduce the temperature to 450°F (230°C) . Bake for 25 minutes.
-
Bake Uncovered: After 25 minutes, carefully remove the lid. The bread should be pale but set. Continue baking for another 20-25 minutes, until the crust is a deep, dark mahogany brown. Don’t be afraid of color—darkness equals flavor.
-
Cool: Using the parchment paper, lift the loaf out of the pot and transfer it to a wire cooling rack. This step is crucial. Do not slice into it for at least 2 hours. The interior is still cooking, and cutting early will result in a gummy, wet crumb.
Nutrition Information (per slice, based on 12 slices)
-
Calories: 185 kcal
-
Carbohydrates: 37g
-
Protein: 7g
-
Fat: 1g
-
Fiber: 1.5g
-
Sodium: 325mg
Note: Nutritional values are estimates and will vary based on the specific flour and starter used