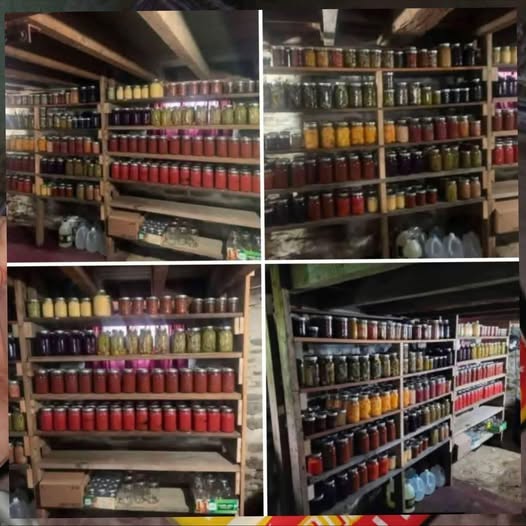
pantry or a canning room
- Prep Time: 30 minutes
- Cooking Time: 15 minutes
- Processing Time: 15 minutes
- Cooling Time: 12–24 hours
- Total Time: Approximately 1 hour (plus cooling)
- Difficulty Level: Moderate
- Yield: 6 pint jars
Equipment Needed
- Water bath canner
- Large stockpot
- Canning funnel
- Jar lifter
- Bubble remover
- Clean towels
- Measuring cups
- Measuring spoons
- 6 sterilized pint jars with lids and bands
Ingredients
Vegetables
- 4 cups cucumber slices
- 2 cups cauliflower florets
- 2 cups carrot slices
- 1 cup bell pepper strips
- 1 cup pearl onions or sliced onions
Pickling Brine
- 4 cups white vinegar (5% acidity)
- 2 cups water
- ¼ cup pickling salt
- 2 tablespoons sugar
Seasonings
- 2 teaspoons mustard seeds
- 1 teaspoon black peppercorns
- 1 teaspoon celery seed
- 1 teaspoon dill seed
- 6 garlic cloves
Ingredient Notes
Fresh Vegetables
Use fresh, crisp vegetables for the best texture and flavor.
Vinegar
Always use vinegar with at least 5% acidity for safe home canning.
Pickling Salt
Pickling salt dissolves clearly and helps maintain the appearance of the brine.
Garlic and Spices
These ingredients provide depth of flavor and improve the overall taste of the preserves.
Step-by-Step Instructions
Step 1: Prepare the Jars
Time: 10 minutes
Intensity: Easy
Wash jars, lids, and bands thoroughly.
Keep jars hot until ready to fill.
Prepare your water bath canner according to the manufacturer’s instructions.
Proper preparation helps ensure safe preservation.
Step 2: Prepare the Vegetables
Time: 15 minutes
Intensity: Easy
Wash all vegetables thoroughly.
Slice cucumbers, carrots, onions, and peppers into uniform pieces.
Cut cauliflower into bite-sized florets.
Uniform pieces ensure even packing and attractive jars.
Step 3: Make the Pickling Brine
Time: 10 minutes
Intensity: Easy
In a large stockpot combine:
- White vinegar
- Water
- Pickling salt
- Sugar
Bring the mixture to a gentle boil over medium-high heat.
Stir until the salt and sugar completely dissolve.
Reduce heat and keep warm.
Step 4: Add Seasonings to Jars
Time: 5 minutes
Intensity: Easy
Place into each sterilized jar:
- 1 garlic clove
- A pinch of mustard seeds
- A few peppercorns
- A small pinch of celery seed
- A pinch of dill seed
This creates consistent flavor throughout all jars.
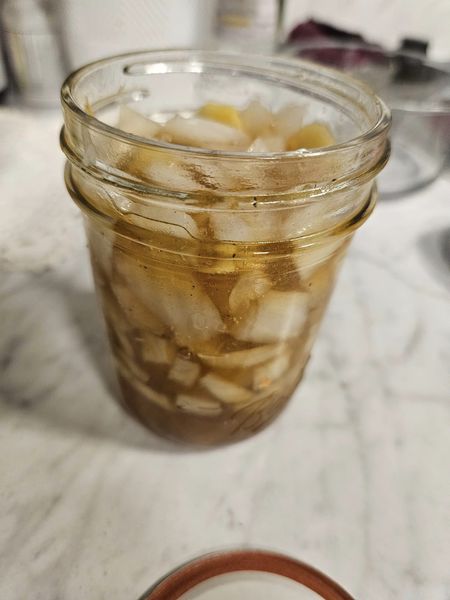
Step 5: Pack the Vegetables
Time: 10 minutes
Intensity: Moderate
Pack the prepared vegetables tightly into the jars.
Arrange colors evenly for an attractive appearance.
Leave approximately:
½ inch headspace
at the top of each jar.
Step 6: Add the Brine
Time: 5 minutes
Intensity: Easy
Carefully pour the hot brine into each jar.
Maintain:
½ inch headspace
Remove trapped air bubbles using a bubble remover or non-metallic utensil.
Add additional brine if necessary.
Step 7: Apply Lids
Time: 3 minutes
Intensity: Easy
Wipe jar rims clean with a damp cloth.
Place lids on jars.
Apply bands until fingertip tight.
Avoid overtightening.
Step 8: Process the Jars
Time: 15 minutes
Intensity: Moderate
Place jars into the water bath canner.
Ensure they are covered by at least 1 inch of water.
Bring water to a full rolling boil.
Process pint jars for:
15 minutes
Adjust processing times if required for higher elevations.
Step 9: Cool the Jars
Time: 12–24 hours
Intensity: Passive
Carefully remove jars and place them on a towel-lined surface.
Allow them to cool undisturbed.
You may hear the satisfying “pop” of sealing lids during cooling.
Step 10: Check Seals and Store
Time: 2 minutes
Intensity: Easy
Press the center of each lid.
A properly sealed lid should not move.
Label jars with the preparation date and store them in your pantry or canning room.
Serving Suggestions
These preserved vegetables pair wonderfully with:
Sandwiches
- Ham sandwiches
- Turkey sandwiches
- Roast beef sandwiches
Main Courses
- Grilled chicken
- Burgers
- Barbecue dishes
- Roasted meats
Appetizer Boards
- Cheese platters
- Charcuterie boards
- Crackers and dips
Salads
Chop and add directly to green salads or pasta salads.
Storage Instructions
Pantry Storage
Store sealed jars in a cool, dark pantry or canning room.
Best quality is maintained for:
12–18 months
After Opening
Refrigerate and consume within:
2–3 weeks
Tips for Success
Use Fresh Produce
Fresh vegetables produce the best texture after canning.
Follow Safe Canning Practices
Always use approved canning methods and proper acidity levels.
Keep Jars Hot
Warm jars reduce the risk of cracking during filling.
Remove Air Bubbles
Removing bubbles improves sealing and storage quality.
Label Everything
Always mark jars with the date and contents.
Recipe Variations
Spicy Vegetable Preserve
Add:
- 1 sliced jalapeño per jar
for extra heat.
Sweet Pickled Vegetables
Increase sugar to:
- ½ cup
for a sweeter flavor profile.
Herb Garden Preserve
Add:
- Fresh dill
- Thyme
- Rosemary
to enhance the herbal notes.
Garlic Lovers Version
Double the garlic cloves in each jar for a bolder flavor.
Frequently Asked Questions
How long should I wait before eating?
For the best flavor, allow jars to sit for at least 2 weeks before opening.
Can I use different vegetables?
Yes. Green beans, zucchini, and radishes also work well.
Why are my vegetables floating?
Some floating is normal and does not indicate spoilage.
How do I know if a jar is spoiled?
Discard any jar with:
- Mold
- Leaking liquid
- Bulging lids
- Unpleasant odor
Can I reduce the vinegar?
No. The vinegar ratio is important for safe preservation.
Nutrition Information
Per Serving (½ Cup)
- Calories: 45
- Protein: 1g
- Carbohydrates: 9g
- Total Fat: 0g
- Saturated Fat: 0g
- Cholesterol: 0mg
- Sodium: 310mg
- Dietary Fiber: 2g
- Sugars: 4g
- Potassium: 180mg
- Vitamin A: 15% Daily Value
- Vitamin C: 25% Daily Value
- Calcium: 3% Daily Value
- Iron: 2% Daily Value