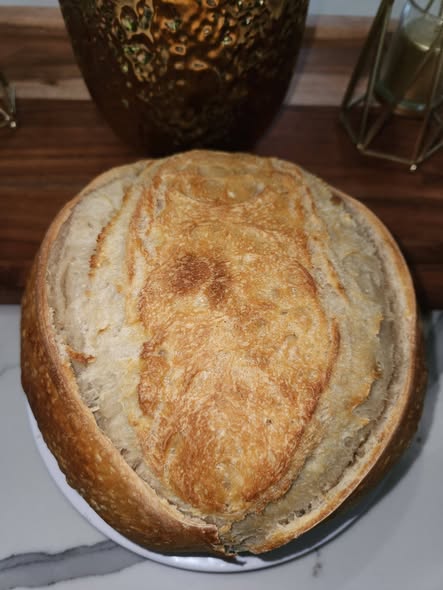
sourdough artisan bread
- Prep Time: 30 minutes
- Bulk Fermentation: 4–6 hours
- Cold Proof: 8–16 hours (recommended)
- Bake Time: 45 minutes
- Total Time: Approximately 14–23 hours
- Difficulty: Intermediate
- Yield: 1 large loaf (10–12 slices)
- Course: Bread
- Cuisine: European-Inspired
Ingredients
- 500 grams bread flour
- 350 grams filtered water, room temperature
- 100 grams active sourdough starter (fed and bubbly)
- 10 grams fine sea salt
- Rice flour or all-purpose flour for dusting
Equipment
- Large mixing bowl
- Kitchen scale
- Dough scraper
- Banneton basket or bowl lined with a floured towel
- Dutch oven with lid
- Parchment paper
- Sharp bread lame or razor blade
- Cooling rack
Instructions
Step 1: Mix the Dough
In a large bowl, combine the water and active sourdough starter, stirring until the starter is mostly dissolved. Add the bread flour and mix until no dry flour remains. Cover the bowl and let the dough rest for 30 minutes. This resting period, known as the autolyse, helps develop gluten and improves the dough’s texture.
Step 2: Add the Salt
Sprinkle the salt evenly over the dough. Gently work it into the dough by pinching and folding until fully incorporated. Cover and let the dough rest for another 30 minutes.
Step 3: Stretch and Fold
During the first 2 hours of bulk fermentation, perform a series of stretch-and-folds every 30 minutes. To do this, gently lift one side of the dough, stretch it upward without tearing, and fold it over itself. Rotate the bowl and repeat until all four sides have been folded.
These folds strengthen the dough while preserving the air bubbles that contribute to an open crumb.
Step 4: Bulk Fermentation
After completing the folds, allow the dough to continue fermenting at room temperature for another 2–4 hours, or until it has increased in volume by about 50% and feels airy.
The exact fermentation time depends on the room temperature and the activity of your sourdough starter.
Step 5: Shape the Dough
Turn the dough onto a lightly floured work surface. Gently shape it into a round by folding the edges toward the center and creating surface tension without pressing out too much air.
Place the shaped dough seam-side up into a well-floured banneton or a bowl lined with a floured kitchen towel.
Step 6: Cold Proof
Cover the dough and refrigerate for 8–16 hours. This cold fermentation develops deeper flavor and makes the dough easier to score before baking.
Step 7: Preheat the Oven
About 45 minutes before baking, place a Dutch oven with its lid into the oven and preheat to 475°F (245°C). A thoroughly heated Dutch oven helps create steam, resulting in a crisp, beautifully browned crust.
Step 8: Score the Dough
Carefully remove the hot Dutch oven. Turn the dough onto a piece of parchment paper and dust off any excess flour. Using a sharp bread lame or razor blade, make one long slash about ½ inch deep across the top. Decorative scoring patterns may also be added.
Step 9: Bake
Transfer the dough into the hot Dutch oven using the parchment paper. Cover with the lid and bake for 20 minutes.
Remove the lid and continue baking for 20–25 minutes, or until the crust is a deep golden brown and the internal temperature reaches about 205–210°F (96–99°C).
Step 10: Cool Completely
Transfer the bread to a wire rack and allow it to cool for at least 1 hour before slicing. Cooling allows the crumb to finish setting and prevents a gummy texture.
Serving Suggestions
This sourdough artisan bread is delicious served with:
- Salted butter
- Olive oil and balsamic vinegar
- Homemade soups and stews
- Cheese and charcuterie boards
- Avocado toast
- Smoked salmon
- Egg dishes
- Bruschetta toppings
- Roasted vegetables
- Nut butter and jam
Tips for Success
- Always use an active, recently fed sourdough starter.
- Measure ingredients by weight for the most accurate results.
- Avoid adding excess flour during shaping to maintain proper hydration.
- Let the loaf cool completely before slicing.
- Use a Dutch oven to trap steam for a crisp crust.
- Adjust fermentation times based on your kitchen temperature.
Flavor Variations
Seeded Sourdough
Fold sunflower seeds, pumpkin seeds, or sesame seeds into the dough before shaping.
Whole Wheat Sourdough
Replace up to 20% of the bread flour with whole wheat flour for a heartier loaf.
Rosemary Garlic
Incorporate chopped fresh rosemary and roasted garlic during the final stretch-and-fold.
Cheddar Jalapeño
Fold shredded sharp cheddar cheese and diced jalapeños into the dough for a savory twist.
Everything Bagel
Sprinkle everything bagel seasoning over the loaf after scoring and before baking.
Storage
Store the cooled loaf in a paper bag, bread box, or wrapped in a clean kitchen towel at room temperature for up to 3 days.
For longer storage, slice the loaf and freeze it in an airtight freezer bag for up to 3 months. Toast slices directly from frozen when ready to serve.
Frequently Asked Questions
Why didn’t my bread rise?
A weak or inactive sourdough starter, cool room temperatures, or under-fermentation can all affect the rise. Make sure your starter is bubbly and doubles in size after feeding before using it.
Can I use all-purpose flour?
Yes, although bread flour generally produces a chewier crumb and better structure because of its higher protein content.
Why is my crust so hard?
A thick crust is common with artisan bread. Wrapping the cooled loaf in a clean towel for a few hours can soften the crust slightly if preferred.
Do I need a Dutch oven?
A Dutch oven is highly recommended because it traps steam, helping create excellent oven spring and a crisp crust. If you don’t have one, you can bake on a baking stone or sheet while placing a pan of hot water on the oven’s lower rack to generate steam.
How do I know when the bread is done?
The loaf should have a deep golden-brown crust and an internal temperature of 205–210°F (96–99°C) when measured with an instant-read thermometer.
Nutrition Information (Per Slice)
- Calories: 165
- Protein: 6 g
- Carbohydrates: 33 g
- Fat: 1 g
- Saturated Fat: 0 g
- Fiber: 2 g
- Sugar: 0 g
- Sodium: 240 mg
- Potassium: 70 mg
- Calcium: 10 mg
- Iron: 2 mg