vanilla ice cream
Making vanilla ice cream at home with your Thermomix is an incredibly easy and fun process! This recipe is smooth, creamy, and has the perfect balance of sweetness and vanilla flavor. With just a few simple ingredients and your Thermomix, you’ll have homemade vanilla ice cream ready in no time.
Preparation Time: 10 minutes
Freezing Time: 4–6 hours (or overnight for best results)
Total Time: 4–6 hours (mostly hands-off time)
Difficulty Level: Easy
Serves: 4–6 servings
Ingredients:
-
500g heavy cream (full-fat)
-
200g whole milk
-
100g granulated sugar
-
1 tablespoon pure vanilla extract (or 1 vanilla bean pod)
-
1 tablespoon lemon juice (optional, helps balance sweetness)
-
3 large egg yolks (optional for extra richness)
Equipment Needed:
-
Thermomix
-
Freezer-safe container for storing the ice cream
Instructions:
Step 1: Prepare the Vanilla Base
-
Mix Milk, Cream, and Sugar
In the Thermomix bowl, add 500g heavy cream, 200g whole milk, and 100g granulated sugar. -
Infuse Vanilla Flavor
If you’re using a vanilla bean pod, split it down the center, scrape out the seeds, and add both the seeds and the pod to the bowl. If you’re using vanilla extract, simply add it to the mixture in the Thermomix bowl. -
Heat the Mixture
Set the Thermomix to 90°C, speed 2 for 5 minutes. This will dissolve the sugar completely and infuse the vanilla flavor into the cream and milk mixture.
Step 2: Temper the Eggs (Optional, for Extra Creaminess)
-
Beat the Egg Yolks (if using)
If you’re using egg yolks for a richer, custard-style ice cream, beat 3 large egg yolks in a separate bowl until smooth and slightly pale. -
Add Hot Cream Mixture to the Yolks
Slowly pour a small amount of the hot cream mixture into the beaten yolks to temper them. This ensures the yolks don’t curdle. Stir well, then gradually whisk the yolk mixture back into the Thermomix bowl. -
Cook the Custard
Set the Thermomix to 90°C, speed 3, and cook for an additional 5 minutes. This will thicken the custard, creating a smoother, richer ice cream.
Step 3: Chill the Ice Cream Base
-
Cool the Mixture
Pour the mixture into a heatproof bowl or container and let it cool to room temperature. Then, cover it and place it in the fridge for at least 4 hours (or overnight) to chill completely. This will help the flavors meld together and make for a smoother ice cream texture.
Step 4: Freeze the Ice Cream
-
Prepare the Freezer Container
Once the ice cream base has fully chilled, prepare your freezer-safe container. You’ll need something with a lid for storing the ice cream once it’s ready. -
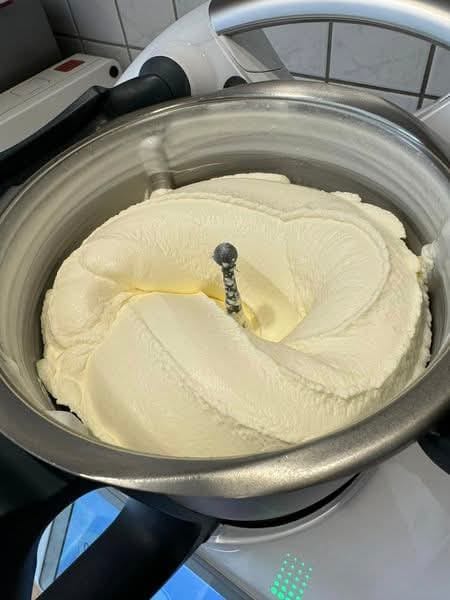
Churn the Ice Cream
If your Thermomix has a “Ice Cream” setting, use it to churn the mixture into ice cream. If you don’t have an ice cream maker attachment, pour the chilled mixture into the Thermomix bowl and set it to speed 4, slowly adding a little more cream or milk if needed, and blend until you achieve a smooth, frozen texture (about 20 minutes). -
Store and Freeze
Once the mixture reaches a smooth, ice cream consistency, pour it into your prepared freezer-safe container. Place a sheet of parchment paper over the surface before sealing the lid to prevent ice crystals from forming. Freeze for at least 4–6 hours (or overnight for best texture).
Step 5: Serve
-
Serve the Ice Cream
Once the ice cream is firm, scoop it into bowls or cones and serve immediately. If the ice cream is too hard to scoop after being in the freezer, let it sit out for a few minutes before serving to soften slightly.
Tips for Success:
-
Consistency: If you prefer a softer ice cream, take it out of the freezer 5-10 minutes before serving.
-
Flavor Variations: You can infuse the cream with different flavors (like cinnamon, coffee, or even chocolate chips) by adding them to the base before cooking. For a fruity twist, blend in some pureed berries after chilling.
-
Extra Creaminess: Using egg yolks in the recipe adds a richer texture and depth to the ice cream. If you prefer a lighter version, feel free to skip them.
Nutritional Information (per serving, based on 6 servings):
-
Calories: 280 kcal
-
Total Fat: 21g
-
Saturated Fat: 12g
-
Trans Fat: 0g
-
-
Cholesterol: 105mg
-
Sodium: 50mg
-
Total Carbohydrates: 24g
-
Dietary Fiber: 0g
-
Sugars: 23g
-
-
Protein: 3g
-
Vitamin A: 15% DV
-
Vitamin C: 0% DV
-
Calcium: 6% DV
-
Iron: 0% DV
Making vanilla ice cream in your Thermomix is a simple and rewarding process. The result is a luxurious, creamy treat that can be customized with your favorite mix-ins or enjoyed just as is. Whether you’re hosting a summer gathering, serving it alongside a dessert, or simply indulging in a classic scoop of ice cream, this homemade vanilla ice cream will satisfy your sweet tooth in the best way!