Victoria Sponge Cake
Prep Time: 20 minutes
Cook Time: 25–30 minutes
Cooling & Assembling Time: 45 minutes
Total Time: ~1.5 hours
Difficulty: ★★☆☆☆ (Easy to Moderate)
Servings: 8–10 slices
Introduction
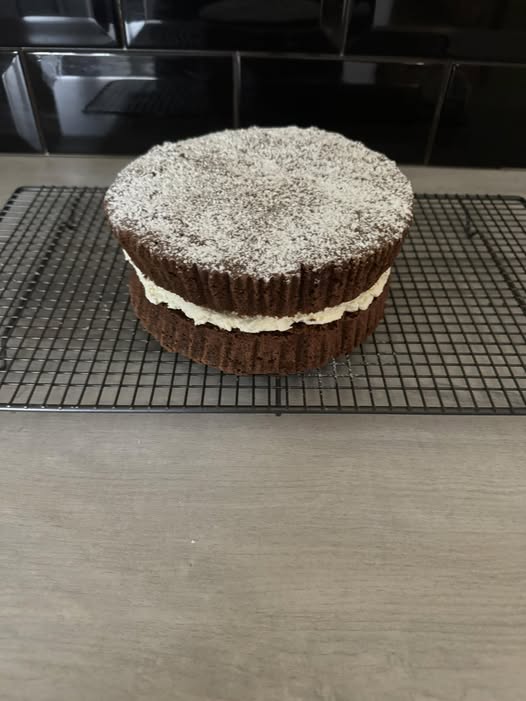
The Victoria Sponge Cake — sometimes referred to as a Victoria Sandwich Cake — is a beloved staple in British baking, named after Queen Victoria, who was said to enjoy a slice with her afternoon tea. This light, buttery sponge cake typically consists of two layers of fluffy vanilla sponge, sandwiched together with raspberry jam and whipped cream or buttercream, then finished with a light dusting of powdered sugar.
It’s simple, elegant, and timeless — perfect for everything from a casual brunch to a formal afternoon tea.
Ingredients
For the Sponge Cake:
-
200g (1 cup) unsalted butter, softened
-
200g (1 cup) granulated sugar
-
4 large eggs, room temperature
-
1 tsp vanilla extract
-
200g (1 2/3 cups) self-raising flour, sifted
-
2 tbsp milk (optional, for consistency)
Tip: For best results, use equal weights of butter, sugar, eggs, and flour — the traditional British method.
For the Filling:
-
4 tbsp raspberry jam (or strawberry, if preferred)
-
150ml (2/3 cup) heavy whipping cream or double cream
-
1 tbsp powdered sugar (for cream)
-
1/2 tsp vanilla extract (optional)
To Finish:
-
1–2 tbsp powdered (icing) sugar for dusting
Equipment Needed
-
2 x 8-inch (20cm) round cake tins
-
Electric mixer or hand whisk
-
Mixing bowls
-
Offset spatula or butter knife
-
Cooling rack
-
Sieve for dusting powdered sugar
Preparation Steps
Step 1: Preheat and Prep the Tins
Time: 5 minutes
-
Preheat your oven to 180°C / 350°F / Gas Mark 4.
-
Grease two 8-inch round cake tins and line the bases with parchment paper.
Step 2: Cream Butter and Sugar
Time: 5–7 minutes
-
In a large bowl, beat the softened butter and granulated sugar together until pale, light, and fluffy. This step is crucial — take your time here to incorporate plenty of air.
Step 3: Add the Eggs
Time: 3 minutes
-
Add the eggs one at a time, beating well after each addition.
-
If the mixture begins to curdle, add a tablespoon of flour with each egg to stabilize it.
Step 4: Add Vanilla and Flour
Time: 3–4 minutes
-
Stir in the vanilla extract.
-
Gently fold in the self-raising flour, a little at a time, using a spatula or large spoon.
-
Be careful not to overmix — you want to keep the air in the batter.
-
If the batter seems too thick, add 1–2 tbsp of milk to loosen it slightly.
Step 5: Divide and Bake
Time: 25–30 minutes baking
-
Divide the batter evenly between the two prepared tins. Smooth the tops gently with a spatula.
-
Bake in the preheated oven for 25–30 minutes, or until the sponges are golden and a skewer inserted in the center comes out clean.
Step 6: Cool the Cakes
Time: 30–45 minutes
-
Let the cakes cool in the tins for 5–10 minutes, then turn out onto a wire rack to cool completely.
-
Ensure they are fully cooled before adding any filling, or the cream may melt.
Step 7: Make the Whipped Cream Filling (Optional)
Time: 5 minutes
-
Whip the cream with 1 tbsp powdered sugar and vanilla extract (if using) until soft peaks form. Do not overwhip — you want it soft and spreadable.
Alternative: If you prefer a sweeter and more stable filling, substitute with buttercream (beat 100g butter with 200g icing sugar and 1 tsp vanilla).
Step 8: Assemble the Cake
Time: 5–10 minutes
-
Place one sponge layer on a cake plate or stand, top side down.
-
Spread the raspberry jam evenly over the cake.
-
Spoon or pipe the whipped cream on top of the jam.
-
Place the second sponge layer on top, top side up.
-
Lightly dust the top with powdered sugar.
Optional garnish: Fresh raspberries, strawberries, or a sprig of mint.
Serving Suggestions
-
Serve the cake with a pot of English Breakfast Tea or Earl Grey for the full British experience.
-
Pairs beautifully with berries and a dollop of clotted cream for extra indulgence.
-
Best enjoyed fresh, ideally the same day it’s assembled.
Storage Tips
-
If filled with whipped cream, store in the refrigerator and consume within 2 days.
-
For longer shelf life, use buttercream and store at room temperature (in a cake dome or airtight container) for up to 3 days.
-
Avoid freezing once assembled, though unfilled sponges can be frozen for up to 2 months (wrap tightly in plastic wrap and foil).
Variations
-
Lemon Victoria Sponge: Add 1 tbsp lemon zest to the sponge batter and use lemon curd in place of raspberry jam.
-
Chocolate Twist: Replace 50g of the flour with cocoa powder for a chocolate sponge.
-
Berry Layered Cake: Add a layer of fresh sliced strawberries or raspberries between the jam and cream.
Nutrition Information
(Per slice, based on 10 servings)
| Nutrient | Amount |
|---|---|
| Calories | ~330 kcal |
| Total Fat | 18g |
| Saturated Fat | 11g |
| Cholesterol | 90mg |
| Sodium | 120mg |
| Carbohydrates | 36g |
| Sugars | 20g |
| Protein | 5g |
| Fiber | 0.8g |
Note: Values vary based on filling choice and portion size.
Final Thoughts
The Victoria Sponge Cake is proof that simplicity can be stunning. With its light sponge layers, fruity jam, and airy cream filling, it’s a perfect centerpiece for afternoon tea or a delightful end to any meal. Easy to make yet elegant in presentation, it’s no wonder this cake has stood the test of time.
Whether you’re baking for a birthday, a garden party, or just because — this cake will never go out of style.