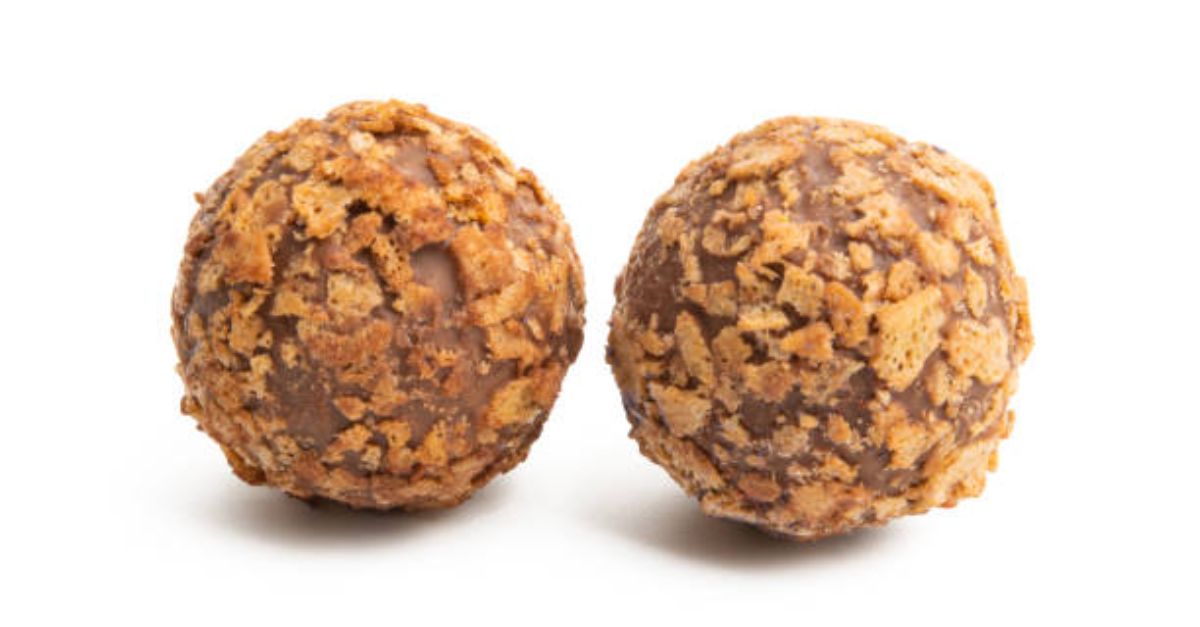
Butterfinger Balls
Prep Time: 20 minutes
Chill Time: 1 hour
Total Time: 1 hour 20 minutes
Yield: 24–30 bite-sized balls
Intensity Ratings (1–5 scale)
| Category | Rating | Notes |
|---|---|---|
| Difficulty | ★★☆☆☆ (Easy) | Simple mixing and rolling; no baking required. |
| Hands-On Effort | ★★★☆☆ (Moderate) | Rolling 30 balls takes focus, but goes quickly. |
| Mess Factor | ★★☆☆☆ (Low) | One bowl, a baking sheet, and your hands. Melting chocolate adds a spoon. |
Why You’ll Love This Recipe
Imagine the crunchy, peanut-buttery, lightly salty flavor of a Butterfinger candy bar—but in a soft, melt-in-your-mouth ball, dipped in dark or milk chocolate. These Butterfinger Balls are dangerously easy to make, require no oven, and disappear faster than you can roll them. They’re perfect for holiday cookie platters, game-day snacks, or when that candy craving hits but you want something slightly more homemade (and addictive).
Ingredients
For the Filling
-
2 cups (about 200g) crushed Butterfinger bars (approx. 8–10 fun-size bars)
-
1 cup (240g) creamy peanut butter (not natural/drip-style)
-
3 tbsp unsalted butter, softened
-
1 ½ cups (180g) powdered sugar
-
¼ tsp fine sea salt (omit if using salted peanut butter)
For the Coating
-
12 oz (340g) chocolate melting wafers (dark, milk, or semi-sweet)
-
1 tbsp coconut oil (optional, for thinning)
Optional Toppings
-
Crushed Butterfinger pieces
-
Flaky sea salt
-
Sprinkles
Equipment Needed
-
Food processor or zip-top bag + rolling pin
-
Large mixing bowl
-
Hand mixer or sturdy spatula
-
Baking sheet lined with parchment or silicone mat
-
Small cookie scoop (1-inch / 2.5cm) or teaspoon
-
Double boiler or microwave-safe bowl
-
Toothpicks or dipping fork
Instructions
Phase 1: Crush the Butterfingers (Intensity: Low)
Time: 5 minutes
-
Unwrap the Butterfinger bars. Break them into rough chunks.
-
Using a food processor: Pulse until you have fine crumbs with some tiny crunchy bits left. Do not over-process into powder.
-
No food processor: Place chunks in a zip-top bag and crush with a rolling pin until you have a mix of crumbs and small pebbles.
-
Set aside ¼ cup of the crumbs for topping (optional).
Phase 2: Make the Filling (Intensity: Moderate)
Time: 10 minutes
-
In a large bowl, combine softened butter, peanut butter, and salt. Beat with a hand mixer or spatula until completely smooth and fluffy.
-
Gradually add powdered sugar (½ cup at a time), mixing after each addition. The mixture will become thick and crumbly.
-
Add the crushed Butterfinger crumbs. Mix until fully incorporated. The dough should feel like stiff play-dough—it must hold a ball shape without cracking. If too dry, add 1 tsp milk or extra peanut butter. If too sticky, add 1 tbsp powdered sugar.
Phase 3: Roll the Balls (Intensity: Moderate – Repetitive)
Time: 15 minutes
-
Line your baking sheet with parchment.
-
Scoop 1-inch balls using the cookie scoop or a teaspoon. Roll between your palms firmly but gently into smooth spheres.
-
Place each ball on the parchment, spacing ½ inch apart.
-
Chill: Freeze the tray for 20 minutes OR refrigerate for 45 minutes. The balls must be very firm before dipping, otherwise they will fall apart in the melted chocolate.
Phase 4: Melt & Dip (Intensity: Moderate – Careful with Heat)
Time: 15 minutes
-
Place chocolate wafers and coconut oil (if using) in a microwave-safe bowl. Microwave in 20-second bursts at 50% power, stirring each time, until 90% melted. Then stir gently until fully melted. Do not overheat or the chocolate will seize.
-
Remove the chilled Butterfinger balls from freezer/fridge. Work in batches of 5–6 to keep them cold.
-
Dipping methods:
-
Fork method: Drop a ball into chocolate, turn with a fork, lift, tap off excess.
-
Toothpick method: Spear ball, dip, spin to coat, then slide off using another toothpick.
-
Spoon method: Spoon chocolate over the ball on a fork.
-
-
Return dipped balls to the parchment. Immediately sprinkle with reserved Butterfinger crumbs or flaky salt before the chocolate sets.
Phase 5: Set & Serve (Intensity: Very Low)
Time: 5 minutes active + 30 minutes setting
-
Refrigerate the tray uncovered for 30 minutes until chocolate is firm.
-
Transfer to an airtight container. Store in the refrigerator for up to 2 weeks (if they last that long).
-
Serve cold or at room temperature. Cold = firmer bite. Room temp = slightly softer center.
Time & Intensity Summary Table
| Step | Active Time | Passive Time | Intensity (Effort) |
|---|---|---|---|
| Crush Butterfingers | 5 min | – | Low |
| Make filling | 10 min | – | Moderate |
| Roll balls | 15 min | – | Moderate |
| Chill balls | – | 45 min | None |
| Melt chocolate | 5 min | – | Moderate |
| Dip balls | 10 min | – | Moderate |
| Set chocolate | – | 30 min | None |
| Total | 45 min | 1 hr 15 min | Overall: Easy-Medium |
Pro Tips for Perfect Butterfinger Balls
-
Don’t skip the chilling. Warm filling + melted chocolate = puddles of sadness.
-
Use candy melts or almond bark for easiest dipping. Real chocolate needs tempering; wafers are beginner-friendly.
-
Double dip for extra crunch: Dip once, let set for 10 minutes, then dip again.
-
Make mini bites: Use a ½-teaspoon scoop for 50+ tiny party bites.
-
Flavor twist: Add ¼ tsp espresso powder to the chocolate or ½ tsp cinnamon to the filling.
Storage & Make-Ahead
-
Fridge: Airtight container, 2 weeks.
-
Freezer (undipped): Freeze rolled balls on a tray, then bag them. Dip directly from frozen—add 30 seconds to melting time.
-
Freezer (dipped): Freeze in single layer, then bag. Thaw in fridge for 1 hour before serving.
Nutritional Snapshot (per ball, approx.)
-
Calories: 145
-
Fat: 8g
-
Carbs: 16g
-
Protein: 3g
-
Sugar: 12g
Estimates based on 30 balls using milk chocolate and standard peanut butter.