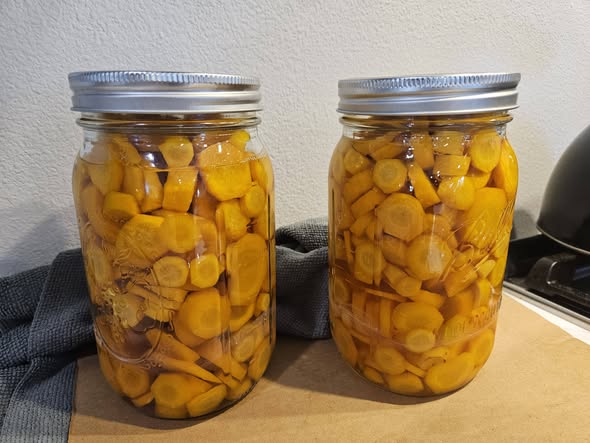
canned carrots
Preparation Time: 30 minutes
Cooking Time: 10 minutes
Pressure Canning Time: 25–30 minutes
Cooling Time: 12–24 hours
Total Time: Approximately 1 hour plus cooling
Difficulty Level: Intermediate
Ingredients
- 10 pounds fresh carrots
- Water for boiling
- 2–3 teaspoons canning salt (optional, per quart jar)
Optional Seasonings
- Fresh dill
- Garlic cloves
- Peppercorns
- Bay leaves
Equipment Needed
- Pressure canner
- Canning jars (quart or pint size)
- New canning lids and bands
- Large stockpot
- Jar lifter
- Bubble remover tool
- Funnel
- Clean kitchen towels
- Cutting board
- Vegetable peeler
Choosing the Best Carrots
For the highest-quality canned carrots:
- Select fresh, firm carrots.
- Avoid soft, cracked, or damaged carrots.
- Medium-sized carrots often provide the best texture.
- Use carrots harvested recently for optimal flavor.
Fresh produce results in better preservation and taste.
Step 1: Prepare the Carrots
Wash the carrots thoroughly under cool running water.
Peel the carrots using a vegetable peeler.
Trim off both ends.
Cut the carrots into:
- Slices
- Chunks
- Sticks
Pieces should be approximately 1 inch long for even processing.
Preparation Time
15–20 Minutes
Step 2: Prepare the Jars
Wash jars, lids, and bands in hot soapy water.
Rinse thoroughly.
Keep jars hot until ready to fill.
Inspect jars carefully for cracks or chips.
Damaged jars should not be used for canning.
Step 3: Pre-Cook the Carrots
Place the prepared carrots into a large stockpot.
Cover with water.
Bring to a boil over medium-high heat.
Cooking Intensity
Medium-High Heat
Boil for 5 minutes.
This hot-pack method helps remove excess air from the vegetables and improves quality during storage.
Drain the carrots while reserving the hot water if desired.
Step 4: Fill the Jars
Using a canning funnel, pack the hot carrots into prepared jars.
Leave 1 inch of headspace at the top.
If using canning salt:
- Add 1 teaspoon per pint jar
- Add 2 teaspoons per quart jar
Canning salt is optional and used primarily for flavor.
Step 5: Add Hot Water
Pour boiling water over the carrots.
Maintain 1 inch headspace.
Use a bubble remover tool or plastic utensil to release trapped air bubbles.
Add additional water if necessary to maintain proper headspace.
Step 6: Clean Jar Rims
Wipe jar rims with a clean damp cloth.
This removes food particles that could interfere with sealing.
Place lids on jars.
Apply bands until fingertip tight.
Do not overtighten.
Step 7: Prepare the Pressure Canner
Add the amount of water recommended by your pressure canner manufacturer.
Place the filled jars onto the canning rack.
Secure the canner lid.
Cooking Intensity
High Heat
Heat until steam begins venting steadily.
Allow steam to vent for 10 minutes.
This process removes excess air from the canner.
Step 8: Pressurize the Canner
After venting, place the weight or close the vent according to your canner instructions.
Allow pressure to build.
Pressure Settings
- 10 PSI for weighted-gauge canners
- 11 PSI for dial-gauge canners
Adjust according to altitude requirements if necessary.
Step 9: Process the Jars
Once proper pressure is reached:
Pint Jars
Process for 25 minutes
Quart Jars
Process for 30 minutes
Cooking Intensity
Consistent High Pressure
Maintain steady pressure throughout processing.
Avoid pressure fluctuations.
Stable pressure ensures safe preservation.
Step 10: Cool the Canner
When processing time is complete:
Turn off the heat.
Allow the canner to cool naturally.
Do not force-cool the canner.
Cooling Time
Approximately 30–60 minutes.
Wait until pressure returns to zero before opening.
Step 11: Remove the Jars
Carefully remove jars using a jar lifter.
Place jars on a towel-covered counter.
Leave undisturbed for 12–24 hours.
Cooling Intensity
Room Temperature Cooling
Do not tighten bands or press lids during cooling.
Step 12: Check Seals
After cooling:
Press the center of each lid.
A properly sealed lid should not flex.
Remove the bands.
Clean the jars.
Label with the date.
Store in a cool, dark location.
Serving Suggestions
Canned carrots can be used in many delicious ways.
Side Dishes
Heat with butter and herbs.
Soups
Add directly to vegetable or chicken soups.
Stews
Mix into beef or vegetable stews.
Casseroles
Incorporate into baked casseroles.
Salads
Chill and serve in vegetable salads.
Baby Food
Mash into a smooth puree for homemade baby food.
Storage Guidelines
Pantry Storage
Store sealed jars in a cool, dark place.
Ideal temperature:
50°F–70°F (10°C–21°C)
Shelf Life
Best quality within 12–18 months.
Properly sealed jars often remain safe beyond this period, though quality may gradually decline.
After Opening
Refrigerate immediately.
Use within 3–5 days.
Tips for Successful Canning
Use Fresh Carrots
Fresh vegetables provide better texture and flavor.
Follow Pressure Canning Guidelines
Carrots are low-acid vegetables and require pressure canning for safety.
Maintain Proper Headspace
Accurate headspace helps ensure successful seals.
Remove Air Bubbles
Trapped air may affect sealing and storage quality.
Inspect Jars Carefully
Discard any jars with broken seals before use.
Flavor Variations
Herb Carrots
Add:
- Dill
- Thyme
- Rosemary
Garlic Carrots
Add one peeled garlic clove per jar.
Peppercorn Carrots
Add several whole black peppercorns.
Bay Leaf Carrots
Include one small bay leaf per jar for subtle flavor.
Frequently Asked Questions
Can I Water-Bath Can Carrots?
No.
Carrots are low-acid vegetables and must be pressure canned for safe preservation.
Do I Need Canning Salt?
No.
Salt is optional and mainly enhances flavor.
Can I Use Baby Carrots?
Yes.
Baby carrots can be canned whole if desired.
Why Are My Carrots Soft?
Pressure canning naturally softens vegetables.
Slight softness is normal.
How Long Do Home-Canned Carrots Last?
For best quality, use within 12–18 months.
Nutrition Information
Serving Size: ½ Cup Drained Carrots
Approximate Nutrition Per Serving
- Calories: 35
- Protein: 1g
- Total Fat: 0g
- Saturated Fat: 0g
- Cholesterol: 0mg
- Carbohydrates: 8g
- Dietary Fiber: 3g
- Sugars: 4g
- Sodium: 20mg (without added salt)
- Potassium: 180mg
- Vitamin A: 180% Daily Value
- Vitamin C: 4% Daily Value
- Calcium: 3% Daily Value
- Iron: 2% Daily Value