Cast Iron Bread Oven
- Prep Time: 15 minutes
- First Rise: 12–18 hours
- Second Rise: 45 minutes
- Bake Time: 45 minutes
- Total Time: Approximately 14 hours
- Servings: 12 slices
- Difficulty: Easy
Ingredients
- 3 cups (360 g) bread flour
- 1½ teaspoons fine sea salt
- ½ teaspoon instant yeast
- 1½ cups (360 ml) warm water (about 105–110°F / 40–43°C)
Optional Toppings
- Rolled oats
- Sesame seeds
- Poppy seeds
- Fresh rosemary
- Coarse sea salt
Equipment Needed
- 5- to 6-quart cast iron Dutch oven with lid
- Large mixing bowl
- Wooden spoon or dough whisk
- Plastic wrap or clean kitchen towel
- Parchment paper
- Cooling rack
- Sharp bread lame or serrated knife
Instructions
Step 1: Mix the Dough
In a large mixing bowl, combine the bread flour, salt, and instant yeast.
Pour in the warm water and stir with a wooden spoon until a shaggy dough forms. The dough should be sticky but fully combined.
Cover the bowl with plastic wrap or a clean towel.
Step 2: First Rise
Let the dough rise at room temperature for 12 to 18 hours.
During this time, the dough will expand significantly and develop bubbles on the surface, creating the characteristic texture of artisan bread.
Step 3: Shape the Dough
Lightly flour your work surface.
Turn the dough out onto the floured surface and gently fold the edges toward the center several times to form a rough round loaf.
Avoid kneading aggressively, as preserving the air bubbles helps create an open crumb.
Place the dough seam-side down on a sheet of parchment paper.
Cover loosely with a towel.
Allow it to rise for 45 minutes.
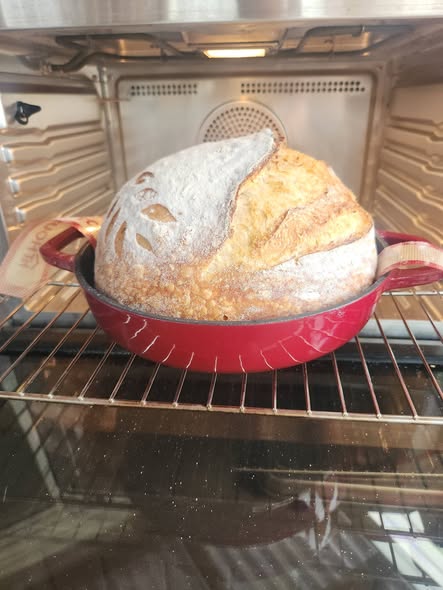
Step 4: Preheat the Dutch Oven
About 30 minutes before baking, place the cast iron Dutch oven with its lid into the oven.
Preheat the oven to 450°F (232°C).
Heating the Dutch oven thoroughly ensures excellent oven spring and a crisp crust.
Step 5: Score the Dough
Using a bread lame or a sharp serrated knife, make one or two shallow slashes across the top of the dough. This allows the bread to expand evenly during baking.
If desired, sprinkle the loaf with oats, sesame seeds, or rosemary before baking.
Step 6: Bake
Carefully remove the hot Dutch oven from the oven using oven mitts.
Lift the dough by the parchment paper and lower it into the hot pot.
Cover with the lid.
Bake for 30 minutes.
Remove the lid and continue baking for an additional 15 minutes, or until the crust is deep golden brown and the internal temperature reaches 205–210°F (96–99°C).
Step 7: Cool
Carefully transfer the bread to a wire cooling rack.
Allow it to cool for at least 1 hour before slicing. Cooling completely helps the crumb finish setting and makes slicing easier.
Serving Suggestions
This artisan bread is delicious served with:
- Soft butter
- Olive oil and balsamic vinegar
- Homemade soups
- Beef stew
- Chili
- Pasta dishes
- Cheese boards
- Avocado toast
- Sandwiches
- Toast with jam or honey
It also makes excellent garlic bread or croutons for salads.
Tips for Success
- Use bread flour for a chewier texture and better rise.
- Measure flour accurately using a kitchen scale whenever possible.
- Do not skip the long fermentation, as it develops flavor and improves texture.
- Always preheat the Dutch oven for the best oven spring.
- Resist slicing the bread while it’s hot; cooling prevents a gummy interior.
- Store the loaf in a paper bag or bread box to preserve the crust.
Delicious Variations
Rosemary Bread
Add 1 tablespoon of finely chopped fresh rosemary to the dough before the first rise.
Garlic Herb Bread
Mix in roasted garlic cloves and dried Italian herbs for extra savory flavor.
Whole Wheat Version
Replace up to one-third of the bread flour with whole wheat flour for a heartier loaf.
Cheddar Bread
Fold in 1 cup of shredded sharp cheddar cheese during shaping.
Seeded Bread
Top the loaf with sesame seeds, sunflower seeds, pumpkin seeds, or flaxseeds before baking for added crunch.
Storage Instructions
Store the cooled bread in a paper bag or bread box at room temperature for up to 3 days.
For longer storage, wrap the loaf tightly and freeze for up to 3 months. Slice before freezing so you can thaw individual pieces as needed.
Reheating
To refresh the crust, place the loaf in a 350°F (175°C) oven for 8–10 minutes.
Individual slices can also be toasted for a crisp texture and warm interior.
Frequently Asked Questions
Can I use all-purpose flour?
Yes. Bread flour produces a chewier texture, but all-purpose flour works well if that’s what you have available.
Why is my bread dense?
Dense bread can result from insufficient rising time, inaccurate flour measurements, or inactive yeast. Be sure to allow the full fermentation time and use fresh yeast.
Do I need parchment paper?
Parchment paper makes transferring the dough into the hot Dutch oven much easier and helps prevent sticking, though it is optional if you’re comfortable handling the dough directly.
Why bake with the lid on?
The covered Dutch oven traps steam released by the dough, creating the moist environment needed for a tall loaf and crisp crust.
Can I add mix-ins?
Absolutely. Herbs, shredded cheese, olives, roasted garlic, or seeds can all be incorporated into the dough for different flavor variations.
Nutrition Information (Per Slice)
- Calories: 150
- Protein: 5g
- Carbohydrates: 31g
- Dietary Fiber: 1g
- Sugars: 0g
- Total Fat: 0.5g
- Saturated Fat: 0g
- Cholesterol: 0mg
- Sodium: 290mg
- Potassium: 40mg
- Calcium: 6mg
- Iron: 2mg