gluten free bread
Introduction
This gluten-free sourdough bread recipe is perfect for those avoiding yeast, eggs, dairy, and xanthan gum. With a deliciously tangy flavor and tender texture, this bread is a healthy and satisfying alternative to traditional loaves. It uses a natural gluten-free sourdough starter and wholesome ingredients for a completely allergen-friendly loaf.
Preparation Time and Cooking Intensity
- Preparation Time: 15 minutes (active) + 12-24 hours (fermentation)
- Cooking Time: 50-60 minutes
- Total Time: Approximately 13-25 hours
- Cooking Intensity: Moderate (Requires planning for fermentation.)
Ingredients
For the Sourdough Starter:
- 1 cup gluten-free flour blend (preferably one with a mix of rice flour, tapioca starch, and potato starch)
- ½ cup filtered water
For the Bread:
- 2 cups gluten-free flour blend
- ½ cup almond flour or oat flour
- 1 teaspoon baking soda
- 1 teaspoon baking powder (aluminum-free)
- ½ teaspoon sea salt
- 1 tablespoon psyllium husk powder (for binding)
- 1 ½ cups natural gluten-free sourdough starter
- ½ cup plant-based milk (e.g., almond, oat, or coconut)
- 2 tablespoons olive oil or melted coconut oil
Instructions
Step 1: Prepare the Sourdough Starter
- Combine the gluten-free flour blend and filtered water in a clean jar.
- Mix thoroughly and cover loosely with a cloth.
- Let it sit at room temperature for 24 hours, stirring occasionally.
- Feed the starter daily with ½ cup gluten-free flour and ¼ cup water until it bubbles and has a tangy aroma (this usually takes 5-7 days).
Step 2: Mix the Dry Ingredients
- In a large mixing bowl, whisk together the gluten-free flour blend, almond flour, baking soda, baking powder, salt, and psyllium husk powder.
Step 3: Combine Wet Ingredients
- In a separate bowl, mix the sourdough starter, plant-based milk, and olive oil.
- Pour the wet ingredients into the dry ingredients and mix until a dough forms. The dough should be sticky but not overly wet. Add more flour or milk as needed to achieve the right consistency.
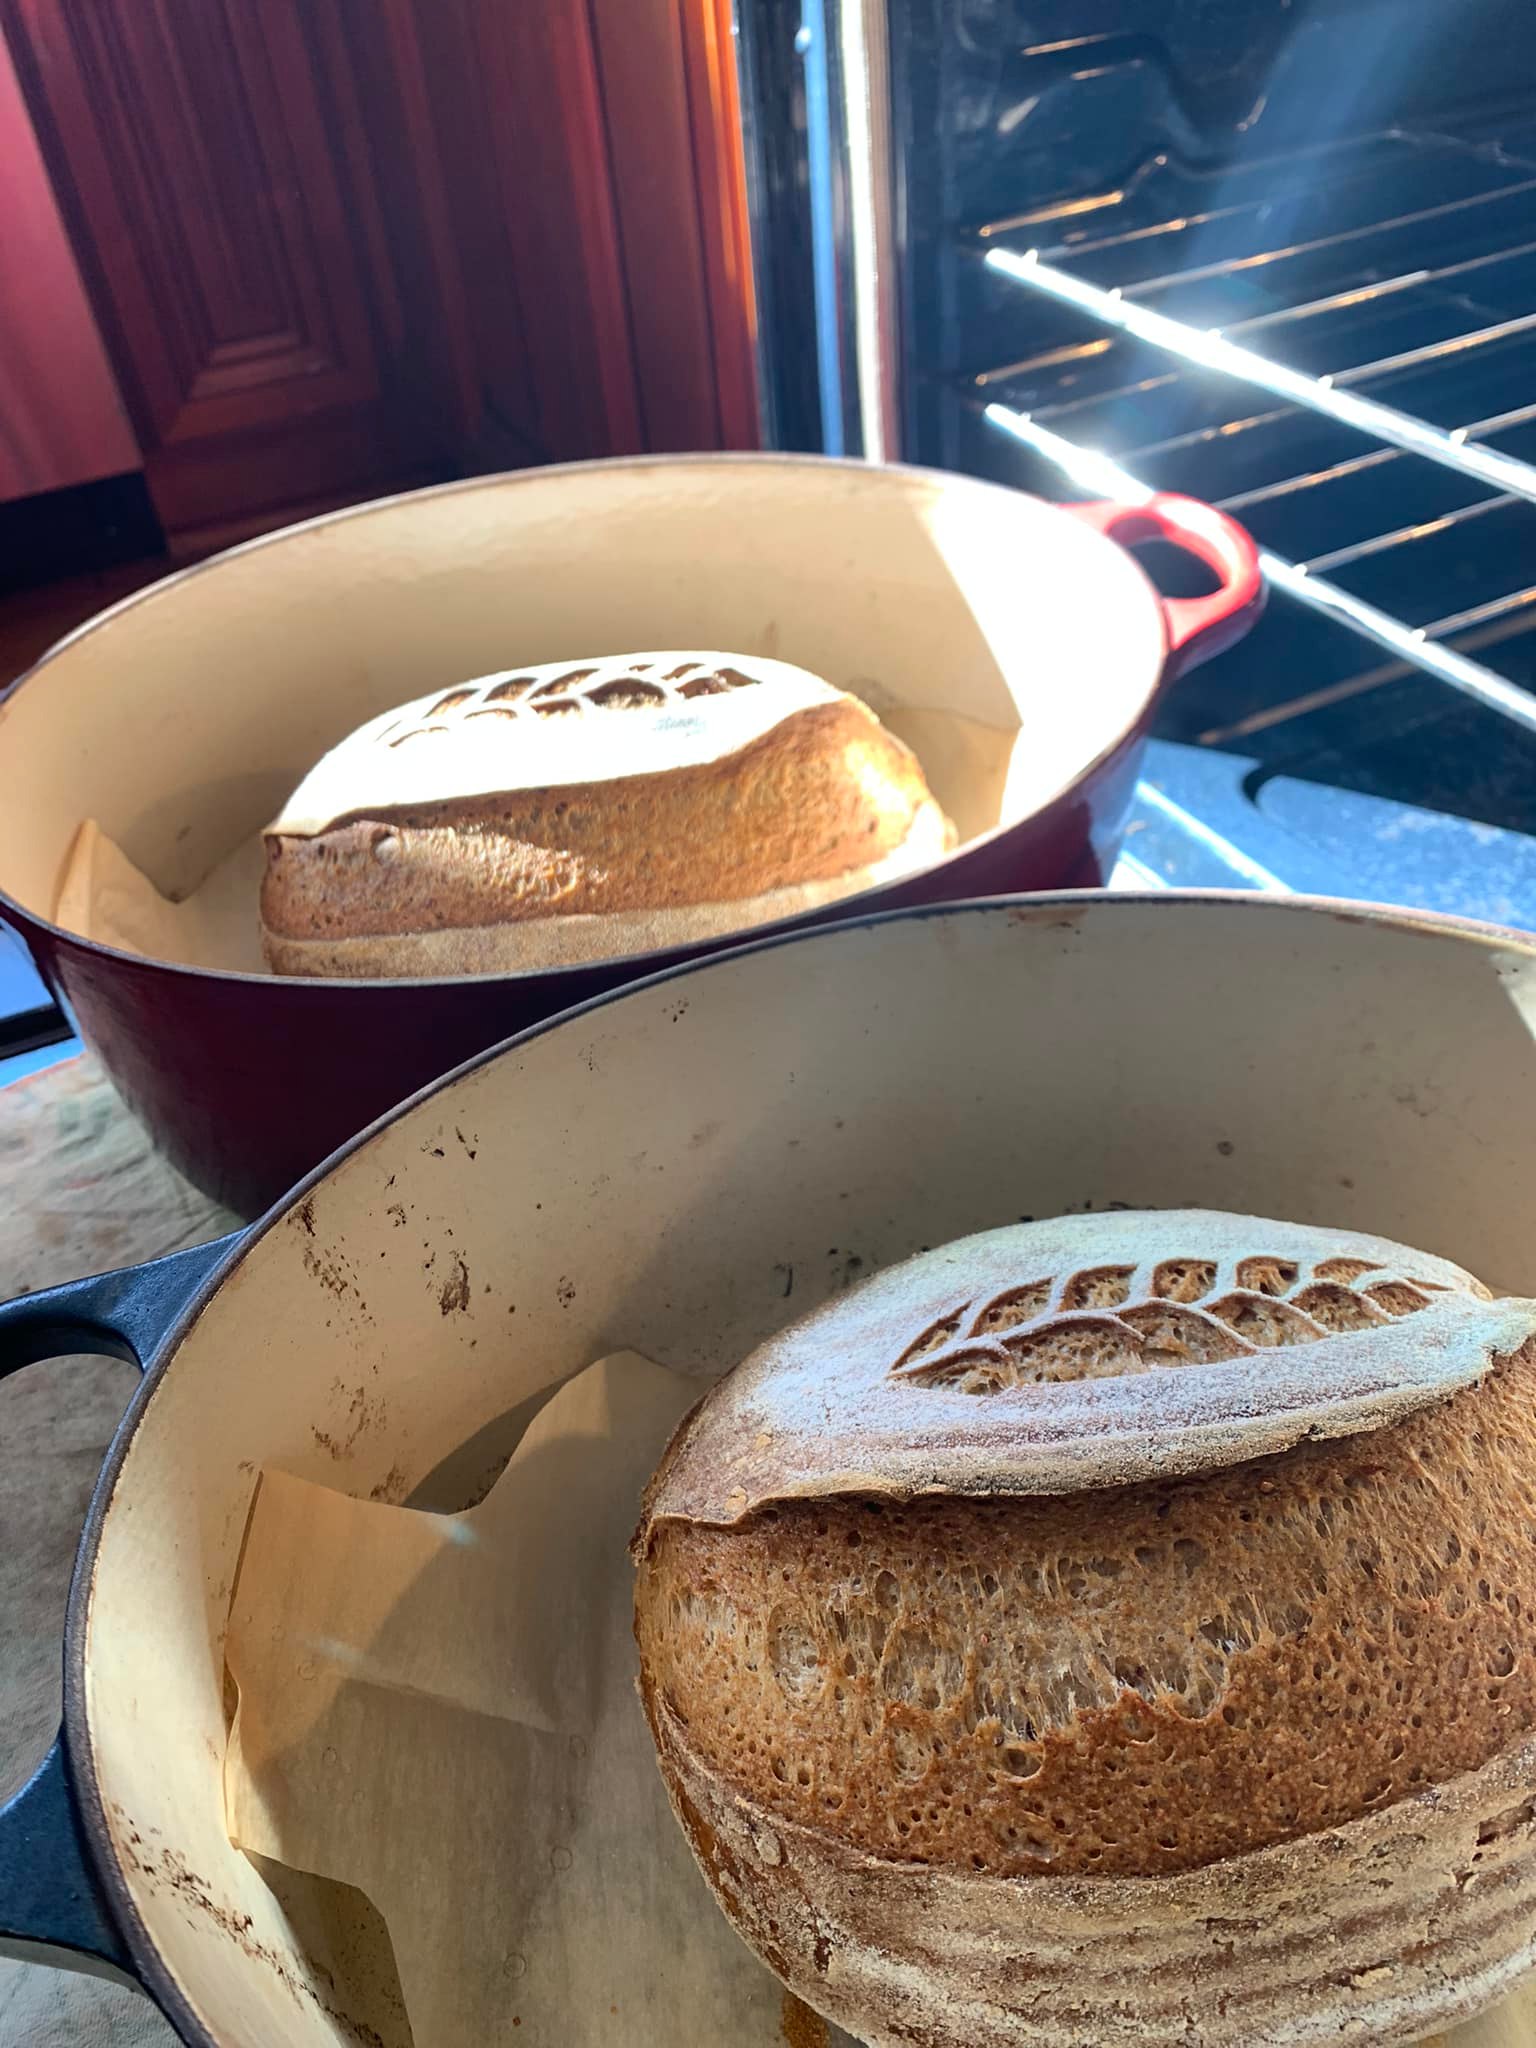
Step 4: Shape and Ferment
- Transfer the dough to a lightly floured surface and shape it into a round loaf.
- Place the dough on a parchment-lined baking sheet or in a loaf pan.
- Cover with a damp cloth and let it ferment at room temperature for 12-24 hours. The dough will not rise significantly but will develop its sourdough flavor.
Step 5: Bake the Bread
- Preheat your oven to 375°F (190°C).
- Bake the bread for 50-60 minutes or until the crust is golden brown and a toothpick inserted in the center comes out clean.
- Allow the bread to cool completely on a wire rack before slicing.
Storage and Serving
- Storage: Store the bread in an airtight container at room temperature for up to 3 days or freeze for up to 1 month.
- Serving Suggestions: Enjoy this bread as a sandwich base, toasted with your favorite spreads, or alongside soups and stews.
Nutritional Information (Per Slice)
- Calories: 150
- Total Fat: 6g
- Saturated Fat: 1g
- Cholesterol: 0mg
- Sodium: 200mg
- Total Carbohydrates: 22g
- Dietary Fiber: 3g
- Sugars: 1g
- Protein: 4g
Tips for Success
- Use a high-quality gluten-free flour blend for the best results.
- Make sure your sourdough starter is active and bubbly before using.
- Psyllium husk powder is crucial for binding and structure in this bread.
Enjoy your allergen-free, homemade sourdough bread! It’s a nourishing and delicious addition to any meal.