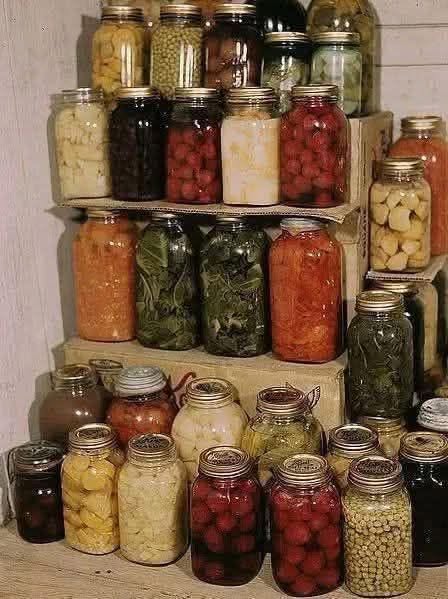
Home Canned Foods
- Preparation Time: 30 minutes
- Cooking Time: Varies (30–90 minutes depending on recipe)
- Canning Processing Time: 10–100 minutes (depending on food and method)
- Cooling Time: 12–24 hours
- Total Time: Approximately 2–24 hours
Yield
- Makes approximately 6–8 pint jars or 3–4 quart jars, depending on the food being canned.
Ingredients
The ingredients will vary depending on the food you wish to preserve. Below is a basic example for mixed vegetables.
- 6 cups green beans
- 4 cups carrots, sliced
- 4 cups corn kernels
- 2 cups peas
- Water
- 2 teaspoons canning salt (optional)
Optional additions
- Garlic cloves
- Fresh herbs
- Black peppercorns
- Bay leaves
- Lemon juice (required for certain fruits and tomatoes)
Equipment
- Pressure canner (for low-acid foods)
- Water bath canner (for high-acid foods)
- Mason jars
- New lids
- Screw bands
- Jar lifter
- Funnel
- Bubble remover
- Clean towels
- Large stockpot
- Ladle
Safe Canning Methods
Water Bath Canning
Suitable for:
- Fruits
- Jams
- Jellies
- Pickles
- Most fruit preserves
- Acidified tomatoes
Pressure Canning
Required for:
- Vegetables
- Meat
- Poultry
- Seafood
- Soups
- Beans
- Broth
Using the correct method is essential for food safety.
Step 1: Prepare the Jars
Wash jars thoroughly with hot soapy water.
Rinse well.
Keep jars hot until ready to fill.
Prepare lids according to the manufacturer’s directions.
Step 2: Prepare the Food
Wash produce carefully.
Remove damaged portions.
Peel if necessary.
Cut into evenly sized pieces.
Cook according to your recipe if required.
Step 3: Fill the Jars
Using a canning funnel:
Fill jars with prepared food.
Pour boiling liquid over food.
Leave proper headspace.
Typical headspace:
- ¼ inch for jams
- ½ inch for fruits
- 1 inch for vegetables and meats
Remove trapped air bubbles.
Wipe jar rims clean.
Apply lids and bands until fingertip tight.
Step 4: Process the Jars
For Water Bath Canning
Place jars into boiling water.
Water should cover jars by 1–2 inches.
Process according to the recipe.
Typical processing time:
- 10–30 minutes
Boil continuously throughout processing.
For Pressure Canning
Place jars into the pressure canner.
Add recommended water.
Lock the lid.
Vent steam for 10 minutes.
Bring to the recommended pressure.
Common pressure settings:
- 10 PSI
- 11 PSI
- 15 PSI (depending on altitude and canner type)
Typical processing time:
- Pints: 20–90 minutes
- Quarts: 25–100 minutes
Step 5: Cool the Jars
After processing:
Turn off heat.
Allow pressure to return to zero naturally if using a pressure canner.
Remove jars carefully.
Place on a towel.
Do not tighten bands.
Allow jars to cool undisturbed for 12–24 hours.
Step 6: Check the Seals
After cooling:
Press the center of each lid.
A properly sealed lid will not flex.
Remove screw bands.
Label jars with:
- Food name
- Date canned
Store in a cool, dark place.
Processing Time Overview
| Food | Method | Time |
|---|---|---|
| Jam | Water Bath | 10 minutes |
| Pickles | Water Bath | 15 minutes |
| Tomatoes | Water Bath | 40 minutes |
| Green Beans | Pressure | 20–25 minutes |
| Carrots | Pressure | 25–30 minutes |
| Chicken | Pressure | 75–90 minutes |
| Beef | Pressure | 75–90 minutes |
Always follow a tested recipe for exact processing times and pressure adjustments based on your altitude.
Cooking Intensity
- Preparation: Easy
- Cooking Difficulty: Moderate
- Canning Difficulty: Intermediate
- Heat Level: High during processing
- Skill Level: Beginner to Intermediate
Storage
Properly sealed jars can generally be stored in a cool, dark, dry place for up to 12 months while maintaining the best quality. Although some foods may remain safe longer if the seal stays intact, flavor, texture, and nutritional value gradually decline over time.
Ideal storage temperature:
- 50°F–70°F (10°C–21°C)
Avoid:
- Direct sunlight
- Damp basements
- Freezing temperatures
Serving Suggestions
Home canned foods can be used in countless meals:
- Add canned vegetables to soups and stews.
- Serve canned peaches over yogurt or oatmeal.
- Use canned tomatoes in pasta sauces and chili.
- Enjoy homemade jams on toast or biscuits.
- Incorporate canned chicken into casseroles and salads.
- Make quick weeknight meals with home-canned beans and broth.
Helpful Tips
- Use only jars specifically designed for home canning.
- Inspect jars for cracks or chips before use.
- Always use new canning lids unless the manufacturer states they are reusable.
- Follow scientifically tested canning recipes for safe processing times and pressures.
- Do not alter jar sizes or headspace recommendations unless the recipe specifically allows it.
- If a jar becomes unsealed during storage or shows signs of spoilage—such as an off odor, mold, leaking, or a bulging lid—discard the contents without tasting them.
Flavor Variations
Try preserving:
- Applesauce
- Pears
- Peaches
- Mixed berries
- Salsa
- Tomato sauce
- Chicken broth
- Beef stew
- Chili
- Vegetable soup
- Corn relish
- Dill pickles
- Bread and butter pickles
Frequently Asked Questions
How long do home canned foods last?
For the best quality, use them within one year when stored in a cool, dark location with an intact seal.
Can I reuse canning lids?
Standard metal lids are intended for one-time use. Screw bands may be reused if they are clean and free of rust.
Why didn’t my jars seal?
Common reasons include food on the rim, insufficient processing, damaged lids, or incorrect headspace.
Can I freeze home canned food?
Yes. Once a jar has been opened, transfer any leftovers to a freezer-safe container before freezing. Do not freeze food in standard glass canning jars unless they are specifically designed for freezer use.
Nutrition Information (Approximate)
Serving Size: 1 cup mixed canned vegetables
- Calories: 70
- Protein: 3 g
- Carbohydrates: 15 g
- Dietary Fiber: 5 g
- Sugars: 6 g
- Total Fat: 0.5 g
- Saturated Fat: 0 g
- Cholesterol: 0 mg
- Sodium: 280 mg (varies depending on added salt)
- Potassium: 420 mg
- Vitamin A: 90% Daily Value
- Vitamin C: 20% Daily Value
- Calcium: 4% Daily Value
- Iron: 6% Daily Value