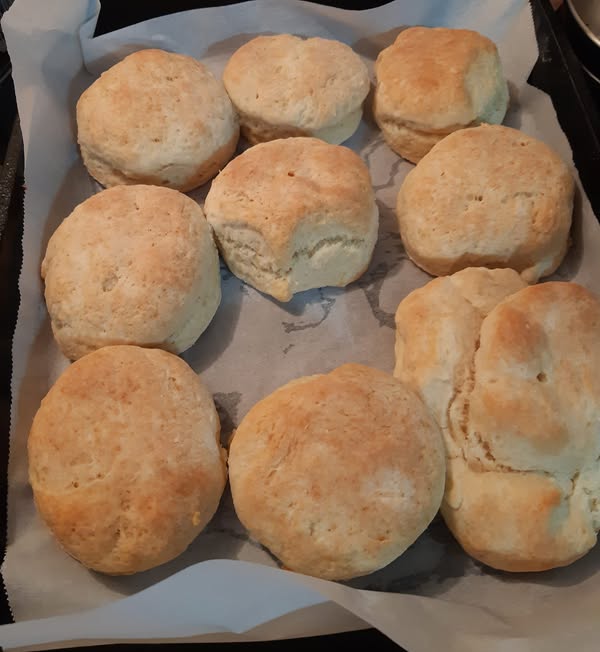
Homemade biscuits
Preparation Time: 15 minutes
Cooking Time: 15-20 minutes
Total Time: 30-35 minutes
Difficulty Level: Easy
Introduction:
Newfoundland Biscuits are a beloved classic in Newfoundland and Labrador, Canada, with a rich cultural history. These biscuits are soft, fluffy, and incredibly versatile. Traditionally, they were made with simple ingredients that were easily accessible, making them a staple in homes throughout Newfoundland. Perfect for breakfast, as a side for dinner, or enjoyed with butter and jam, these biscuits are often made with lard or butter for a rich, flaky texture.
These Newfoundland biscuits, also known as “Flaky Biscuits,” are characterized by their soft, tender crumb and their ability to rise high with a lovely golden crust. They pair wonderfully with meats, soups, or just a cup of tea. Whether you’re making them for a holiday meal or a cozy family dinner, this recipe will give you a taste of Newfoundland tradition.
Ingredients:
-
2 cups all-purpose flour
-
1 tablespoon baking powder
-
1/2 teaspoon salt
-
1/4 cup cold butter (or lard, if you prefer a more traditional flavor)
-
3/4 cup milk (approximately, you may need a bit more or less depending on dough consistency)
Instructions:
Step 1: Preheat the Oven
Preheat your oven to 450°F (230°C) to ensure it’s nice and hot for baking.
Step 2: Mix Dry Ingredients
In a large mixing bowl, combine the all-purpose flour, baking powder, and salt. Mix them together well to ensure the baking powder is evenly distributed throughout the flour.
Step 3: Cut in the Butter
Cut the cold butter (or lard) into small cubes. Add the butter into the dry ingredients, and use a pastry cutter or your fingers to work the fat into the flour. Continue until the mixture resembles coarse crumbs or small pea-sized bits of butter throughout.
Step 4: Add the Milk
Make a well in the center of the dry mixture, and pour in the milk. Stir gently with a spoon or spatula until the dough just comes together. Be careful not to overmix the dough, as this can result in dense biscuits. If the dough feels too dry, add a little extra milk, one tablespoon at a time, until the dough holds together but isn’t sticky.
Step 5: Turn Out the Dough
Turn the dough out onto a lightly floured surface. Gently knead it just a few times (around 4-5 folds) to bring it together. The key to light and fluffy biscuits is to handle the dough minimally. If the dough seems too sticky, sprinkle a little more flour, but be cautious not to add too much.
Step 6: Roll Out the Dough
Use a rolling pin to roll the dough out to about 1/2 inch thick. You don’t need to roll it too thin, as thicker dough will result in taller, fluffier biscuits. If you don’t have a rolling pin, you can simply press it out gently with your hands.
Step 7: Cut the Biscuits
Using a round biscuit cutter (about 2 inches in diameter), cut the dough into rounds. Place the biscuit cutter straight down, without twisting, to ensure the biscuits rise evenly. If you don’t have a biscuit cutter, you can use the rim of a glass.
Gather any scraps, reroll them, and cut out more biscuits. Continue until all the dough is used.
Step 8: Bake the Biscuits
Place the biscuit rounds on an ungreased baking sheet, with the sides touching slightly. This helps the biscuits rise tall. Bake for 15-20 minutes, or until the tops are golden brown and a toothpick inserted into the center comes out clean.
Step 9: Serve
Remove the biscuits from the oven and allow them to cool for a few minutes before serving. These biscuits are best enjoyed warm with butter, jam, or as a side to your favorite meal.
Tips for Success:
-
Cold Fat: It’s important to keep the butter or lard cold. This creates pockets of fat in the dough, which is what makes the biscuits flaky. If the fat gets too warm, the biscuits will be dense rather than light and flaky.
-
Minimal Mixing: Don’t overwork the dough—mix it until it just comes together. Overmixing can lead to tough biscuits.
-
Milk Temperature: Use cold milk (or room temperature) to help the dough come together smoothly.
-
Baking Time: Keep an eye on the biscuits in the oven. Every oven is different, so start checking them around the 12-15 minute mark to avoid overbaking.
-
Flour Substitution: You can substitute some of the all-purpose flour with whole wheat flour for a slightly heartier version.
Nutrition Information (Per Biscuit, assuming 8 biscuits):
-
Calories: 150 kcal
-
Total Fat: 8g
-
Saturated Fat: 5g
-
Cholesterol: 20mg
-
Sodium: 250mg
-
Total Carbohydrates: 19g
-
Dietary Fiber: 1g
-
Sugars: 2g
-
Protein: 3g
(Note: The nutritional content may vary depending on the type of fat used and serving sizes.)
Conclusion:
These Homemade Newfoundland Biscuits are a delicious and easy way to bring a taste of Newfoundland to your kitchen. Soft, flaky, and golden brown, they are a perfect accompaniment to any meal or simply enjoyed with a dollop of butter or your favorite jam. Whether you’re serving them for breakfast or as a side to a hearty dinner, they are sure to be a hit.
With their simple ingredients and straightforward preparation, these biscuits are a great recipe for both beginner and experienced bakers. So, gather your ingredients, preheat your oven, and enjoy the comforting, warm goodness of Newfoundland’s finest!