Homemade Bread
Making homemade bread is a satisfying and rewarding process that yields a soft, warm loaf with a delightful aroma. Whether you are a seasoned baker or a beginner, this recipe for homemade bread is simple and accessible, requiring only a few ingredients and some patience. There’s something magical about fresh, homemade bread; it’s the perfect way to fill your kitchen with comforting scents and offer a delicious, soft loaf to share with loved ones.
Recipe Name: Homemade Bread
Preparation Time: 15 minutes
Resting Time: 1 hour 30 minutes (for proofing)
Baking Time: 30-35 minutes
Total Time: 2 hours 20 minutes
Ingredients:
- 4 cups all-purpose flour (plus extra for dusting)
- 1 ½ teaspoons salt
- 2 teaspoons sugar
- 1 tablespoon active dry yeast
- 1 ½ cups warm water (around 110°F / 45°C)
- 2 tablespoons olive oil (or vegetable oil)
- 1 tablespoon honey (optional, for slight sweetness)
- 1 tablespoon milk (optional, for softer crust)
Step-by-Step Instructions:
Step 1: Activate the Yeast
- Warm the Water: In a small bowl or cup, pour the warm water. The water should feel warm to the touch but not hot, ideally around 110°F (45°C). Too hot water can kill the yeast, while cold water will not activate it.
- Add Sugar and Yeast: Stir in the sugar (this helps to activate the yeast) and sprinkle the active dry yeast into the water. Give it a gentle stir to mix and let it sit for about 5-10 minutes. During this time, the yeast will start to foam and bubble, indicating it’s activated and ready to use. If it doesn’t foam, your yeast may be expired, and you should try with fresh yeast.
Step 2: Prepare the Dough
- Mix the Dry Ingredients: In a large mixing bowl, combine the 4 cups of all-purpose flour and the salt. Stir well to evenly distribute the salt throughout the flour.
- Add Wet Ingredients: Once the yeast mixture is ready, pour it into the flour mixture along with the olive oil and honey (if using). Using a wooden spoon or a spatula, mix everything until it begins to come together into a dough.
- Knead the Dough: Transfer the dough onto a floured surface. Knead it for about 8-10 minutes until the dough becomes smooth, elastic, and slightly tacky but not overly sticky. You can add small amounts of flour if the dough is too sticky, but be careful not to add too much as it can make the bread dense. If you’re using a stand mixer, you can knead it with the dough hook on medium speed for about 6-8 minutes.
Step 3: First Rise (Proofing)
- Rest the Dough: Lightly grease the inside of a clean bowl with a little oil. Place your kneaded dough into the bowl and cover it with a damp cloth or plastic wrap. Set the bowl in a warm, draft-free place to rise for about 1 hour or until the dough has doubled in size. This is known as the first proofing.
- Check the Dough: After 1 hour, punch the dough gently to release the air, and you should see the dough deflate slightly. If it hasn’t risen enough, leave it for a little longer. Otherwise, proceed to the next step.
Step 4: Shape the Dough
- Shape the Loaf: Once the dough has risen, transfer it back onto a lightly floured surface and gently punch it down. Form the dough into a loaf shape by folding the edges inward and rolling it into a log or a round shape, depending on your preference. You can also divide it into two smaller loaves if you want a smaller size.
- Prepare the Pan: Grease a loaf pan (9×5 inches) or line it with parchment paper. Place the shaped dough inside the pan and cover it loosely with a clean cloth. Let it rise for another 30 minutes, allowing the dough to puff up and nearly double in size.
Step 5: Bake the Bread
- Preheat the Oven: While the dough is rising, preheat your oven to 375°F (190°C) so that it’s hot and ready for baking.
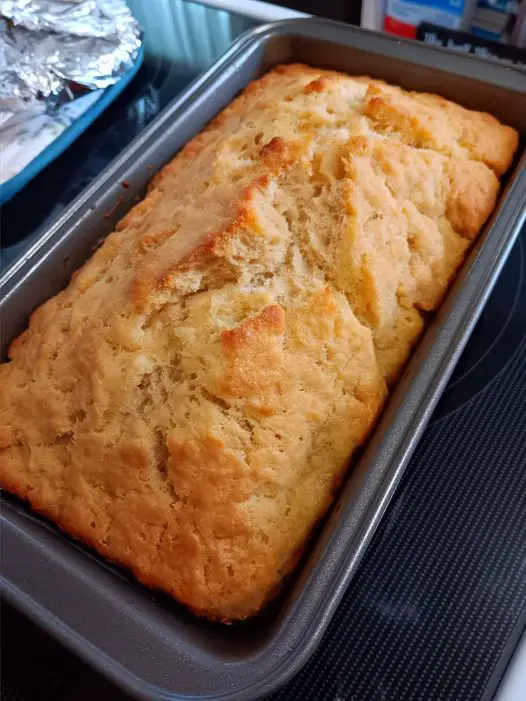
- Bake the Bread: Once the dough has risen, place the loaf pan in the preheated oven and bake for 30-35 minutes. The bread is done when the top is golden brown and it sounds hollow when tapped on the bottom. If you have a kitchen thermometer, the internal temperature of the bread should read about 190°F (88°C) when fully baked.
- Optional Glaze: For a soft crust, you can brush the top of the loaf with a little milk or butter right after it comes out of the oven. This will give it a nice, shiny appearance and a tender crust.
Step 6: Cool and Slice
- Cool the Bread: Once the bread is baked, remove it from the oven and let it cool in the pan for about 10 minutes. Then, transfer it to a wire rack to cool completely. Cooling the bread before slicing ensures that the texture sets properly.
- Slice and Serve: Once cooled, slice the bread into even slices and serve. It’s perfect for sandwiches, toasts, or simply enjoying with butter.
Tips for Success:
- Use Fresh Yeast: Make sure your yeast is fresh and within its expiration date. Yeast is key to creating a light, airy loaf.
- Kneading Technique: If you’re new to kneading, remember that it should be done gently and consistently. The goal is to develop the gluten structure, so don’t rush through this step.
- Proofing: Proofing the dough in a warm area (but not too hot) is crucial for proper rising. If your kitchen is cold, you can place the bowl near a heater or in an oven with just the light on to maintain a warm environment.
- Add-ins: Feel free to get creative with this recipe. You can add herbs, cheese, seeds, or other flavorings to make the bread unique.
- Storage: Once baked and completely cooled, store the bread in a paper bag or a bread box at room temperature for up to 3-4 days. For longer storage, freeze the loaf and thaw when ready to eat.
Nutrition Information (per slice, based on 12 slices per loaf):
- Calories: 120
- Protein: 3g
- Carbohydrates: 22g
- Fiber: 1g
- Fat: 2g
- Sodium: 150mg
- Sugar: 1g
(Note: Nutritional values are approximate and based on the ingredients used. For more precise information, it’s recommended to input the specific brands and ingredients used into a nutrition calculator.)
Why Make Homemade Bread?
- Fewer Preservatives: Store-bought bread often contains preservatives and chemicals to extend shelf life. Homemade bread is made with wholesome ingredients you can trust, which means fewer additives and a cleaner product.
- Customization: When you make your own bread, you have the freedom to choose the ingredients. Want whole wheat? You can easily substitute part or all of the flour. Craving garlic bread? Add garlic to the dough or sprinkle it on top before baking.
- Satisfaction: There’s something inherently satisfying about making bread from scratch. The process involves simple techniques, patience, and care, and the result is a beautifully crafted loaf of bread that’s perfect for any meal.
- Great for Beginners: Don’t be intimidated by the idea of making bread! With a little patience and practice, you’ll have a bread-making routine that will become second nature. You can even experiment with different shapes or loaves once you get the hang of it.
This homemade bread recipe is easy to follow, produces a soft and flavorful loaf, and offers endless possibilities for customization. Whether you’re making it for a family dinner, a gathering with friends, or just to enjoy with your morning coffee, this bread will surely become a staple in your kitchen.