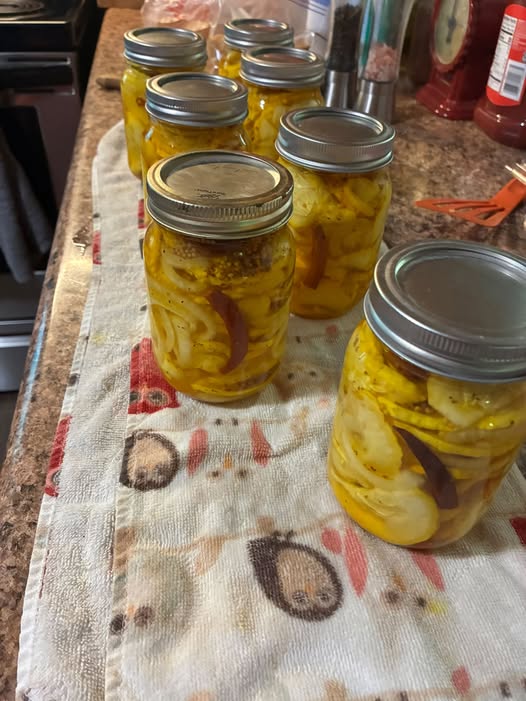
pickled yellow squash
- Prep Time: 20 minutes
- Cooking Time: 10 minutes
- Cooling Time: 30 minutes
- Chilling Time: 24 hours
- Total Time: Approximately 25 hours
- Difficulty Level: Easy
- Recipe Yield: 4 pint jars (about 16 servings)
Ingredients
- 2 pounds fresh yellow squash, sliced into ¼-inch rounds
- 1 medium sweet onion, thinly sliced
- 2 cups white vinegar (5% acidity)
- 1 cup apple cider vinegar
- 1½ cups granulated sugar
- 2 tablespoons kosher salt
- 2 teaspoons mustard seeds
- 1 teaspoon celery seeds
- 1 teaspoon turmeric
- ½ teaspoon black peppercorns
- ½ teaspoon crushed red pepper flakes (optional)
- 4 cloves garlic, peeled and lightly crushed
- 2 sprigs fresh dill (optional)
- 2 cups water
Kitchen Equipment
- Large saucepan
- Sharp knife
- Cutting board
- Measuring cups and spoons
- Wooden spoon
- Four sterilized pint jars with lids
- Jar funnel (optional)
- Tongs
Instructions
Step 1: Prepare the Squash
Wash the yellow squash thoroughly under cool running water. Trim both ends and slice the squash into even ¼-inch thick rounds. Thin slices absorb the pickling brine evenly while maintaining a pleasant crunch.
Peel and thinly slice the onion.
Step 2: Sterilize the Jars
Wash jars and lids with hot soapy water and rinse thoroughly. Sterilize the jars by placing them in simmering water for 10 minutes or by running them through the dishwasher’s sanitizing cycle. Keep the jars warm until ready to fill.
Step 3: Make the Pickling Brine
In a large saucepan, combine:
- White vinegar
- Apple cider vinegar
- Water
- Sugar
- Salt
- Mustard seeds
- Celery seeds
- Turmeric
- Black peppercorns
- Red pepper flakes (if using)
Bring the mixture to a gentle boil over medium-high heat.
Stir continuously until the sugar and salt dissolve completely.
Reduce the heat and simmer for about 5 minutes to allow the spices to infuse the brine.
Step 4: Fill the Jars
Divide the sliced squash and onions evenly among the sterilized jars.
Add one crushed garlic clove and a small sprig of fresh dill to each jar if desired.
Carefully pour the hot pickling brine over the vegetables, ensuring they are fully submerged.
Leave about ½ inch of headspace at the top of each jar.
Remove any trapped air bubbles using a clean utensil.
Wipe the jar rims clean before sealing with lids.
Step 5: Cool and Refrigerate
Allow the jars to cool completely at room temperature for about 30 minutes.
Transfer them to the refrigerator.
For the best flavor, let the pickles chill for at least 24 hours before serving. The flavor continues to improve over the next several days.
Optional Water Bath Canning
If you wish to store the pickles in the pantry:
- Process filled jars in a boiling water bath for 10 minutes (adjust for altitude if necessary).
- Carefully remove jars.
- Let cool undisturbed for 12–24 hours.
- Check seals before storing.
Always follow current USDA-approved canning guidelines for safe long-term storage.
Serving Suggestions
Pickled yellow squash pairs wonderfully with:
- Grilled burgers
- Pulled pork sandwiches
- Hot dogs
- Fried chicken
- BBQ platters
- Potato salad
- Pasta salad
- Cheese boards
- Charcuterie platters
- Grilled vegetables
- Tacos
- Grain bowls
Their bright acidity cuts through rich foods, making them a versatile side dish.
Recipe Tips
- Choose small, firm squash for maximum crunch.
- Slice vegetables evenly for consistent pickling.
- Allow at least one full day for flavors to develop.
- Adjust red pepper flakes for desired heat.
- Fresh dill adds classic pickle flavor.
- Apple cider vinegar provides extra depth.
- Store refrigerated pickles submerged in brine.
Flavor Variations
Try customizing your pickled squash by adding:
- Jalapeño slices for spicy pickles
- Fresh thyme
- Rosemary
- Coriander seeds
- Fennel seeds
- Bay leaves
- Whole cloves
- Ginger slices
- Honey instead of part of the sugar
Each variation creates a unique flavor profile while preserving the signature tangy taste.
Storage Instructions
Refrigerator pickles remain fresh for up to 1 month when stored in airtight jars and kept submerged in the brine.
Properly water-bath canned jars can be stored in a cool, dark pantry for up to 1 year. Refrigerate after opening and consume within 1 month.
Common Mistakes to Avoid
- Using overripe squash
- Skipping sterilization
- Reducing vinegar below the recommended amount
- Not fully dissolving the sugar
- Overcooking the squash
- Opening jars before the flavors have developed
- Storing vegetables above the brine
Frequently Asked Questions
Can I use zucchini instead of yellow squash?
Yes. Zucchini works equally well and creates a similar texture.
Do I have to refrigerate them?
Refrigerator pickles must stay refrigerated. Water-bath canned jars may be stored in the pantry until opened.
How long before they’re ready?
They taste good after 24 hours, but the flavor is even better after 2–3 days.
Can I reduce the sugar?
You may slightly reduce it, but doing so changes the balance of sweet and tangy flavors.
Can I reuse the brine?
It’s best to prepare fresh brine for each batch to ensure the proper balance of acidity and flavor.
Nutrition Information (Per Serving)
- Calories: 65
- Total Fat: 0 g
- Saturated Fat: 0 g
- Cholesterol: 0 mg
- Sodium: 240 mg
- Total Carbohydrates: 16 g
- Dietary Fiber: 1 g
- Total Sugars: 14 g
- Protein: 1 g
- Vitamin C: 15% Daily Value
- Vitamin A: 6% Daily Value
- Calcium: 2% Daily Value
- Iron: 2% Daily Value