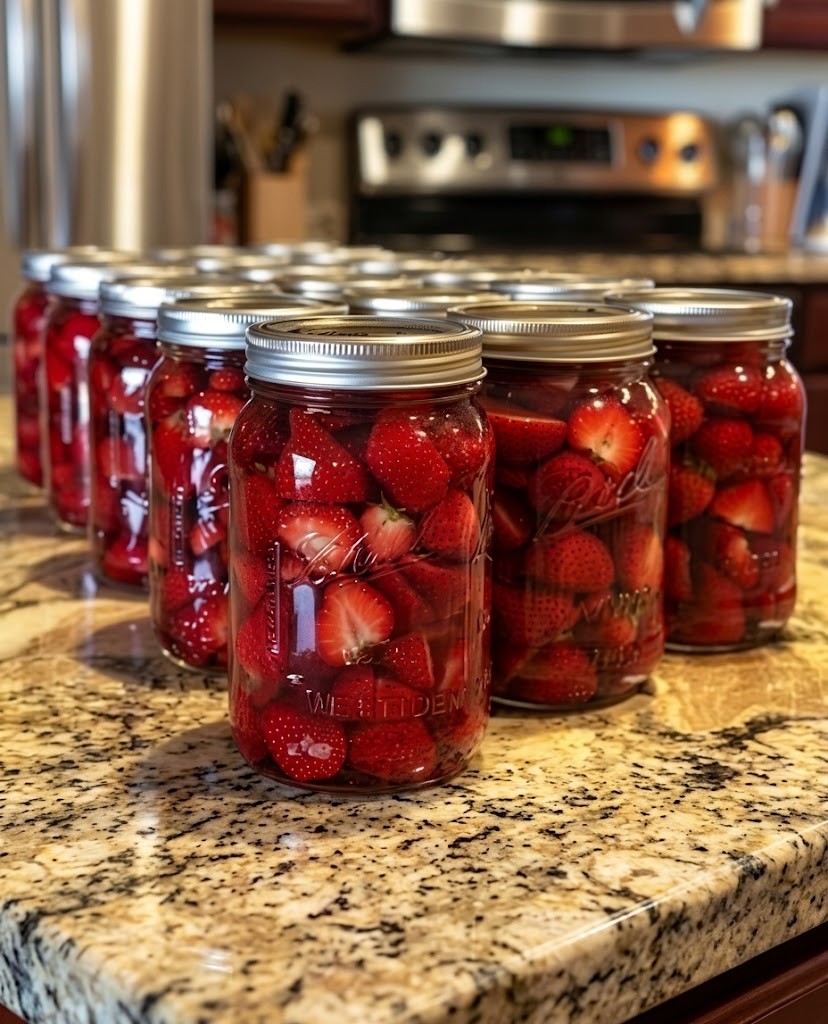
Preserving Fruit
-
Prep Time: 45 minutes
-
Processing / Active Cook Time: 30 minutes to 6 hours (depending on method chosen)
-
Total Time: Varies from 2 hours (Freezing/Canning) to 12 hours (Dehydrating)
-
Intensity Level: Intermediate (Requires precision, cleanliness, and strict adherence to food safety guidelines)
-
Yield: 6 Pint Jars (or equivalent frozen/dried storage batches)
-
Category: Pantry Staple / Master Technique / Home Preservation
Equipment & Essential Tools
To ensure safety, longevity, and optimal flavor retention, gather your tools before handling any fresh fruit:
-
Large Heavy-Bottomed Stockpot (for water-bath canning)
-
Electric Food Dehydrator (optional, for drying)
-
Baking Sheets and Parchment Paper (for flash freezing)
-
Standard Mason Jars with Two-Piece Lids (sterilized)
-
BPA-Free Freezer Bags or Vacuum-Sealer Bags
-
Jar Lifter, Canning Funnel, and Bubble Remover Tool
-
Digital Kitchen Scale and Instant-Read Thermometer
Ingredients
-
4 pounds Fresh Fruit (Firm peaches, Bartlett pears, strawberries, or tart apples—ripe yet firm)
-
4 cups Granulated Sugar (Used for light preserving syrup and balancing osmotic pressure)
-
6 cups Filtered Water (Divided for syrup preparation)
-
3 tablespoons Fresh Lemon Juice (Crucial for lowering pH, preventing enzymatic browning, and enhancing flavor brightness)
-
1 teaspoon Ascorbic Acid Crystals (Optional, for optimal color retention during drying/canning)
Step-by-Step Instructions
Step 1: Selection, Sorting, and Sanitation
-
Inspect and Sort: Select fruit that is completely free of bruising, mold, or overripening. Underripe fruit lacks natural sugars, while overripe fruit breaks down into mush during processing.
-
Wash Thoroughly: Wash all fruit thoroughly in cold, running water. Do not soak fruit for extended periods to avoid losing water-soluble vitamins and natural flavors.
-
Sanitize Equipment: Submerge your glass jars in a simmering water bath for 10 minutes to sterilize them. Keep them warm until ready to pack. Submerge flat metal lids in hot (not boiling) water to soften the sealing compound.
Step 2: Preparation by Preservation Method
Depending on your kitchen goals, choose one of the three foundational preservation paths below:
Method A: Water-Bath Canning (Best for Long-Term Pantry Storage)
-
Prepare the Syrup: In a medium saucepan, combine 2 cups of sugar and 4 cups of water. Bring to a gentle boil, stirring until the sugar completely dissolves. Keep the syrup hot on the stove burner.
-
Peel and Slice: Peel, core, and slice your fruit (such as peaches or pears) into uniform halves or quarters. Drop the slices immediately into an acidic bath (water mixed with lemon juice) to prevent browning.
-
Pack the Jars: Pack the fruit tightly into your hot, sterilized Mason jars, leaving a clean 1/2-inch headspace at the top.
-
Add Liquid: Ladle the hot sugar syrup over the fruit, ensuring all pieces are fully submerged while maintaining the 1/2-inch headspace. Run a non-metallic spatula down the inside of the jars to release any trapped air bubbles.
-
Process: Wipe the jar rims clean with a damp cloth, apply the lids, and screw the bands down fingertip-tight. Lower the jars into your boiling water-bath canner (ensure water covers the jars by at least 1 inch). Process pint jars for 20 minutes, adjusting for altitude if necessary. Remove and let cool undisturbed for 24 hours.
Method B: Freezing (Best for Fresh Flavor and Smoothies)
-
Flash Freezing: Slice or pit your fruit (such as berries, cherries, or sliced peaches). Toss them lightly with 1 tablespoon of lemon juice to lock in color.
-
Arrange the fruit pieces in a single layer on a parchment-lined baking sheet. Place the tray in the freezer for 2 to 3 hours until completely solid. This prevents the fruit from clumping together.
-
Transfer the flash-frozen fruit into heavy-duty freezer bags or vacuum-seal bags. Squeeze out as much excess air as possible, seal tightly, label with the date, and freeze for up to 12 months.
Method C: Dehydrating (Best for Lightweight Snacks and Space-Saving)
-
Slice Uniformly: Slice fruits into even 1/4-inch thick rings or pieces to ensure even drying rates.
-
Pre-treat: Dip slices into a solution of water and lemon juice for 10 minutes to deactivate browning enzymes. Pat completely dry with clean paper towels.
-
Dehydrate: Arrange slices in a single layer on dehydrator trays without overlapping. Set the electric dehydrator to 135°F (57°C) and dry for 6 to 12 hours. Fruit is done when it is pliable, leathery, and contains no pockets of moisture. Cool completely before storing in airtight glass containers.
Chef’s Pro-Tips for Success
-
Headspace Precision: Never neglect the recommended headspace in canning. Too little headspace can cause the jar to fail sealing; too much headspace can trap excess oxygen, leading to food discoloration and degradation over time.
-
Altitude Adjustments: If you live above 1,000 feet in elevation, increase your water-bath processing time by 1 minute for every 1,000 feet of elevation gain to ensure complete microbial destruction.
-
Testing Seals: For canned goods, test the seal after 24 hours by pressing the center of the lid. If it flexes or pops back, the jar did not seal and must be refrigerated immediately or reprocessed.
Nutritional Information
Note: Nutrition values are calculated as an approximate average per 1/2-cup serving of syrup-canned or preserved fruit.
-
Calories: 112 kcal
-
Total Fat: 0.2 g
-
Saturated Fat: 0.0 g
-
-
Sodium: 2.5 mg
-
Total Carbohydrates: 28.5 g
-
Dietary Fiber: 2.1 g
-
Sugars: 25.0 g (primarily natural fruit sugars and light preserving syrup)
-
-
Protein: 0.8 g
-
Vitamin C: 14% Daily Value
-
Potassium: 165 mg