Redbud Jelly
Preparation Time: 30 minutes
Steeping Time: 12 hours
Cooking Time: 20 minutes
Canning Time: 10 minutes
Total Time: Approximately 13 hours
Difficulty Level: Moderate
Cooking Intensity: Medium
Course: Condiment, Preserve
Cuisine: American
Ingredients
For the Redbud Tea
- 4 cups fresh redbud blossoms, rinsed and stems removed
- 4 cups boiling water
For the Jelly
- 3½ cups prepared redbud tea
- ¼ cup fresh lemon juice
- 1 package (1.75 ounces) powdered fruit pectin
- 4 cups granulated sugar
Equipment Needed
- Large heatproof bowl
- Fine mesh strainer
- Cheesecloth
- Large saucepan or preserving pot
- Wooden spoon
- Measuring cups
- Sterilized half-pint canning jars
- Canning funnel
- Water bath canner or large stockpot
Important Note About Redbud Blossoms
Before harvesting redbud flowers:
- Ensure the tree has not been treated with pesticides or chemicals.
- Harvest blossoms from a clean, safe area away from roadways.
- Use only flowers from edible redbud species.
- Rinse blossoms thoroughly before use.
Preparation Overview
| Task | Time | Intensity |
|---|---|---|
| Harvesting & Cleaning | 20 minutes | Low |
| Steeping Tea | 12 hours | None |
| Jelly Preparation | 10 minutes | Medium |
| Cooking | 10 minutes | Medium |
| Canning | 10 minutes | Medium |
| Total Active Time | 50 minutes | Medium |
Instructions
Step 1: Harvest and Clean the Blossoms
Collect approximately 4 cups of fresh redbud blossoms.
Remove stems, leaves, and any debris.
Place the blossoms in a colander and rinse gently under cool running water.
Drain thoroughly.
Time: 20 minutes
Intensity: Low
Step 2: Prepare the Redbud Tea
Place the cleaned blossoms into a large heatproof bowl.
Pour 4 cups of boiling water over the blossoms.
Cover the bowl and allow the flowers to steep for 8–12 hours, preferably overnight.
During steeping, the water will gradually develop a beautiful purple-blue color.
Time: 5 minutes active, 12 hours resting
Intensity: Low
Step 3: Strain the Tea
After steeping, strain the liquid through a fine mesh sieve lined with cheesecloth.
Discard the spent blossoms.
Measure exactly 3½ cups of the prepared tea for the jelly.
If necessary, add a small amount of water to reach the correct measurement.
Time: 5 minutes
Intensity: Low
Step 4: Sterilize the Jars
While preparing the jelly, sterilize your canning jars and lids according to safe canning guidelines.
Keep jars warm until ready to fill.
Time: 10 minutes
Intensity: Low
Step 5: Combine Tea, Lemon Juice, and Pectin
In a large preserving pot, combine:
- 3½ cups redbud tea
- Lemon juice
- Powdered pectin
Stir thoroughly until dissolved.
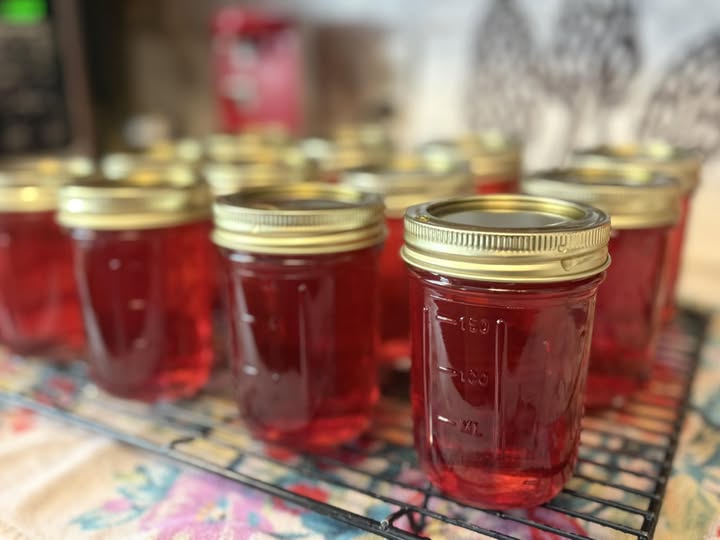
The lemon juice will often transform the tea from blue-purple to a beautiful pink color.
Time: 3 minutes
Intensity: Medium
Step 6: Bring to a Boil
Place the pot over medium-high heat.
Bring the mixture to a full rolling boil while stirring constantly.
A rolling boil should not stop when stirred.
Time: 5 minutes
Intensity: Medium
Step 7: Add Sugar
Add all the sugar at once.
Stir continuously until completely dissolved.
Return the mixture to a full rolling boil.
Boil hard for exactly 1 minute, stirring constantly.
Time: 2 minutes
Intensity: Medium
Step 8: Remove Foam
Remove the pot from the heat.
If foam forms on the surface, skim it off using a spoon.
This creates a clearer finished jelly.
Time: 2 minutes
Intensity: Low
Step 9: Fill the Jars
Using a canning funnel, carefully ladle the hot jelly into the prepared jars.
Leave approximately ¼ inch of headspace.
Wipe jar rims clean and apply lids and bands.
Time: 5 minutes
Intensity: Medium
Step 10: Process in Water Bath
Place jars into a boiling water bath canner.
Process for 10 minutes.
After processing, carefully remove the jars and place them on a towel-lined surface.
Allow them to cool undisturbed for 12–24 hours.
Time: 10 minutes
Intensity: Medium
Step 11: Check Seals
Once cooled, check that all lids have sealed properly.
The center of each lid should not flex when pressed.
Store sealed jars in a cool, dark place.
Time: 2 minutes
Intensity: Low
Serving Suggestions
Redbud Jelly is delicious served with:
- Fresh biscuits
- English muffins
- Homemade bread
- Croissants
- Scones
- Pancakes
- Waffles
- Crackers and cream cheese
It also pairs beautifully with:
- Goat cheese
- Brie
- Sharp cheddar
- Roasted pork
- Glazed chicken
Tips for Success
Use Fresh Blossoms
Freshly picked flowers produce the best color and flavor.
Measure Carefully
Accurate measurements are essential for proper jelly setting.
Do Not Overboil
Excessive boiling can affect texture and reduce flavor.
Use Proper Pectin
Follow the pectin manufacturer’s instructions if using a different brand.
Allow Time to Set
The jelly may require up to 24 hours to fully set.
Flavor Variations
Honey Redbud Jelly
Replace a portion of the sugar with honey for a deeper flavor.
Lavender Redbud Jelly
Add a small amount of culinary lavender during steeping.
Lemon Blossom Jelly
Increase lemon juice slightly for a brighter citrus profile.
Mixed Wildflower Jelly
Combine redbud blossoms with edible violets or other edible flowers.
Vanilla Redbud Jelly
Add a small amount of vanilla extract after cooking for a unique twist.
Storage Instructions
Pantry Storage
Properly sealed jars can be stored in a cool, dark pantry for up to 12 months.
Refrigeration
After opening, refrigerate and use within 3 weeks.
Freezer Option
Unprocessed jelly can be frozen in freezer-safe containers for up to 6 months.
Frequently Asked Questions
What does Redbud Jelly taste like?
It has a mild floral flavor with subtle sweetness and light citrus notes.
Is every redbud tree edible?
Most common redbud species are edible, but always verify identification before harvesting.
Why did my jelly not set?
Possible causes include incorrect measurements, insufficient pectin, or undercooking.
Can I reduce the sugar?
Traditional jelly recipes require specific sugar levels for proper setting. Use low-sugar pectin if reducing sugar.
Why did the color change?
The natural pigments in redbud blossoms react with acidity, creating a pink color when lemon juice is added.
Nutritional Information
Per Tablespoon
- Calories: 45
- Total Fat: 0g
- Saturated Fat: 0g
- Cholesterol: 0mg
- Sodium: 0mg
- Carbohydrates: 12g
- Sugars: 11g
- Fiber: 0g
- Protein: 0g
- Potassium: 5mg
- Calcium: 1mg