silicone bread sling
Preparation Time: 20 minutes
First Rise: 12–18 hours
Second Rise: 1 hour
Baking Time: 45 minutes
Cooling Time: 1 hour
Total Time: Approximately 15–21 hours
Difficulty Level: Intermediate
Cooking Intensity: Medium
Yield: 1 large loaf (8 servings)
Ingredients
- 3 cups (375 g) bread flour
- 1¼ teaspoons salt
- ½ teaspoon instant yeast
- 1½ cups warm water
Equipment Needed
- Large mixing bowl
- Wooden spoon
- Silicone bread sling
- Dutch oven with lid
- Bench scraper
- Kitchen towel
- Cooling rack
What Is a Silicone Bread Sling?
A silicone bread sling is a flexible, heat-resistant baking accessory shaped to fit inside Dutch ovens.
It typically features:
- Long handles for lifting
- Non-stick surface
- High-temperature resistance
- Reusable construction
The sling acts as a carrier, allowing bakers to move delicate dough without disturbing its structure.
Step 1: Mix the Dough
Time: 10 minutes
Intensity: Easy
In a large mixing bowl, combine:
- Bread flour
- Salt
- Instant yeast
Mix thoroughly.
Gradually add warm water while stirring with a wooden spoon.
Continue mixing until a shaggy dough forms.
The dough will appear sticky and rough.
This is completely normal for artisan bread.
Step 2: First Rise
Time: 12–18 Hours
Intensity: No Heat
Cover the bowl with plastic wrap or a kitchen towel.
Allow the dough to rise at room temperature.
During this long fermentation period:
- Flavor develops
- Gluten strengthens
- Dough becomes airy
The dough should double in size and appear bubbly.
Step 3: Shape the Dough
Time: 5 minutes
Intensity: Easy
Lightly flour your work surface.
Turn out the dough.
Using a bench scraper, fold the dough toward the center several times.
Shape into a round loaf.
Avoid excessive kneading.
The goal is to preserve the air bubbles created during fermentation.
Step 4: Second Rise
Time: 1 Hour
Intensity: No Heat
Place the shaped dough onto a lightly floured surface.
Cover loosely with a towel.
Allow it to rise for approximately 1 hour.
The loaf should become slightly puffy.
Step 5: Preheat the Dutch Oven
Time: 30 minutes
Intensity: High Heat
Place the empty Dutch oven and lid into the oven.
Preheat to:
450°F (232°C)
Allow the Dutch oven to heat for at least 30 minutes.
This creates the intense heat needed for oven spring and crust development.
Step 6: Prepare the Silicone Bread Sling
Time: 2 minutes
Intensity: Easy
Place the silicone bread sling on your work surface.
Carefully transfer the risen dough onto the center of the sling.
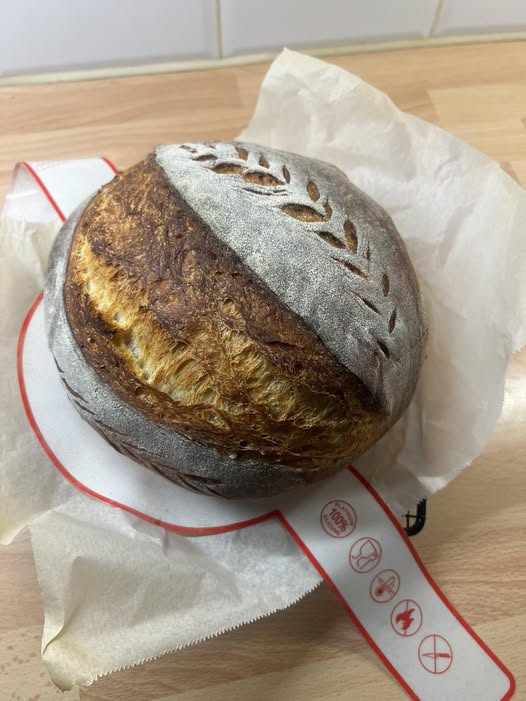
If desired, score the dough using a bread lame or sharp knife.
Scoring allows controlled expansion during baking.
Step 7: Transfer Dough Using the Silicone Bread Sling
Time: 2 minutes
Intensity: Medium
Carefully remove the hot Dutch oven from the oven.
Using the sling handles, lower the dough directly into the Dutch oven.
The sling helps maintain the loaf’s shape while preventing accidental burns.
Replace the lid immediately.
Step 8: Bake Covered
Time: 30 minutes
Intensity: High Heat
Bake the bread covered at:
450°F (232°C)
The covered environment traps steam.
Steam contributes to:
- Better oven spring
- Crisp crust
- Professional bakery appearance
Step 9: Bake Uncovered
Time: 15 minutes
Intensity: Medium-High Heat
Remove the lid.
Continue baking until:
- Deep golden brown color develops
- Crust becomes crisp
- Internal temperature reaches approximately 205°F (96°C)
The loaf should sound hollow when tapped.
Step 10: Remove the Bread
Time: 1 minute
Intensity: Easy
Using the silicone sling handles, lift the bread from the Dutch oven.
No need to reach into the hot pot.
This is one of the biggest advantages of using a bread sling.
Step 11: Cool Completely
Time: 1 Hour
Intensity: No Heat
Place the loaf on a cooling rack.
Allow it to cool completely before slicing.
Cutting too soon may result in a gummy texture.
Cooling allows moisture to redistribute throughout the bread.
Benefits of a Silicone Bread Sling
Improved Safety
The sling significantly reduces the risk of burns from hot Dutch ovens.
Better Dough Handling
Delicate dough remains intact during transfer.
Reusable
Unlike parchment paper, silicone slings can be used repeatedly.
Environmentally Friendly
Less waste means a more sustainable baking process.
Easy Cleanup
Most slings are dishwasher-safe or easy to hand wash.
Tips for Successful Dutch Oven Bread
Use Bread Flour
Bread flour produces a stronger gluten structure and chewier texture.
Allow Proper Fermentation
Long fermentation improves both flavor and texture.
Preheat Thoroughly
A fully heated Dutch oven is essential for oven spring.
Don’t Skip Cooling
Cooling helps achieve the ideal crumb structure.
Common Mistakes to Avoid
Underheating the Dutch Oven
Insufficient heat can lead to poor rise and pale crust.
Over-Flouring the Dough
Too much flour may create a dense loaf.
Cutting Bread Too Soon
Fresh bread continues cooking internally after baking.
Forgetting to Score
Scoring helps prevent uncontrolled cracking.
Serving Suggestions
This artisan loaf is excellent served with:
- Butter
- Olive oil
- Soup
- Sandwiches
- Cheese boards
- Roasted vegetables
- Pasta dishes
The crisp crust and soft interior complement many meals.
Caring for Your Silicone Bread Sling
After baking:
- Allow the sling to cool completely.
- Wash with warm soapy water.
- Rinse thoroughly.
- Dry completely before storage.
Avoid using sharp utensils directly on the sling to extend its lifespan.
Frequently Asked Questions
Can a silicone bread sling replace parchment paper?
Yes. Many bakers prefer silicone slings because they are reusable and easier to handle.
Is it safe at high temperatures?
Most silicone bread slings are rated between 450°F and 500°F (232°C–260°C). Always verify manufacturer specifications.
Can I use it for sourdough?
Absolutely. Silicone bread slings are especially popular among sourdough bakers.
Does it affect crust formation?
No. Properly designed slings allow excellent airflow and crust development.
Nutritional Information
Per Slice (1/8 Loaf)
- Calories: 175
- Protein: 5 g
- Total Fat: 0.5 g
- Saturated Fat: 0 g
- Carbohydrates: 36 g
- Fiber: 1.5 g
- Sugars: 0 g
- Sodium: 365 mg
- Potassium: 45 mg
- Calcium: 6 mg
- Iron: 2 mg