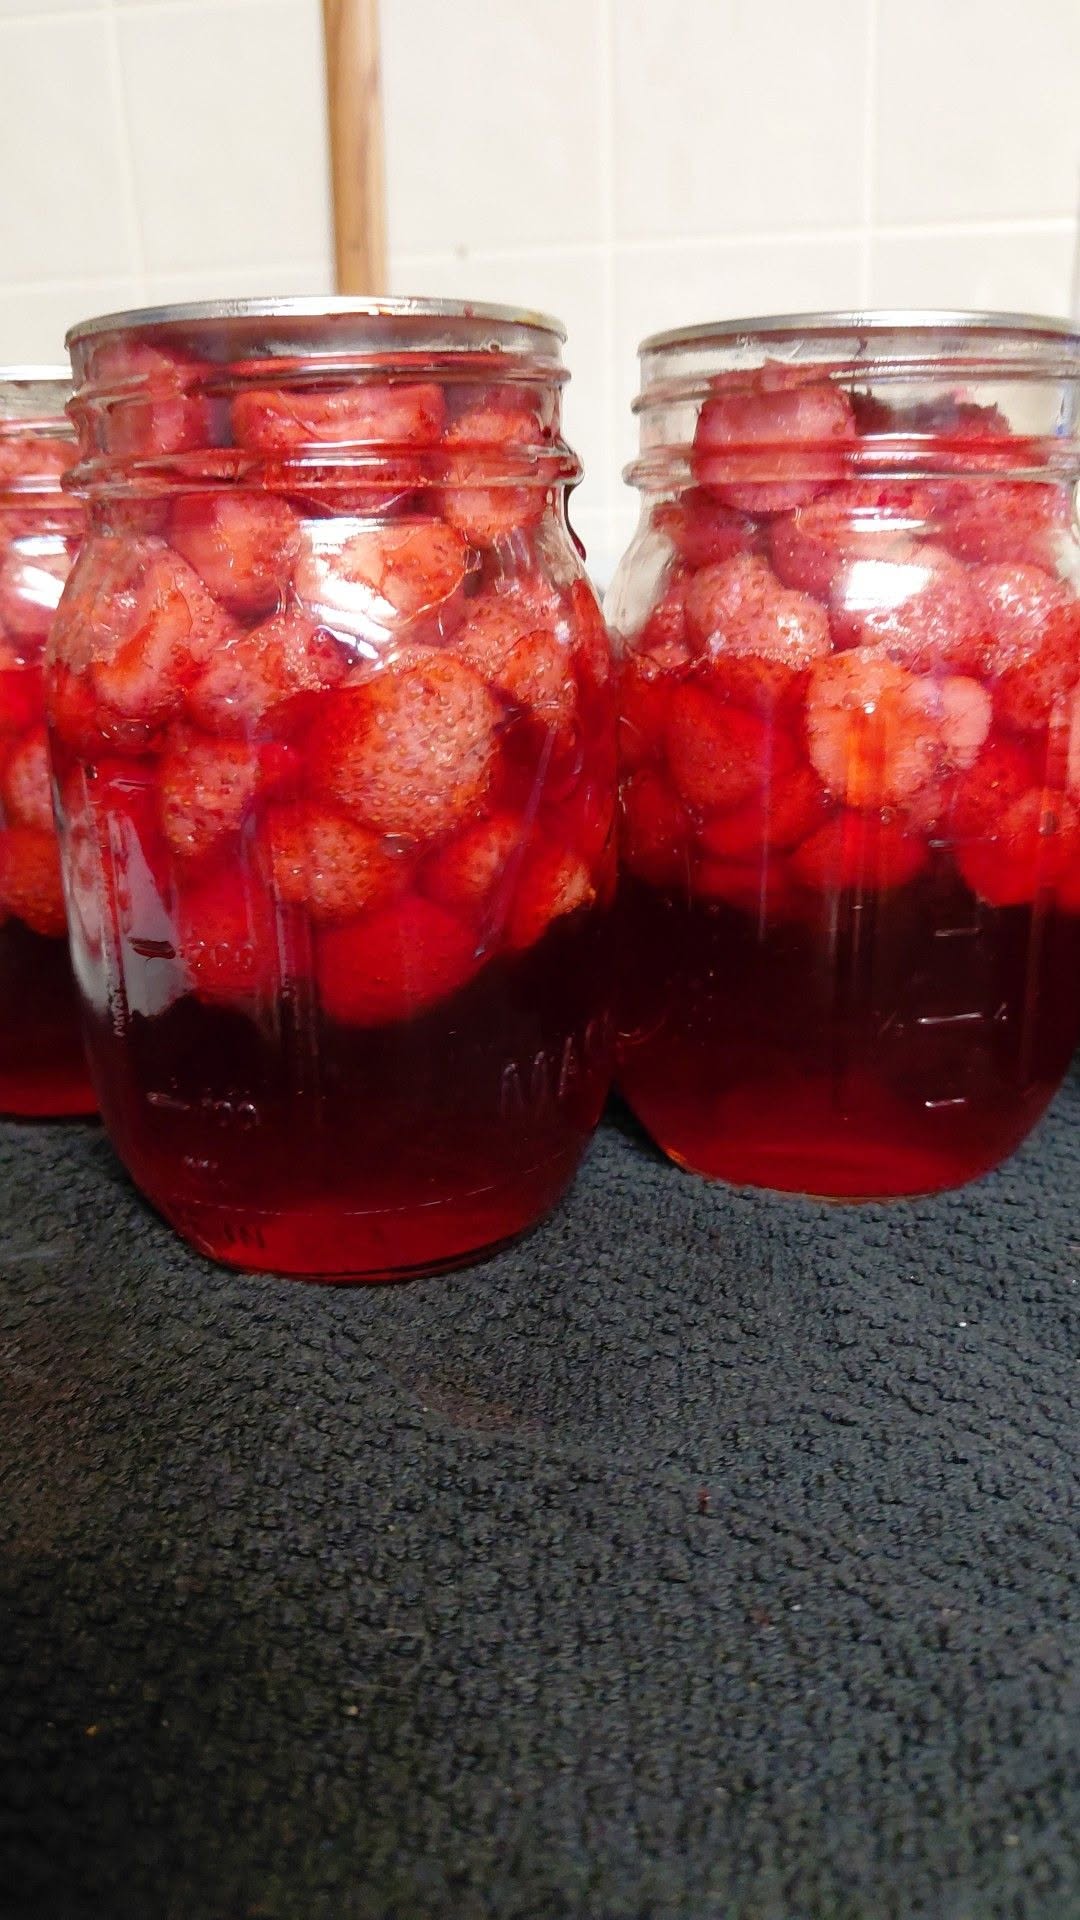
strawberry preserves
- Prep Time: 20 minutes
- Cook Time: 30–35 minutes
- Total Time: 50–55 minutes
- Difficulty: Easy
- Yield: About 4 half-pint jars (approximately 32 ounces)
- Cuisine: American
Ingredients
- 2 pounds (900g) fresh strawberries, hulled
- 4 cups granulated sugar
- 2 tablespoons fresh lemon juice
- 1 teaspoon lemon zest (optional)
- 1 tablespoon fruit pectin (optional, for a firmer set)
- ¼ teaspoon unsalted butter (optional, helps reduce foam)
Equipment Needed
- Large heavy-bottomed saucepan or preserving pot
- Wooden spoon
- Potato masher (optional)
- Measuring cups and spoons
- Candy or instant-read thermometer (optional)
- Sterilized glass jars with lids
- Jar funnel
- Ladle
- Water bath canner (if canning for long-term storage)
Instructions
Step 1: Prepare the Strawberries
Wash the strawberries thoroughly under cool running water. Remove the stems and hulls, then cut large berries into halves or quarters while leaving smaller berries whole. This helps create the chunky texture that makes preserves unique.
Step 2: Combine Ingredients
In a large saucepan, combine the strawberries, sugar, lemon juice, and lemon zest if using. Stir gently until the berries are evenly coated.
Allow the mixture to rest for about 10–15 minutes. This helps the strawberries release their natural juices and dissolve some of the sugar before cooking.
Step 3: Bring to a Boil
Place the saucepan over medium-high heat and stir occasionally until the sugar has completely dissolved.
Increase the heat and bring the mixture to a rolling boil. If using butter, stir it in now to minimize foam.
Step 4: Cook the Preserves
Reduce the heat slightly to maintain a steady boil and cook for 25–30 minutes, stirring frequently to prevent sticking.
If desired, lightly mash some of the berries with a potato masher while leaving others whole for a chunky preserve.
If using fruit pectin, add it according to the package directions during the final minutes of cooking.
Step 5: Check for Doneness
The preserves are ready when they reach 220°F (104°C) on a candy thermometer.
If you don’t have a thermometer, place a small spoonful on a chilled plate. Let it cool for one minute, then push it gently with your finger. If it wrinkles and holds its shape, it’s ready.
Step 6: Skim the Foam
Use a spoon to remove any foam that has collected on the surface. This creates a clearer, more attractive finished preserve.
Step 7: Fill the Jars
Carefully ladle the hot preserves into sterilized jars, leaving about ¼ inch of headspace.
Wipe the jar rims clean, place the lids on top, and tighten the bands until fingertip-tight.
Step 8: Process for Canning (Optional)
For shelf-stable preserves, process the jars in a boiling water bath for 10 minutes (adjust for altitude if necessary).
Remove the jars and let them cool undisturbed for 12–24 hours. Check that each lid has sealed properly before storing.
If you are not canning, allow the preserves to cool completely and store them in the refrigerator.
Tips for Perfect Strawberry Preserves
- Use ripe, fragrant strawberries for the best flavor.
- Avoid overcooking, which can dull the fresh berry taste.
- Stir frequently to prevent scorching.
- Fresh lemon juice balances sweetness and helps the preserves set.
- Sterilize jars properly for safe storage.
- Leave some berries whole for a traditional preserve texture.
Flavor Variations
Vanilla Strawberry Preserves
Add 1 teaspoon pure vanilla extract after removing the preserves from the heat.
Strawberry Basil
Stir in 2 tablespoons finely chopped fresh basil during the last few minutes of cooking.
Strawberry Balsamic
Add 1 tablespoon balsamic vinegar for a rich, gourmet flavor.
Mixed Berry Preserves
Replace one-third of the strawberries with raspberries or blueberries.
Cinnamon Strawberry Preserves
Add ½ teaspoon ground cinnamon for a warm, comforting twist.
Serving Suggestions
Homemade strawberry preserves are delicious with:
- Toast or English muffins
- Biscuits and scones
- Pancakes and waffles
- French toast
- Yogurt parfaits
- Cheesecake
- Vanilla ice cream
- Oatmeal
- Peanut butter sandwiches
- Thumbprint cookies
- Cake fillings
- Charcuterie boards with cheeses
Storage
Refrigerator
Store unopened refrigerator preserves for up to 3 weeks.
Once opened, keep refrigerated and use within 2–3 weeks.
Pantry
Properly canned and sealed jars can be stored in a cool, dark place for up to 1 year.
Freezing
Freeze preserves in freezer-safe containers, leaving about ½ inch of space for expansion.
They will keep well for up to 6 months. Thaw overnight in the refrigerator before using.
Frequently Asked Questions
What’s the difference between preserves and jam?
Preserves contain larger pieces or whole fruit, while jam is made with crushed fruit for a smoother consistency.
Can I reduce the sugar?
Sugar helps preserve the fruit and contributes to the texture. You can reduce it slightly, but doing so may shorten the shelf life and affect the set. For significant reductions, use a low-sugar pectin designed for that purpose.
Do I need pectin?
Not necessarily. Strawberries contain some natural pectin, and lemon juice helps the preserves thicken. Pectin simply creates a firmer consistency.
Why are my preserves too runny?
They may need a few more minutes of cooking, or they may continue to thicken as they cool. If they remain too thin, you can reheat them and cook a bit longer.
Can I use frozen strawberries?
Yes. Thaw and drain them first, then proceed with the recipe. The texture may be slightly softer, but the flavor will still be delicious.
Nutrition Information (Per Serving)
Approximate values based on 1 tablespoon.
- Calories: 50
- Protein: 0g
- Fat: 0g
- Carbohydrates: 13g
- Fiber: 0.5g
- Sugar: 12g
- Sodium: 0mg
- Vitamin C: 8% Daily Value