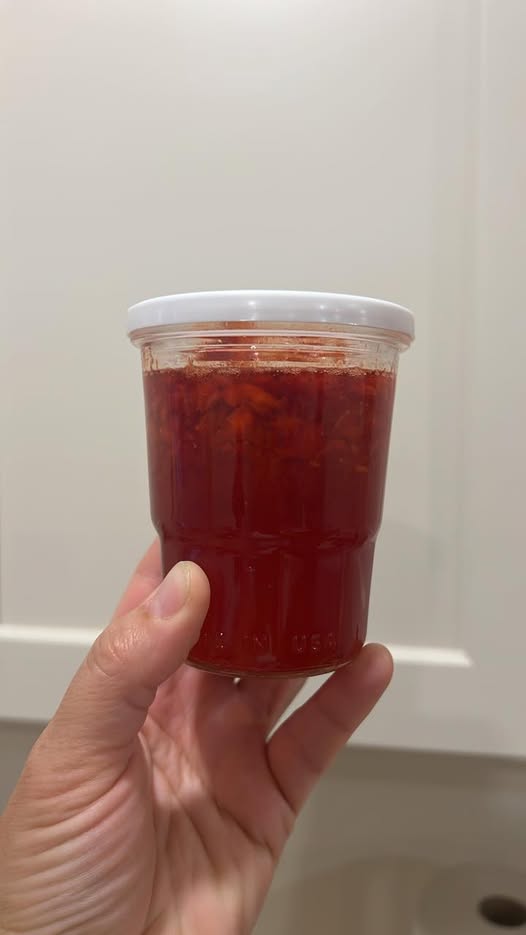
sweet chilli sauce
- Preparation Time: 10 minutes
- Cooking Time: 15 minutes
- Cooling Time: 20 minutes
- Total Time: 45 minutes
Yield
- Makes approximately 2 cups (480 ml)
- Servings: 16 tablespoons
Ingredients
For the Sauce
- 10 fresh red chilies, roughly chopped
- 4 garlic cloves, peeled
- 1 cup granulated sugar
- ½ cup rice vinegar
- ½ cup water
- 1 tablespoon soy sauce
- 1 teaspoon salt
Cornstarch Slurry
- 1 tablespoon cornstarch
- 2 tablespoons cold water
Equipment Needed
- Medium saucepan
- Blender or food processor
- Measuring cups and spoons
- Wooden spoon
- Fine mesh strainer (optional)
- Sterilized glass jar or bottle
Ingredient Notes
Red Chilies
Fresh red chilies provide both color and flavor. For a milder sauce, remove the seeds before blending. For extra heat, leave the seeds intact.
Rice Vinegar
Rice vinegar gives the sauce its signature tangy flavor while maintaining a mild acidity. White vinegar may be substituted if necessary.
Sugar
Sugar balances the heat and acidity while creating the glossy texture sweet chilli sauce is known for.
Garlic
Fresh garlic adds depth and complexity. Avoid garlic powder for the best flavor.
Step-by-Step Instructions
Step 1: Blend the Chilies and Garlic
Time: 3 minutes
Intensity: Easy
Place the chopped red chilies and garlic cloves into a blender or food processor.
Add a few tablespoons of water from the measured amount and blend until a smooth paste forms.
You can leave the mixture slightly chunky if you prefer a more textured sauce.
Step 2: Combine the Base Ingredients
Time: 2 minutes
Intensity: Easy
Pour the chili-garlic mixture into a medium saucepan.
Add:
- Sugar
- Rice vinegar
- Remaining water
- Soy sauce
- Salt
Stir thoroughly to combine all ingredients.
Step 3: Bring to a Simmer
Time: 5 minutes
Intensity: Medium Heat
Place the saucepan over medium heat.
Stir occasionally as the sugar dissolves completely.
Once the mixture begins to bubble gently, reduce the heat slightly and allow it to simmer.
The aroma will become sweet, tangy, and garlicky.
Step 4: Simmer the Sauce
Time: 8 minutes
Intensity: Medium-Low Heat
Continue simmering the sauce for approximately 8 minutes.
During this stage:
- Flavors meld together
- Garlic softens
- Chilies infuse the liquid
- Sauce begins to thicken slightly
Stir every couple of minutes to prevent sticking.
If foam appears on the surface, skim it off with a spoon.
Step 5: Prepare the Thickening Slurry
Time: 1 minute
Intensity: Easy
In a small bowl, whisk together:
- 1 tablespoon cornstarch
- 2 tablespoons cold water
Mix until completely smooth.
This slurry will provide the sauce’s characteristic glossy texture.
Step 6: Thicken the Sauce
Time: 2 minutes
Intensity: Medium Heat
Slowly pour the cornstarch slurry into the simmering sauce while stirring continuously.
Increase the heat slightly to medium.
Continue stirring for 1 to 2 minutes.
The sauce will noticeably thicken and develop a shiny appearance.
Avoid over-thickening, as the sauce will continue to thicken slightly as it cools.
Step 7: Cool the Sauce
Time: 20 minutes
Intensity: No Heat
Remove the saucepan from the heat.
Allow the sauce to cool for approximately 20 minutes.
As it cools, it will reach its final consistency.
For a smoother sauce, strain through a fine mesh sieve before bottling.
Step 8: Store
Time: 2 minutes
Intensity: Easy
Transfer the cooled sweet chilli sauce into a clean glass jar or bottle.
Seal tightly and refrigerate.
The sauce can be used immediately but tastes even better after resting overnight.
Tips for Perfect Sweet Chilli Sauce
Control the Heat
- Mild: Remove all chili seeds.
- Medium: Remove half the seeds.
- Hot: Leave all seeds intact.
- Extra Hot: Add bird’s eye chilies.
Achieve the Right Thickness
If the sauce becomes too thick:
- Stir in 1–2 tablespoons of warm water.
If it is too thin:
- Simmer for a few extra minutes.
Enhance Flavor
For additional depth, consider adding:
- A teaspoon of grated ginger
- A splash of fish sauce
- A squeeze of lime juice
Serving Suggestions
Sweet chilli sauce pairs wonderfully with many dishes.
Appetizers
- Spring rolls
- Egg rolls
- Chicken wings
- Shrimp tempura
- Fried wontons
Main Dishes
- Grilled chicken
- Roasted salmon
- Stir-fried vegetables
- Rice bowls
- Noodle dishes
Snacks
- French fries
- Potato wedges
- Onion rings
- Chicken tenders
Sandwiches and Wraps
Use sweet chilli sauce as:
- A burger spread
- Wrap dressing
- Sandwich condiment
- Taco topping
Storage Instructions
Refrigerator
Store in an airtight container for up to 3 weeks.
Freezer
Freeze in small portions for up to 3 months.
Thaw overnight in the refrigerator before use.
Common Mistakes to Avoid
Overcooking
Excessive simmering can make the sauce overly thick and syrupy.
Adding Cornstarch Directly
Always create a slurry first to avoid lumps.
Using High Heat
Boiling aggressively may affect the sauce’s texture and flavor balance.
Skipping the Cooling Stage
The sauce reaches its final consistency only after cooling.
Variations
Mango Sweet Chilli Sauce
Blend ½ cup ripe mango with the chilies for a fruity twist.
Pineapple Sweet Chilli Sauce
Add ½ cup crushed pineapple for tropical sweetness.
Ginger Sweet Chilli Sauce
Incorporate 1 tablespoon freshly grated ginger.
Extra Garlic Version
Double the garlic quantity for a bolder flavor.
Nutritional Information
Per Tablespoon Serving
- Calories: 35
- Protein: 0 g
- Total Fat: 0 g
- Saturated Fat: 0 g
- Carbohydrates: 9 g
- Sugars: 8 g
- Fiber: 0.2 g
- Sodium: 75 mg
- Potassium: 12 mg
- Cholesterol: 0 mg