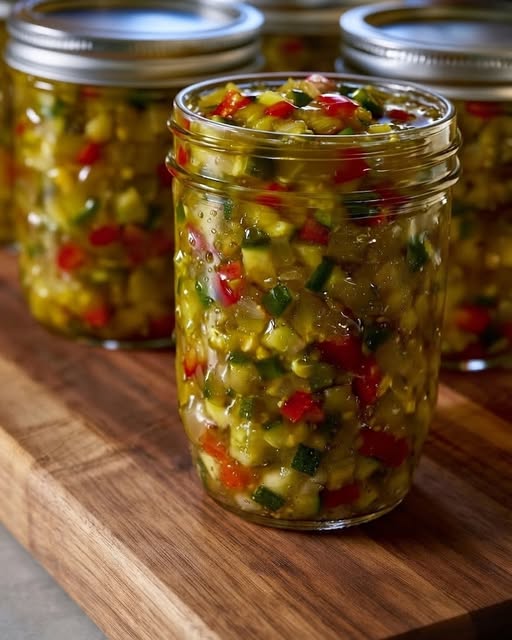
Zucchini Relish

Prep Time 30 minutes
Chilling / Salting Time 2 hours (or overnight)
Cook Time 20 minutes
Canning Time 10 minutes
Total Time ~3 hours (includes resting time)
Recipe Intensity / Difficulty Level Easy to Medium (Beginner-friendly canning)
Yield 6 pint jars (approx. 48 servings)

Why You’ll Love This Recipe

  • Zero Waste Solution: Perfect for using up oversized summer zucchini that are too large for frying or roasting.

  • Balanced Flavor Profile: A delicious harmony of sweet sugar, sharp cider vinegar, mustard seed, and aromatic spices.

  • Superior Texture: Salting and draining the shredded zucchini extracts excess moisture, keeping the final relish crunchier than standard store-bought pickle relish.

  • Versatile Storage: Choose between a quick refrigerator relish (no canning required) or water bath canning for long-term pantry storage up to 1 year.

Ingredients Breakdown

Fresh Produce

  • 10 cups shredded or finely diced zucchini (about 4–5 large zucchinis)

  • 4 cups finely chopped yellow onions (about 2 large onions)

  • 2 cups finely chopped red bell pepper (about 2 medium peppers)

  • 1 cup finely chopped green bell pepper (about 1 medium pepper)

  • ¼ cup pickling salt or non-iodized sea salt (essential for pulling out liquid)

The Pickling Liquid & Spices

  • 2 ¼ cups Apple Cider Vinegar (5% acidity for safe canning)

  • 3 cups granulated white sugar (adjust slightly to taste, but sugar aids preservation)

  • 1 tablespoon mustard seeds

  • 1 tablespoon celery seeds

  • ½ teaspoon ground turmeric (for that signature bright golden hue)

  • ½ teaspoon ground nutmeg

  • ½ teaspoon black pepper

1.Prep & Salt the Vegetables:Essential for texture and removing excess water.

  1. Wash the zucchini thoroughly. Trim the ends (peeling is optional; leaving the skin on adds vibrant green color).

  2. Shred the zucchini using a food processor fitted with a shredding disc, or finely chop it by hand.

  3. In a large non-reactive mixing bowl, combine the shredded zucchini, chopped onions, red bell pepper, and green bell pepper.

  4. Sprinkle the ¼ cup of pickling salt evenly over the vegetables and toss thoroughly.

  5. Cover the bowl with a clean towel and let it sit at room temperature for 2 hours (or in the refrigerator overnight). The salt draws out water from the zucchini cells to guarantee crispness.

2.Rinse and Drain Thoroughly:Removes excess salt and prevents soggy relish.

  1. Transfer the salted vegetable mixture into a colander set in the sink.

  2. Rinse the vegetables thoroughly under cold running water for 1–2 minutes to wash away the excess salt.

  3. Use your hands, a clean flour-sack kitchen towel, or cheesecloth to squeeze out as much moisture as humanly possible. Squeezing thoroughly is the secret to a thick, rich relish.

3.Simmer the Brine and Relish:Cook time: 20 minutes on medium heat.

  1. In a large stainless steel or enamel-coated stockpot, combine the apple cider vinegar, sugar, mustard seeds, celery seeds, turmeric, nutmeg, and black pepper.

  2. Bring the vinegar and spice mixture to a boil over medium-high heat, stirring until the sugar completely dissolves.

  3. Add the well-drained vegetable mixture to the pot and stir to combine.

  4. Bring the entire mixture back to a gentle boil. Reduce heat to medium-low and simmer uncovered for 15 to 20 minutes, stirring occasionally until the vegetables are tender and have absorbed the golden brine.

4.Fill the Jars:Follow standard home-canning sanitization steps.

  1. If canning, pre-sterilize 6 pint-sized Mason jars and keep them warm.

  2. Ladle the hot relish into the warm jars using a canning funnel, leaving ½-inch of headspace at the top.

  3. Run a non-metallic spatula or bubble-remover tool down the inside of each jar to release trapped air bubbles.

  4. Wipe the jar rims with a damp cloth to remove any sticky liquid. Center a clean lid on each jar and screw the band down until fingertip tight.

5.Water Bath Canning Process:10 minutes boiling water bath.

  1. Place the filled jars onto the rack inside a water bath canner filled with hot water (water should cover the jars by at least 1–2 inches).

  2. Cover the pot and bring to a rolling boil over high intensity heat.

  3. Process pint jars for 10 minutes (adjust time for higher altitudes: +5 min for 1,001–3,000 ft; +10 min for 3,001–6,000 ft).

  4. Turn off heat, remove the canner lid, and let jars sit for 5 minutes before removing them with jar tongs.

  5. Place jars on a towel-lined countertop and allow them to cool undisturbed for 12–24 hours. You should hear the satisfying pop of the vacuum seals!


Pro-Tips for Success

  • Do Not Skip the Salting Step: Zucchini is over 94% water. Squeezing out the moisture prevents the relish from becoming watery when stored.

  • Uniform Chop Size: Using a food processor with a coarse shredding disc or pulse function speeds up prep while maintaining consistent texture.

  • Acidity Safety: Always use commercially bottled vinegar with a guaranteed 5% acidity to ensure safe home canning.

Storage & Shelf Life

  • Water Bath Canned: Stored in a cool, dark pantry for up to 12 months. Once opened, keep refrigerated and consume within 1 month.

  • Refrigerator Method (No-Can Option): Skip the boiling water bath, let jars cool to room temperature, and place directly in the fridge. Best enjoyed after resting 24 hours to let flavors meld; keeps refrigerated for up to 4–6 weeks.

Nutrition Information

Serving Size: 1 Tablespoon (approx. 15g)

Servings Per Recipe: ~48 servings (6 pint jars)

Nutrient Amount Per Serving % Daily Value*
Calories 25 kcal
Total Fat 0.1 g 0%
Saturated Fat 0.0 g 0%
Trans Fat 0.0 g
Cholesterol 0 mg 0%
Sodium 110 mg 5%
Total Carbohydrates 6.2 g 2%
Dietary Fiber 0.4 g 1%
Total Sugars 5.4 g
Added Sugars 5.0 g 10%
Protein 0.3 g 1%
Vitamin C 4.2 mg 5%
Calcium 6 mg 0%
Iron 0.1 mg 1%
Potassium 38 mg 1%

Similar Posts

  • Aloo flour naan

    Preparation Time: 20 minutes Cooking Time: 10-12 minutes Total Time: 30 minutes Servings: 6-8 naans Ingredients: For the Dough: 2 medium potatoes (aloo), boiled and mashed (about 1 cup mashed) 1 1/2 cups gluten-free flour (you can use a mix of chickpea flour, rice flour, and tapioca flour) 1/2 cup whole wheat flour (optional, or…

  • italian bruschetta

    Crispy toasted bread topped with juicy, garlicky tomatoes, fragrant basil, and a drizzle of extra virgin olive oil — Bruschetta is the quintessential Italian appetizer. Pronounced broo-SKEH-tah, this dish hails from central Italy and is a celebration of simple, fresh ingredients that come together in perfect harmony. Whether you’re hosting a dinner party, preparing a…

  • Crock Pot Chicken Drumsticks

    Preparation & Cooking Details Prep Time: 10 minutes Cook Time: 4–6 hours (low) or 2–3 hours (high) Total Time: 4–6 hours (slow cooker) Servings: 4 servings (about 8 drumsticks) Difficulty Level: Very Easy Cooking Intensity: Minimal — mostly hands-off slow cooking  Introduction If you’re looking for an effortless way to make juicy, fall-off-the-bone chicken drumsticks…

  • Spanish sandwiches

    Prep Time: 15 minutesCook Time: 10 minutesTotal Time: 25 minutesServings: 4 sandwichesDifficulty: EasyCuisine: SpanishMeal Type: Snack / Lunch / Light Dinner Introduction Spanish sandwiches, known as bocadillos, are a beloved part of Spanish culinary culture. Served in cafés, train stations, and homes across the country, they offer a simple yet flavorful experience. Unlike their American…

  • Silky Swiss Meringue Buttercream

    Introduction Swiss Meringue Buttercream (often abbreviated as SMB or SMBC) is the silky, smooth, and luxurious frosting of professional bakers and pastry chefs. Unlike traditional American buttercream, which is sweet and often gritty, Swiss Meringue Buttercream is lighter in texture, far less sweet, and melts beautifully on the tongue. It’s the perfect choice for those…

Leave a Reply

Your email address will not be published. Required fields are marked *