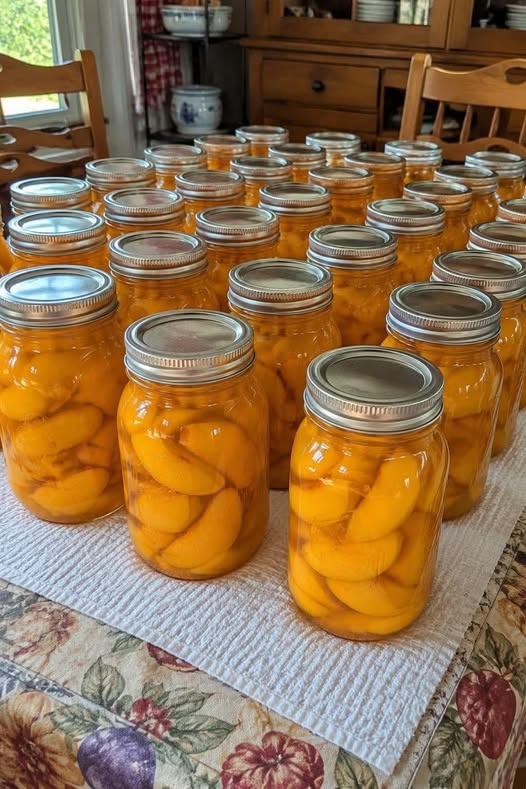
canned peach slices
- Prep Time: 30 minutes
- Cooking Time: 20 minutes
- Processing Time: 25–30 minutes
- Total Time: Approximately 1 hour 20 minutes
Recipe Intensity
- Difficulty Level: Moderate
- Skill Level: Beginner to Intermediate
- Canning Method: Water Bath Canning
Yield
- Makes approximately 7 quart jars or 14 pint jars
Ingredients
For the Peaches
- 10 pounds fresh peaches, ripe but firm
- 8 cups water
- ¼ cup lemon juice
For Light Syrup (Optional)
- 5 cups water
- 2 cups granulated sugar
For Medium Syrup (Optional)
- 5 cups water
- 3 cups granulated sugar
For Heavy Syrup (Optional)
- 5 cups water
- 4 cups granulated sugar
Equipment Needed
- Water bath canner
- Mason jars with lids and bands
- Jar lifter
- Canning funnel
- Large stockpot
- Slotted spoon
- Sharp knife
- Cutting board
- Large mixing bowl
How to Choose the Best Peaches
For successful canning, choose peaches that are:
- Fully ripe but still firm
- Free from bruises or soft spots
- Fragrant and sweet-smelling
- Uniform in size for easier processing
Freestone peaches work best because the pits separate easily from the flesh.
Step 1: Prepare the Jars
Wash jars, lids, and bands thoroughly with hot soapy water.
Inspect jars for cracks or chips. Sterilize jars if required by local canning recommendations.
Keep jars warm until ready to fill.
Step 2: Prepare the Peaches
Bring a large pot of water to a gentle boil.
Using a sharp knife, cut a small “X” on the bottom of each peach.
Place peaches into boiling water for 30–60 seconds.
Immediately transfer them to an ice bath.
The skins should slide off easily.
Peel all peaches and discard skins.
Cut peaches in half and remove pits.
Slice into even wedges.
Step 3: Prevent Browning
In a large bowl, combine:
- 8 cups water
- ¼ cup lemon juice
Place peach slices into the solution as you work.
This prevents oxidation and keeps peaches bright and attractive.
Step 4: Make the Syrup
In a saucepan, combine water and sugar according to your preferred sweetness level.
Heat over medium heat.
Stir until sugar completely dissolves.
Maintain a gentle simmer.
Do not boil aggressively.
The syrup should remain clear and smooth.
Step 5: Hot Pack the Peaches
Drain peach slices from the lemon water solution.
Add peach slices to the simmering syrup.
Cook gently for 5 minutes.
This hot-pack method helps remove excess air from the fruit and improves shelf life.
Stir carefully to avoid breaking the slices.
Step 6: Fill the Jars
Using a canning funnel, fill warm jars with hot peach slices.
Leave approximately ½ inch headspace.
Ladle hot syrup over the peaches.
Maintain the same ½ inch headspace.
Remove trapped air bubbles by running a non-metallic utensil around the inside edge of the jar.
Adjust syrup if necessary.
Wipe jar rims with a clean damp cloth.
Place lids on jars and tighten bands until fingertip tight.
Step 7: Process in Water Bath Canner
Place filled jars into the prepared water bath canner.
Ensure jars are covered by at least 1–2 inches of water.
Bring water to a full rolling boil.
Processing Times
Pint Jars
- Process for 20 minutes
Quart Jars
- Process for 25 minutes
Adjust processing times according to your altitude if necessary.
Maintain a steady boil throughout processing.
Step 8: Cool and Seal
Once processing is complete:
Turn off heat.
Remove canner lid carefully.
Allow jars to rest in the canner for 5 minutes.
Using a jar lifter, transfer jars to a towel-lined surface.
Let cool undisturbed for 12–24 hours.
Do not tighten bands or press lids during cooling.
Step 9: Check the Seals
After cooling:
- Press the center of each lid.
- Properly sealed lids will not flex up and down.
- Remove bands for storage if desired.
Any unsealed jars should be refrigerated and consumed within one week.
Storage Instructions
Store sealed jars in a cool, dark place.
Ideal storage temperature:
- 50°F–70°F (10°C–21°C)
For best quality, use within:
- 12–18 months
Properly sealed jars may remain safe beyond this period, though flavor and texture may gradually decline.
Serving Suggestions
Homemade canned peach slices are incredibly versatile.
Enjoy them:
- Over yogurt
- In oatmeal
- On pancakes
- In peach cobbler
- In fruit salads
- Blended into smoothies
- As an ice cream topping
- In trifles and parfaits
- Alongside roasted meats
Recipe Tips
Use Fresh Peaches
The better the fruit, the better the final canned product.
Avoid Overripe Fruit
Very soft peaches can become mushy during processing.
Remove Air Bubbles
This step improves seal quality and storage stability.
Keep Jars Hot
Warm jars reduce the risk of thermal shock and breakage.
Maintain Proper Headspace
Too much or too little headspace can affect sealing success.
Flavor Variations
Vanilla Peach Slices
Add 1 vanilla bean to the syrup while heating.
Cinnamon Peach Slices
Add a cinnamon stick to each jar before processing.
Honey Sweetened Peaches
Replace part of the sugar with honey.
Ginger Peach Slices
Add fresh ginger slices to the syrup for a subtle spicy note.
Common Mistakes to Avoid
- Using damaged peaches
- Overfilling jars
- Skipping lemon water treatment
- Under-processing jars
- Using jars with chips or cracks
- Tightening lids excessively
- Ignoring altitude adjustments
Avoiding these issues helps ensure safe and high-quality canned peaches.
Nutritional Information
Per 1 Cup Serving (Approximate)
- Calories: 145
- Protein: 1g
- Total Fat: 0g
- Saturated Fat: 0g
- Carbohydrates: 37g
- Fiber: 3g
- Sugars: 33g
- Sodium: 2mg
- Potassium: 285mg
- Vitamin A: 11% DV
- Vitamin C: 15% DV
- Calcium: 1% DV
- Iron: 2% DV