canning tomatoes
- Prep Time: 45 minutes
- Cook Time: 40 minutes
- Processing Time: 40–45 minutes (depending on jar size and altitude)
- Total Time: About 2 hours
- Difficulty: Moderate
- Yield: About 7 quart jars (or 14 pint jars)
Ingredients
- 21 pounds ripe tomatoes (for 7 quarts) or about 13 pounds (for 9 pints)
- Bottled lemon juice or food-grade citric acid
- Canning salt (optional, for flavor)
- Water for blanching
- Ice water for cooling
- Water for the boiling water canner
Per Jar
For Quart Jars
- 2 tablespoons bottled lemon juice or
- ½ teaspoon citric acid
- 1 teaspoon canning salt (optional)
For Pint Jars
- 1 tablespoon bottled lemon juice or
- ¼ teaspoon citric acid
- ½ teaspoon canning salt (optional)
Equipment Needed
- Boiling water bath canner with rack
- Mason jars with new lids and bands
- Jar lifter
- Canning funnel
- Bubble remover or plastic spatula
- Ladle
- Large stockpot
- Sharp knife
- Cutting board
- Large bowl filled with ice water
- Clean kitchen towels
Instructions
Step 1: Prepare the Tomatoes
Wash the tomatoes thoroughly under cool running water.
Remove any bruised or damaged areas.
Bring a large pot of water to a rolling boil.
Score a small “X” on the bottom of each tomato.
Place tomatoes into the boiling water for about 30–60 seconds until the skins begin to loosen.
Immediately transfer them to an ice water bath.
Once cool enough to handle, peel away the skins and remove the cores.
Leave the tomatoes whole, halve them, or cut them into large chunks according to your preference.
Step 2: Prepare the Jars
Wash jars, lids, and bands with hot, soapy water.
Keep the jars hot until ready to fill by placing them in simmering water or a warm oven (following the manufacturer’s recommendations).
Prepare the canner according to the manufacturer’s instructions and begin heating the water.
Step 3: Heat the Tomatoes
Place the peeled tomatoes into a large stockpot.
Bring them to a gentle boil over medium heat.
Cook for about 5 minutes, stirring occasionally.
Heating the tomatoes before filling the jars helps remove air and improves processing.
Step 4: Add Acid
Place bottled lemon juice or citric acid into each hot jar according to the measurements listed above.
Add canning salt if desired.
Acidification is essential because tomato acidity varies and safe acidity levels are necessary for water bath canning.
Step 5: Fill the Jars
Using a canning funnel and ladle, fill each hot jar with the hot tomatoes and their juices.
Leave ½ inch of headspace at the top of each jar.
Remove any trapped air bubbles using a bubble remover or plastic spatula.
Adjust the headspace if necessary.
Wipe the jar rims with a clean, damp cloth.
Center the lids on the jars and screw on the bands until fingertip tight.
Step 6: Process the Jars
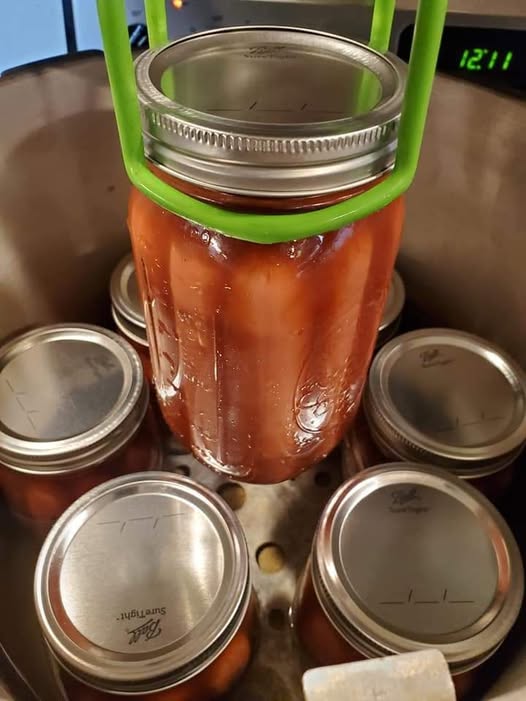
Carefully lower the filled jars into the boiling water canner using a jar lifter.
Ensure the jars are covered by at least 1 inch of boiling water.
Once the water returns to a full rolling boil, begin timing.
Process according to your altitude and jar size:
- Pint Jars: 40 minutes
- Quart Jars: 45 minutes
Adjust processing time as recommended for elevations above 1,000 feet.
Step 7: Cool the Jars
When processing is complete, turn off the heat and allow the jars to rest in the canner for 5 minutes.
Carefully remove the jars and place them on a towel-lined countertop.
Allow them to cool undisturbed for 12–24 hours.
Step 8: Check the Seals
After cooling, press the center of each lid.
A properly sealed lid will not flex up and down.
Remove the screw bands, wipe the jars clean, label them with the date, and store them in a cool, dark place.
Helpful Tips
- Use only fresh, ripe tomatoes without signs of spoilage.
- Bottled lemon juice is recommended because it has standardized acidity.
- Never reduce the amount of acid added to each jar.
- Keep jars hot before filling to prevent thermal shock.
- Always use new canning lids for reliable sealing.
- Follow recommended processing times based on your altitude.
- Label each jar with the contents and date.
Serving Suggestions
Home-canned tomatoes are incredibly versatile and can be used in many recipes, including:
- Homemade pasta sauce
- Tomato soup
- Chili
- Beef stew
- Vegetable soup
- Lasagna
- Shakshuka
- Pizza sauce
- Salsa
- Casseroles
Storage
Store sealed jars in a cool, dry, dark location between 50°F and 70°F (10°C to 21°C).
For the best quality, use within 12–18 months.
Once opened, refrigerate and use within 5–7 days.
Discard any jars with broken seals, unusual odors, mold, or signs of spoilage.
Frequently Asked Questions
Can I use any variety of tomato?
Yes. Roma, San Marzano, Amish Paste, and other meaty varieties are excellent because they contain less water, but slicing tomatoes can also be canned successfully.
Why do I need bottled lemon juice?
Tomatoes naturally vary in acidity. Bottled lemon juice provides a consistent acidity level to help ensure safe water bath canning.
Can I add herbs or vegetables?
For safety, avoid adding onions, peppers, garlic, or fresh herbs to jars of plain canned tomatoes unless you are using a tested recipe designed for those ingredients.
Why did liquid separate inside the jar?
Liquid separation is common and does not necessarily indicate spoilage. Gently shaking the jar after opening will usually recombine the contents.
Nutrition Information (Per 1 Cup)
- Calories: 40
- Protein: 2g
- Carbohydrates: 9g
- Fat: 0g
- Saturated Fat: 0g
- Fiber: 2g
- Sugar: 6g
- Sodium: 15mg (without added salt)
- Potassium: 520mg
- Vitamin A: 20% DV
- Vitamin C: 35% DV
- Calcium: 2% DV
- Iron: 4% DV