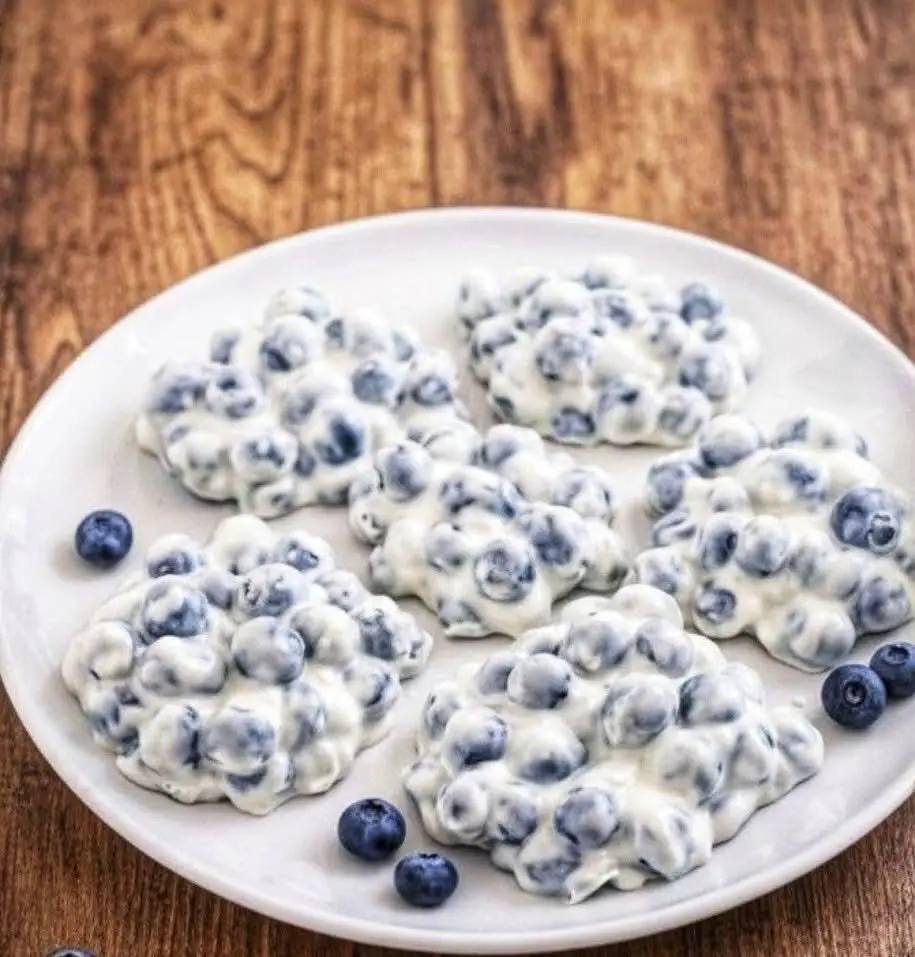
Frozen Blueberry Greek Yogurt Clusters
Total Time: 10 minutes active, 4+ hours inactive freezing
Difficulty Level: Incredibly Easy (Beginner-Friendly)
Yield: Approximately 24-30 clusters
Storage: Lasts up to 3 months in an airtight container in the freezer.
In the realm of healthy snacking, it’s rare to find a recipe that perfectly balances simplicity, nutrition, and sheer deliciousness. Enter Frozen Blueberry Greek Yogurt Clusters. This two-ingredient marvel requires zero special equipment, no added sugar, and transforms into a frosty, creamy, tangy-sweet treat that feels like a guilt-free indulgence. They’re perfect for a post-workout bite, a cool afternoon snack, or a satisfying after-dinner sweet. Think of them as the sophisticated, protein-packed cousin of frozen yogurt dots—bursting with antioxidant-rich berries in every single bite.
Nutritional Snapshot (Per Serving, ~3 clusters):
-
Calories: ~85
-
Protein: 6g
-
Total Fat: 0.5g
-
Carbohydrates: 12g
-
Dietary Fiber: 1g
-
Sugars: 9g (naturally occurring from yogurt and blueberries)
-
Calcium: 6% DV
-
Vitamin C: 10% DV
Note: Nutrition facts are estimates and can vary based on the specific brands of ingredients used.
Ingredients
-
2 cups (about 475g) plain, non-fat Greek yogurt
-
1 ½ cups (about 200g) fresh blueberries, washed and thoroughly dried
-
Optional Add-Ins for Customization:
-
1 teaspoon vanilla extract or almond extract (stirred into the yogurt)
-
1-2 tablespoons honey or maple syrup (for added sweetness)
-
2 tablespoons lemon zest (for a bright, zesty kick)
-
A sprinkle of cinnamon or chia seeds
-
Equipment Needed
-
Medium mixing bowl
-
Spoon or spatula
-
Baking sheet
-
Parchment paper or a silicone baking mat
-
Freezer-safe airtight container for storage
Step-by-Step Instructions
Step 1: Prep & Combine (Time: 5 minutes)
Line your baking sheet with parchment paper or a silicone mat. This prevents sticking and makes cleanup effortless. In your mixing bowl, add the Greek yogurt. If you’re using any optional flavorings like vanilla, honey, or lemon zest, stir them thoroughly into the yogurt now.
Next, gently fold in the dried blueberries. It’s crucial that the blueberries are dry—any excess water will cause the yogurt to become icy. Use a folding motion to coat every blueberry generously with the yogurt, trying not to crush them. The mixture will be thick and lumpy, which is exactly what you want.
Step 2: Form the Clusters (Time: 5 minutes)
Using a spoon, scoop up small mounds of the yogurt-blueberry mixture. Aim for about 1 to 1 ½ tablespoons per cluster. You’re not making perfect balls; the rustic, craggy shape is part of their charm. Drop each mound onto your prepared baking sheet, leaving a little space between them so they don’t freeze together.
Step 3: Freeze Until Solid (Time: Minimum 4 hours, preferably overnight)
Place the baking sheet flat in the freezer. Allow the clusters to freeze completely, uncovered, for at least 4 hours. For the best texture and to prevent ice crystals, leaving them overnight is ideal. The slow, deep freeze ensures the yogurt becomes firm and creamy, not icy.
Step 4: Store & Serve (Lasts up to 3 Months)
Once the clusters are frozen rock-solid, promptly transfer them to a freezer-safe airtight container or a zip-top freezer bag. Place a small piece of parchment paper between layers if stacking to prevent sticking. They will keep for up to 3 months.
To Serve: Enjoy them straight from the freezer! They are meant to be eaten frozen. Let them sit on your tongue for a moment to slightly soften, revealing the creamy yogurt interior and the juicy, frozen blueberry burst.
Chef’s Notes & Tips for Success
-
Yogurt is Key: Use a thick, high-quality Greek yogurt (like Fage or Chobani) for the best texture. Regular yogurt is too thin and will not hold its shape.
-
Berry Varieties: While blueberries are classic, you can use raspberries, chopped strawberries, or blackberries. Ensure all berries are dry and not too large.
-
Avoid Ice Crystals: The two secrets to a creamy, not icy, texture are using dry fruit and storing the frozen clusters in an airtight container as soon as they’re solid.
-
Perfect Portions: This recipe is easily halved or doubled. They are a fantastic make-ahead snack for busy weeks.
-
Serving Ideas: Crumble a few clusters over oatmeal, blend into a smoothie for instant thickness, or enjoy them as a cool, protein-rich dessert.