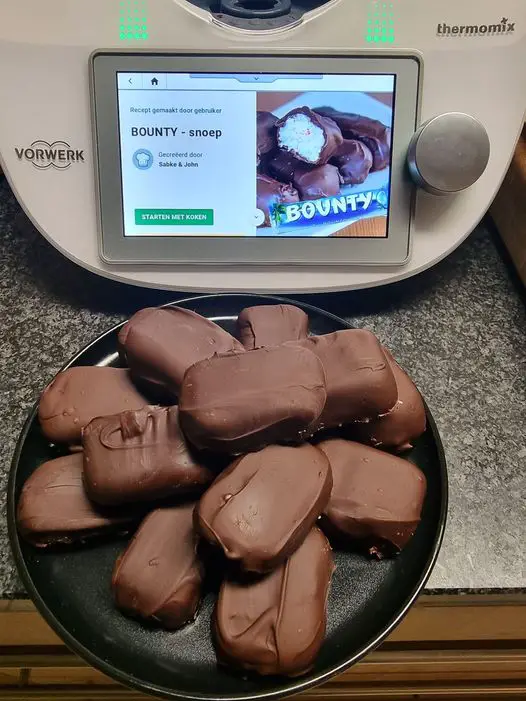
Homemade Bounty
Preparation Time: 20 minutes
Cooking Time: 10 minutes
Total Time: 30 minutes (plus chilling time)
Intensity: Easy
Homemade Bounty Bars are a delicious treat that combines sweet, creamy coconut with a smooth chocolate coating. With the help of your Thermomix, this recipe is super simple and fast to prepare. These bars are perfect for snacking or as a homemade gift for friends and family. Let’s dive in!
Ingredients:
For the Coconut Filling:
-
200g desiccated coconut
-
150g sweetened condensed milk
-
2 tablespoons coconut oil (or butter)
-
1 teaspoon vanilla extract (optional)
For the Chocolate Coating:
-
200g dark chocolate (at least 70% cocoa)
-
1 tablespoon coconut oil (for smoothness in the chocolate)
Method:
Step 1: Prepare the Coconut Filling
-
Combine Coconut Ingredients
In your Thermomix bowl, add desiccated coconut (200g), sweetened condensed milk (150g), and coconut oil (2 tablespoons). If using, add vanilla extract (1 tsp) to enhance the flavor. -
Mix the Filling
Blend the ingredients for 10 seconds on speed 4 until well combined. Scrape down the sides of the bowl and mix again for another 5-10 seconds to ensure everything is evenly mixed. -
Shape the Coconut Mixture
Once the mixture is ready, scoop out small amounts and shape them into small bars or balls with your hands. You should get about 12-16 bars, depending on the size you make them. Place the shaped coconut pieces on a baking tray lined with parchment paper. -
Chill the Bars
Place the coconut bars in the refrigerator for at least 30 minutes or until firm. This will help them hold their shape when dipped in chocolate.
Step 2: Prepare the Chocolate Coating
-
Melt the Chocolate
Place the dark chocolate (200g) and coconut oil (1 tablespoon) into the Thermomix bowl. Melt for 3 minutes at 50°C on speed 2, or until completely smooth. If you prefer a sweeter chocolate coating, you can use milk chocolate instead.
Step 3: Coat the Coconut Bars
-
Dip the Coconut Bars
Once the coconut bars are firm, dip each bar into the melted chocolate, making sure it is fully coated. Use a fork or spoon to lift the bars out of the chocolate, allowing any excess to drip off. -
Place on Tray
Place the coated bars back onto the parchment paper-lined tray. You may want to drizzle any remaining chocolate over the top of the bars for a nice finish. -
Chill Again
Return the bars to the refrigerator for another 30 minutes or until the chocolate has fully set.
Step 4: Serve and Enjoy
-
Serve the Bars
Once the chocolate coating has set, your Homemade Bounty Bars are ready to enjoy! Store them in an airtight container in the fridge for up to 1-2 weeks or keep them at room temperature if you plan to eat them quickly.
Tips for Perfect Homemade Bounty Bars:
-
Adjust Sweetness: If you prefer a less sweet filling, you can reduce the amount of condensed milk or replace it with coconut cream for a more natural sweetness.
-
Chocolate Coating Variations: You can use milk chocolate if you prefer a sweeter coating, or even white chocolate for a different flavor profile.
-
Storage: Keep the bars refrigerated to maintain the shape and texture of the chocolate coating. If you prefer, you can freeze them for up to 3 months for longer storage.
-
Add-ins: For extra texture, try adding chopped almonds or hazelnuts to the coconut filling before shaping them into bars.
Nutrition Information (Per Bar, based on 16 servings):
-
Calories: 160 kcal
-
Fat: 13g
-
Saturated Fat: 10g
-
Carbohydrates: 14g
-
Sugars: 13g
-
Protein: 1g
-
Fiber: 2g
-
Sodium: 10mg
Note: Nutrition values are approximate and may vary depending on specific ingredients used. For more precise nutritional information, use a recipe calculator.
Final Thoughts:
These Homemade Bounty Bars are an easy and delightful treat that brings the tropical flavors of coconut and chocolate together in one bite. Using the Thermomix, this recipe is a breeze to prepare, and the result is just as good (if not better!) than store-bought versions. Whether you’re craving a sweet snack, planning a special treat for a gathering, or making a batch of homemade gifts, these bars are sure to satisfy your chocolate and coconut cravings.
Enjoy them straight from the fridge for the perfect texture and indulgence!