jar lifter
- Preparation Time: 5 minutes
- Usage Time: 10–30 minutes (depending on your canning batch)
- Total Time: 15–35 minutes
Difficulty Level
Easy
No special skills are required, but careful handling and proper technique are essential for safety.
Equipment Needed
- Jar lifter
- Mason jars
- Water bath canner or pressure canner
- Canning rack
- Clean kitchen towel
- Canning funnel
- Bubble remover
- Magnetic lid lifter (optional)
- Heat-resistant gloves (optional)
Step-by-Step Instructions
Step 1: Inspect the Jar Lifter
Before beginning, inspect your jar lifter carefully.
Make sure:
- Rubber grips are secure.
- Hinges move smoothly.
- There are no loose screws.
- Metal is not bent.
- Rubber coating is intact.
A damaged jar lifter should not be used because it may lose its grip on hot jars.
Step 2: Prepare Your Canning Jars
Fill jars according to your tested canning recipe.
Leave the recommended headspace and wipe jar rims clean before placing lids and rings on the jars.
Arrange the filled jars on the canning rack.
Step 3: Process the Jars
Place jars into your boiling water canner or pressure canner according to the recipe directions.
Process for the required amount of time.
Do not attempt to remove jars until processing is complete.
Step 4: Position the Jar Lifter
Open the jar lifter wide enough to fit around the neck of the jar.
Position the rubber-coated ends just below the jar’s screw band.
Avoid gripping:
- The lid
- The top of the jar
- The glass shoulder
The jar lifter should grip the narrow neck of the jar securely.
Step 5: Lift Carefully
Squeeze the handles firmly.
Lift the jar straight upward.
Keep the jar level during lifting.
Tilting the jar may interfere with sealing or allow liquid to escape.
Step 6: Remove from the Canner
Lift slowly out of the boiling water.
Allow excess water to drain back into the canner.
Avoid sudden movements.
Never shake the jar.
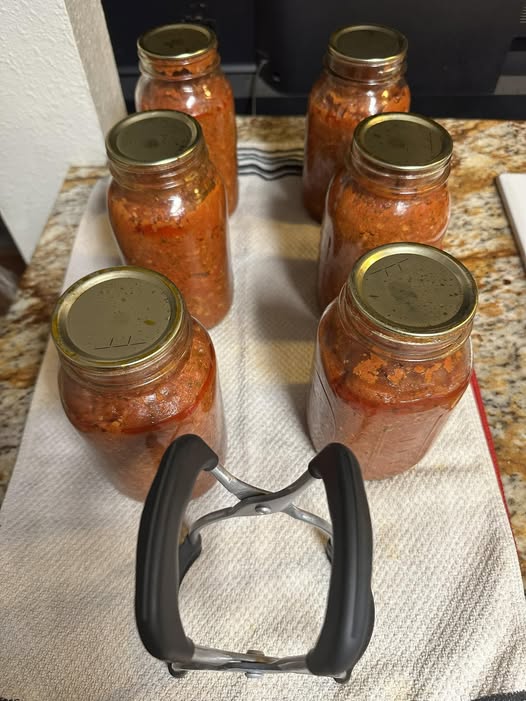
Step 7: Place on a Cooling Surface
Transfer the jar to a towel-covered countertop or cooling rack.
Leave at least one inch of space between jars.
This allows air to circulate for even cooling.
Step 8: Allow Jars to Cool
Do not tighten bands.
Do not press the lids.
Allow jars to cool naturally for 12–24 hours.
After cooling, check each seal according to safe home canning guidelines.
Tips for Safe Use
- Always grip below the screw band.
- Lift jars vertically.
- Keep a firm grip.
- Work slowly.
- Never rush.
- Replace worn rubber grips.
- Keep hands dry.
- Do not use regular kitchen tongs.
- Inspect jars for cracks before use.
- Follow tested canning recipes from reliable sources.
Common Mistakes
Gripping Too High
Holding the lid instead of the neck may cause the jar to slip.
Tilting the Jar
Tilting can break the seal or cause food to leak.
Carrying One-Handed
Always use both hands on the jar lifter handles.
Using Damaged Equipment
Bent or loose jar lifters should be replaced.
Touching Hot Jars
Never attempt to handle freshly processed jars without a jar lifter.
Cleaning Your Jar Lifter
After every canning session:
- Wash with warm, soapy water.
- Rinse thoroughly.
- Dry completely.
- Store in a dry location.
If your jar lifter is dishwasher safe, follow the manufacturer’s recommendations.
Storage
Store the jar lifter:
- In a kitchen drawer
- With canning supplies
- Hanging on a utensil rack
- In a dry cabinet
Avoid damp storage areas to reduce the chance of rust.
Why Every Home Canner Needs One
A jar lifter provides:
- Improved safety
- Better grip
- Reduced burn risk
- Easier handling
- More control over heavy jars
- Greater confidence during canning
It is considered an essential tool by most experienced home canners.
Maintenance
Inspect regularly for:
- Rust
- Loose hinges
- Damaged rubber
- Bent handles
Replace the tool if it no longer grips jars securely.
Proper maintenance helps ensure safe and reliable use.
Frequently Asked Questions
Can I use regular tongs instead?
No. Regular kitchen tongs are not designed to securely hold heavy glass canning jars and may slip.
Will one jar lifter fit all jars?
Most jar lifters fit both regular-mouth and wide-mouth Mason jars, but always check the manufacturer’s specifications.
Can I use a jar lifter for empty jars?
Yes. It can be used for both empty and full jars, though it is most valuable for safely handling hot, filled jars.
Do I need heat-resistant gloves?
They are optional. A properly functioning jar lifter should provide enough distance from the hot jars, but gloves can add extra protection.
Final Thoughts
A jar lifter may seem like a simple kitchen tool, but it plays a vital role in safe and successful home canning. By providing a secure grip on hot Mason jars, it helps prevent burns, spills, and broken glass while making the canning process smoother and more efficient. With proper use, regular inspection, and routine cleaning, a quality jar lifter can last for many years and become one of the most dependable tools in your food preservation kit. Whether you are preserving homemade jams, pickles, fruits, vegetables, or sauces, investing in a reliable jar lifter is a small step that greatly improves both safety and convenience.
Usage Information
- Preparation Time: 5 minutes
- Usage Time: 10–30 minutes
- Cooling Time: 12–24 hours (for canned jars)
- Total Time: Approximately 15–35 minutes, plus cooling time
- Difficulty: Easy
Nutrition Information
A jar lifter is a kitchen tool and is not edible, so it does not have nutritional values.
- Calories: 0
- Protein: 0 g
- Fat: 0 g
- Carbohydrates: 0 g
- Fiber: 0 g
- Sugar: 0 g
- Sodium: 0 mg