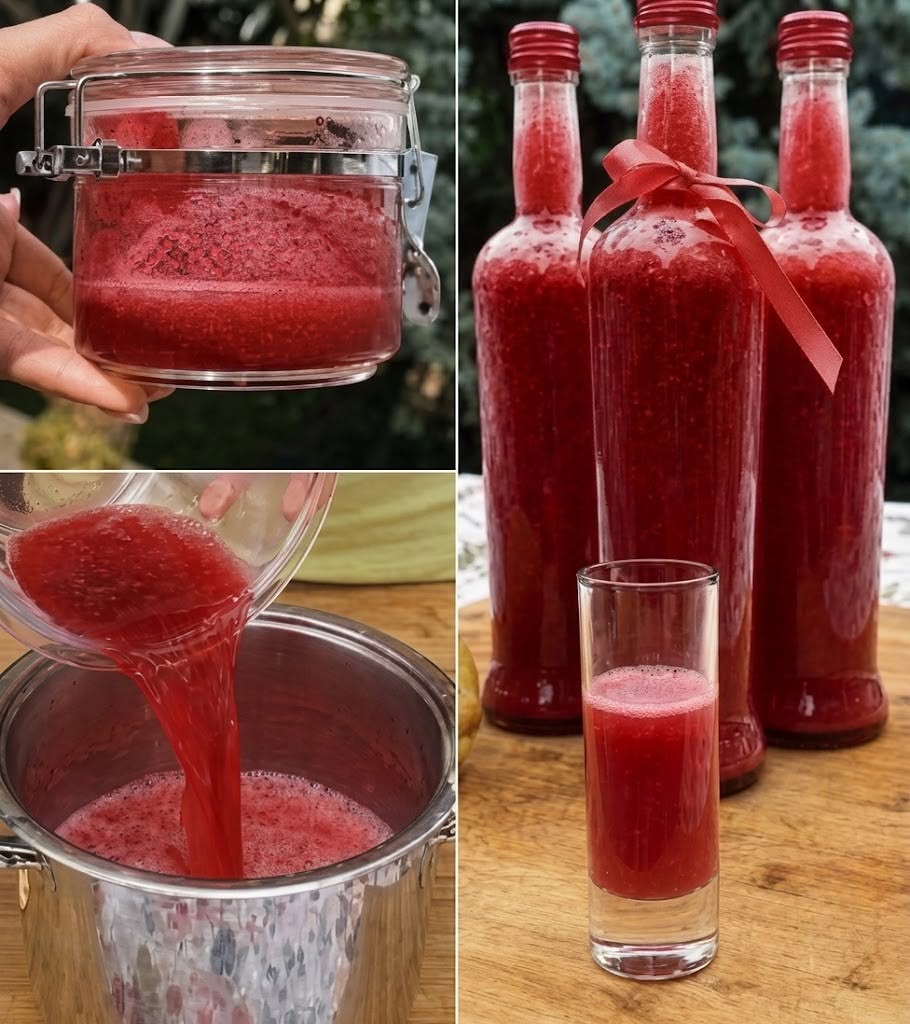
Refreshing Homemade Strawberry Juice canning
Prep Time: 20 minutes
Cook Time: 15 minutes
Canning Process Time: 15 minutes (Pints) / 20 minutes (Quarts)
Total Time: Approximately 1 hour 15 minutes
Intensity: Medium (requires stovetop attention and basic canning knowledge)
Yield: 6 x 1-pint jars (or 3 x 1-quart jars)
Method: Water Bath Canning
Why This Recipe Works
Store-bought strawberry juice often tastes more like candy than fruit. This homemade version captures the bright, sun-ripened essence of fresh strawberries, preserved at their peak. By using a hot-water bath canning method, you create a shelf-stable concentrate that can be enjoyed year-round. Dilute with cold water for a refreshing summer drink, or use it as a base for cocktails, smoothies, or homemade sodas.
Ingredients
-
4 lbs fresh, ripe strawberries (about 2 large baskets)
-
6 cups water (divided: 4 cups for cooking + 2 cups for syrup)
-
1½ cups granulated sugar (adjust to taste; use up to 2 cups for sweeter juice)
-
2 tbsp fresh lemon juice (bottled lemon juice is recommended for canning safety – it has consistent acidity)
-
Optional: 1 tsp pure vanilla extract or 2 strips of lemon zest
Equipment Needed
-
Water bath canner with a rack
-
6 pint-sized canning jars (or 3 quart jars) with new lids and bands
-
Large non-reactive pot (stainless steel or enamel)
-
Fine-mesh strainer or cheesecloth
-
Potato masher or large spoon
-
Jar lifter, canning funnel, bubble remover tool
-
Clean kitchen towels
Nutrition Information (Per 8 oz serving, diluted 1:3 with water)
Note: This recipe produces a concentrated syrup. Nutrition is calculated for the finished concentrate before dilution.
| Nutrient | Amount per 2 tbsp concentrate |
|---|---|
| Calories | 55 |
| Total Fat | 0g |
| Sodium | 1mg |
| Total Carbohydrates | 14g |
| Dietary Fiber | 0.5g |
| Sugars | 12g (naturally occurring + added) |
| Protein | 0g |
| Vitamin C | 35% DV |
| Manganese | 8% DV |
Diluting 1 part concentrate with 3 parts water reduces sugar per serving to approximately 3g per 8oz glass.
Intensity Breakdown
| Step | Intensity Level | Why |
|---|---|---|
| Washing & hulling strawberries | Low | Simple but repetitive |
| Mashing and cooking fruit | Low-Medium | Requires occasional stirring |
| Straining juice | Medium | Needs patience and muscle to extract all liquid |
| Making syrup & combining | Low | Straightforward measuring and stirring |
| Filling hot jars | Medium-High | Hot liquids + glass = careful handling needed |
| Water bath canning | Medium | Managing boiling water safely |
| Cooling & sealing | Low | Passive, but requires patience (don’t touch!) |
Step-by-Step Instructions
Phase 1: Prepare the Strawberries
-
Wash the berries. Rinse strawberries thoroughly under cool running water. Drain in a colander.
-
Hull them. Remove green tops and any soft or bruised spots. Don’t skip this – spoiled fruit can ruin your entire batch.
Phase 2: Extract the Juice (Hot Extraction Method)
-
Combine berries and water. Place hulled strawberries into a large, non-reactive pot. Add 4 cups of water.
-
Cook until soft. Bring to a boil over medium-high heat, then reduce to a simmer. Cover and cook for 10 minutes, mashing occasionally with a potato masher.
-
Mash thoroughly. After 10 minutes, mash the berries well to release all juices.
-
Strain the juice. Set a fine-mesh strainer over a large bowl or another pot. Line it with two layers of damp cheesecloth for crystal-clear juice. Pour the cooked berry mixture through. Do not press or squeeze – let it drip naturally for 15-20 minutes. (Squeezing makes cloudy juice with sediment.)
Phase 3: Make the Sweet Syrup
-
Combine sugar and water. In a clean pot, combine 1½ cups sugar and the remaining 2 cups water.
-
Heat to dissolve. Bring to a gentle boil, stirring until sugar completely dissolves. Remove from heat.
-
Mix juice and syrup. Pour the strained strawberry juice into the syrup pot. Stir in lemon juice. (Lemon juice is critical for safe water bath canning – it raises acidity to prevent botulism.)
Phase 4: Prepare Jars and Canning Equipment
-
Sterilize jars. Place clean jars in the water bath canner, cover with water, and boil for 10 minutes. Keep them hot until ready to use.
-
Simmer lids. Place new lids in a small saucepan of simmering water (not boiling). Bands only need washing.
-
Reheat juice. Bring the strawberry juice mixture to a simmer (185°F – small bubbles at the edges). Do not boil vigorously or you’ll lose flavor.
Phase 5: Fill and Process
-
Fill hot jars. Remove one jar at a time from the canner. Place a canning funnel on top. Ladle hot juice into the jar, leaving ½-inch headspace.
-
Remove air bubbles. Run a bubble remover tool or a clean chopstick along the inside edge of the jar. Adjust headspace if needed.
-
Wipe rims. Dip a clean cloth in vinegar or hot water and wipe the jar rim thoroughly. Any residue prevents sealing.
-
Apply lids. Center a lid on the jar. Screw on a band until fingertip-tight (don’t over-tighten).
-
Load canner. Place filled jars into the water bath canner, ensuring they are covered by at least 1 inch of water. Add boiling water if needed.
-
Process. Cover the canner, bring to a full rolling boil, and process:
-
Pint jars: 15 minutes
-
Quart jars: 20 minutes
-
(Adjust for altitude: add 5 minutes for 1,001–3,000 ft, 10 minutes for 3,001–6,000 ft, 15 minutes above 6,000 ft)
-
Phase 6: Cool and Store
-
Turn off heat. Remove the canner lid and wait 5 minutes for the jars to settle.
-
Remove jars. Using a jar lifter, carefully transfer jars to a towel-lined countertop. Do not tilt or tighten bands.
-
Cool undisturbed. Leave jars alone for 12–24 hours. You’ll hear satisfying “ping” sounds as they seal.
-
Check seals. Press the center of each lid. If it doesn’t flex down, it’s sealed. Refrigerate any unsealed jars and use within 2 weeks.
-
Label and store. Label sealed jars with date and contents. Store in a cool, dark cupboard for up to 12 months.
How to Serve Your Canned Strawberry Juice
-
Classic strawberry drink: Mix 1 part concentrate with 3 parts cold or sparkling water. Add ice and a mint sprig.
-
Strawberry lemonade: Combine 1 part juice, 1 part fresh lemon juice, and 2 parts water.
-
Smoothie base: Blend ¼ cup concentrate with frozen bananas and yogurt.
-
Cocktail mixer: Shake with vodka, lime, and simple syrup.