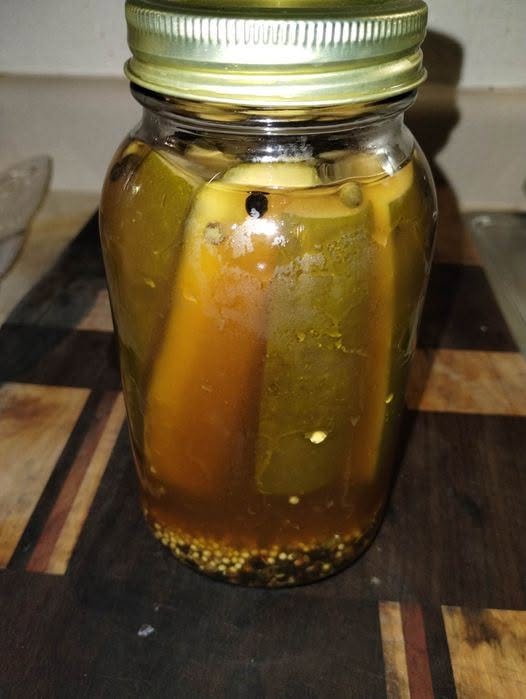
Austin’s Dirty Spice Pickles
- Prep Time: 20 minutes
- Cooking Time: 10 minutes
- Cooling Time: 30 minutes
- Refrigeration Time: 48–72 hours
- Total Time: About 3 days
- Difficulty: Easy
- Servings: 2 quart jars
Ingredients
- 2 pounds pickling cucumbers
- 4 cups white vinegar (5% acidity)
- 2 cups water
- 3 tablespoons kosher salt
- 1 tablespoon granulated sugar
- 8 garlic cloves, peeled
- 4 fresh dill sprigs
- 2 teaspoons mustard seeds
- 2 teaspoons coriander seeds
- 2 teaspoons whole black peppercorns
- 1 teaspoon red pepper flakes
- 2 teaspoons dill seeds (optional)
- 1 teaspoon celery seeds
- 1 teaspoon turmeric
- 2 bay leaves
- 2 fresh jalapeños, sliced
- 1 teaspoon whole allspice berries
- ½ teaspoon crushed chili flakes (optional for extra heat)
Equipment
- Two clean quart-sized mason jars
- Medium saucepan
- Sharp knife
- Cutting board
- Measuring cups
- Measuring spoons
- Tongs
- Funnel (optional)
Instructions
Step 1: Prepare the Cucumbers
Wash the cucumbers thoroughly under cold running water. Trim about ⅛ inch from the blossom end of each cucumber, as this helps maintain a crisp texture. Slice them into spears, thick rounds, or leave smaller cucumbers whole depending on your preference.
Step 2: Prepare the Jars
Divide the garlic cloves, dill sprigs, bay leaves, sliced jalapeños, mustard seeds, coriander seeds, celery seeds, peppercorns, allspice berries, dill seeds, turmeric, and red pepper flakes evenly between the two clean jars.
Pack the cucumbers tightly into the jars without crushing them.
Step 3: Make the Brine
In a medium saucepan combine:
- White vinegar
- Water
- Kosher salt
- Sugar
Bring the mixture to a gentle boil over medium-high heat for about 5–7 minutes, stirring until the salt and sugar dissolve completely.
Step 4: Fill the Jars
Carefully pour the hot brine over the cucumbers until they are completely submerged.
Leave approximately ½ inch of headspace at the top of each jar.
Use a clean utensil to remove any trapped air bubbles.
Seal the jars with clean lids.
Step 5: Cool
Allow the jars to cool on the countertop for about 30 minutes.
Once cooled, refrigerate immediately.
Step 6: Refrigerate
Allow the pickles to chill for at least 48 hours before tasting.
For the deepest flavor, wait 4–5 days.
The spices continue to infuse the cucumbers, creating a richer and more complex flavor every day.
Cooking Temperature and Intensity
- Brine Heat: Medium-high
- Boiling Temperature: Approximately 212°F (100°C)
- Boil Time: 5–7 minutes
- Cooling Time: 30 minutes
- Refrigeration: Minimum 48 hours
- Best Flavor: After 4–5 days
Tips for Perfect Dirty Spice Pickles
Choose fresh, firm pickling cucumbers with no soft spots for the crunchiest results.
Always use kosher or pickling salt rather than table salt, which may cloud the brine.
Fresh garlic delivers stronger flavor than pre-minced garlic.
Whole spices provide the cleanest flavor and keep the brine clear.
Adding grape leaves, oak leaves, or a small pinch of food-grade calcium chloride can help maintain crispness.
Avoid using waxed cucumbers whenever possible.
Keep the cucumbers fully submerged in the brine to prevent spoilage.
Flavor Variations
Extra Hot
Add sliced serrano peppers or habaneros.
Smoky Version
Include one teaspoon smoked paprika and a pinch of chipotle flakes.
Garlic Lover’s Pickles
Double the garlic cloves.
Herb Garden Pickles
Add fresh thyme, oregano, or rosemary.
Sweet and Spicy
Increase the sugar to three tablespoons for a subtle sweet heat.
Serving Suggestions
Austin’s Dirty Spice Pickles pair wonderfully with:
- Cheeseburgers
- Fried chicken sandwiches
- Hot dogs
- Pulled pork sandwiches
- Barbecue platters
- Grilled sausages
- Potato salad
- Tuna salad
- Egg salad sandwiches
- Charcuterie boards
- Smoked meats
- Cheese platters
- Bloody Mary cocktails
They also make an excellent chopped topping for potato salad, macaroni salad, deviled eggs, and wraps.
Storage Instructions
Store the jars in the refrigerator immediately after cooling.
These refrigerator pickles stay fresh for up to 2 months when kept cold and submerged in the brine.
Always use a clean fork or tongs when removing pickles to help maintain freshness.
If the brine becomes cloudy with an unpleasant odor or mold develops, discard the pickles.
Common Mistakes to Avoid
- Using overripe cucumbers
- Skipping the blossom-end trim
- Using iodized table salt
- Overboiling the brine
- Not allowing enough refrigeration time
- Packing the jars too loosely
- Allowing cucumbers to float above the brine
- Reusing old lids that don’t seal properly
Frequently Asked Questions
Can I make these less spicy?
Yes. Simply reduce or omit the jalapeños and red pepper flakes while keeping the aromatic spices.
Can I use apple cider vinegar?
Yes. Apple cider vinegar gives the pickles a slightly sweeter, fruitier flavor while maintaining proper acidity.
How long before they’re ready?
The pickles are enjoyable after 48 hours but reach their best flavor after about 4–5 days.
Can I reuse the brine?
It’s best to make a fresh batch of brine for food safety and consistent flavor rather than reusing old brine.
Can I can these for pantry storage?
This recipe is designed as a refrigerator pickle recipe. If you wish to shelf-stabilize pickles, use a tested water-bath canning recipe that follows current food safety guidelines.
Nutrition Information (Per Serving)
- Calories: 18
- Protein: 1 g
- Total Fat: 0 g
- Saturated Fat: 0 g
- Carbohydrates: 4 g
- Fiber: 1 g
- Sugars: 2 g
- Sodium: 460 mg
- Potassium: 140 mg
- Vitamin C: 8% Daily Value
- Vitamin K: 12% Daily Value
- Calcium: 2% Daily Value
- Iron: 2% Daily Value