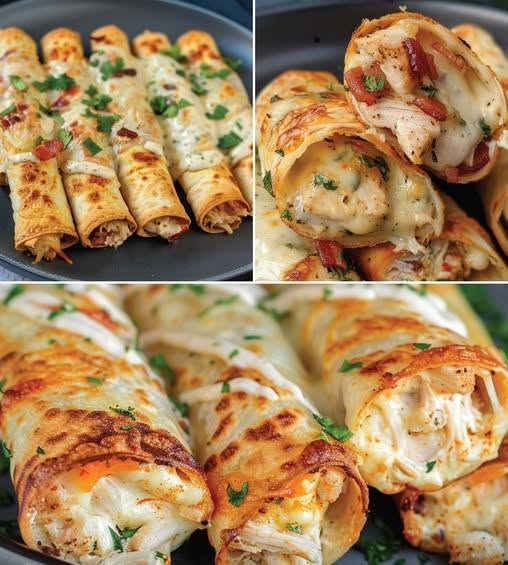
Chicken Bacon Ranch Roll-Ups
- Prep Time: 20 minutes
- Cook Time: 30 minutes
- Total Time: 50 minutes
- Servings: 4
- Difficulty: Easy
Ingredients
- 4 boneless, skinless chicken breasts
- 8 slices bacon, cooked until crispy and chopped
- 1 cup shredded cheddar cheese
- 4 ounces cream cheese, softened
- 3 tablespoons ranch dressing
- 1 tablespoon ranch seasoning mix
- 1 teaspoon garlic powder
- 1 teaspoon onion powder
- ½ teaspoon smoked paprika
- ½ teaspoon black pepper
- ½ teaspoon salt
- 1 tablespoon chopped fresh parsley
- 2 tablespoons olive oil
- Toothpicks or kitchen twine for securing
Optional Garnishes
- Fresh parsley
- Green onions
- Extra ranch dressing
- Crumbled bacon
- Shredded cheddar cheese
Equipment Needed
- Cutting board
- Sharp knife
- Meat mallet
- Mixing bowl
- Baking dish
- Toothpicks
- Oven
- Instant-read thermometer
Instructions
Step 1: Prepare the Chicken
Preheat your oven to 375°F (190°C).
Place each chicken breast between two sheets of plastic wrap. Pound the chicken evenly until it reaches about ¼-inch thickness. This helps the chicken roll easily and cook evenly.
Season both sides with salt, pepper, garlic powder, onion powder, and smoked paprika.
Step 2: Make the Filling
In a medium mixing bowl combine:
- Cream cheese
- Ranch dressing
- Ranch seasoning
- Shredded cheddar cheese
- Chopped bacon
- Fresh parsley
Mix until smooth and evenly combined.
Step 3: Fill the Chicken
Spread approximately one-quarter of the filling onto each flattened chicken breast.
Leave a small border around the edges to prevent the filling from leaking during baking.
Step 4: Roll
Starting from the shorter end, tightly roll each chicken breast into a log.
Secure with toothpicks or tie with kitchen twine.
Step 5: Sear
Heat olive oil in a large skillet over medium-high heat.
Sear each chicken roll-up for 2–3 minutes per side until lightly golden.
This step adds extra flavor and helps keep the roll-ups together.
Step 6: Bake
Transfer the roll-ups to a lightly greased baking dish.
Bake for 25–30 minutes or until the internal temperature reaches 165°F (74°C).
If desired, sprinkle additional cheddar cheese over the top during the final 5 minutes of baking.
Step 7: Rest
Remove the chicken from the oven and allow it to rest for 5 minutes before removing the toothpicks.
Slice into rounds or serve whole.
Garnish with parsley, bacon crumbles, and a drizzle of ranch dressing.
Cooking Intensity
- Preparation Intensity: Easy
- Skill Level: Beginner
- Cooking Method: Searing and Baking
- Oven Temperature: 375°F (190°C)
- Searing Heat: Medium-High
- Internal Temperature: 165°F (74°C)
Serving Suggestions
Chicken Bacon Ranch Roll-Ups pair beautifully with:
- Garlic mashed potatoes
- Buttered green beans
- Roasted broccoli
- Caesar salad
- Macaroni and cheese
- Rice pilaf
- Steamed asparagus
- Dinner rolls
- Corn on the cob
For a lighter meal, serve over mixed greens with tomatoes, cucumbers, and ranch vinaigrette.
Tips for Success
- Pound the chicken evenly to ensure uniform cooking.
- Cook bacon until crispy so it maintains texture inside the filling.
- Do not overfill the chicken.
- Secure tightly with toothpicks.
- Use an instant-read thermometer for perfectly cooked chicken.
- Let the chicken rest before slicing to keep the juices inside.
- Freshly shredded cheese melts better than pre-shredded varieties.
Variations
Buffalo Chicken Roll-Ups
Mix buffalo sauce into the filling and use pepper jack cheese.
Spinach Ranch
Add chopped fresh spinach for extra nutrition and color.
Southwest Style
Mix in diced jalapeños, Monterey Jack cheese, and taco seasoning.
Italian Version
Replace ranch with Italian seasoning, mozzarella, and Parmesan cheese.
Keto Friendly
Serve with cauliflower mash and roasted vegetables for a low-carb dinner.
Storage
Store leftovers in an airtight container in the refrigerator for up to 4 days.
Freezing
Wrap each cooled roll-up individually.
Freeze for up to 3 months.
Thaw overnight in the refrigerator before reheating.
Reheating
Oven: Bake at 350°F (175°C) for 15–20 minutes.
Microwave: Heat for 2–3 minutes until warmed through.
Air Fryer: Reheat at 350°F (175°C) for 5–7 minutes.
Frequently Asked Questions
Can I prepare these ahead of time?
Yes. Assemble the roll-ups up to one day in advance and refrigerate until ready to bake.
Can I use chicken thighs?
Yes. Boneless, skinless chicken thighs work well, though cooking times may vary slightly.
What cheese works best?
Cheddar is classic, but mozzarella, Monterey Jack, Colby Jack, or pepper jack are all excellent choices.
How do I know when the chicken is done?
Use a meat thermometer. The thickest part of the chicken should register 165°F (74°C).
Can I make these gluten-free?
Yes. Check that your ranch seasoning and dressing are certified gluten-free.
Nutrition Information (Per Serving)
- Calories: 485
- Protein: 42g
- Fat: 31g
- Saturated Fat: 12g
- Carbohydrates: 4g
- Fiber: 0g
- Sugar: 2g
- Cholesterol: 155mg
- Sodium: 880mg
- Potassium: 620mg
- Calcium: 210mg
- Iron: 1.4mg