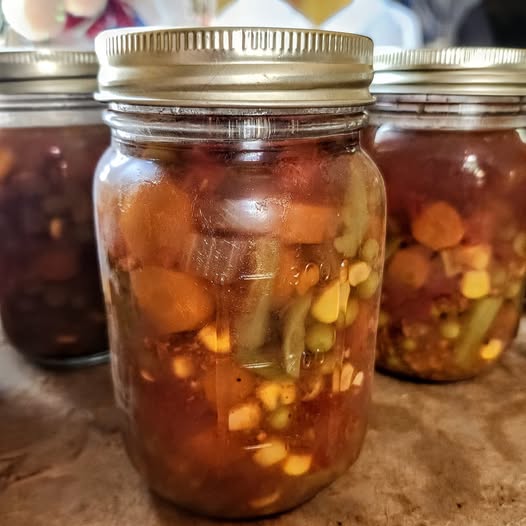
canned vegetable soup
- Prep Time: 35 minutes
- Cook Time: 35 minutes
- Pressure Canning Time: 75 minutes (pints) or 90 minutes (quarts, adjust as needed for altitude and your canner)
- Total Time: About 2 hours 30 minutes
Yield
- Servings: 12
- Yield: Approximately 6 quart jars (or 12 pint jars)
Ingredients
- 4 cups diced tomatoes with their juices
- 3 cups chopped carrots
- 3 cups green beans, cut into 1-inch pieces
- 2 cups diced celery
- 2 cups corn kernels
- 2 cups peas
- 2 cups diced potatoes
- 1½ cups chopped onions
- 3 cloves garlic, minced
- 8 cups low-sodium vegetable broth
- 2 tablespoons tomato paste
- 2 tablespoons olive oil
- 2 teaspoons dried thyme
- 2 teaspoons dried oregano
- 2 bay leaves
- 1 teaspoon black pepper
- 1 teaspoon paprika
- 1 teaspoon salt (or to taste before serving if preferred)
- 2 tablespoons chopped fresh parsley
Equipment Needed
- Large stockpot
- Pressure canner
- Canning jars, lids, and bands
- Jar lifter
- Canning funnel
- Bubble remover or non-metallic spatula
- Ladle
- Clean kitchen towels
Instructions
Step 1: Prepare the Vegetables
Wash all vegetables thoroughly.
Peel the carrots and potatoes if desired, then dice them into bite-sized pieces. Trim the green beans and cut them into 1-inch lengths. Dice the celery and onions, mince the garlic, and measure the remaining vegetables.
Step 2: Build the Soup Base
Heat the olive oil in a large stockpot over medium heat.
Add the onions and cook for about 5 minutes until softened. Stir in the garlic and cook for 1 minute, just until fragrant.
Mix in the tomato paste, then add the diced tomatoes, vegetable broth, thyme, oregano, paprika, black pepper, and bay leaves.
Bring the broth to a gentle boil.
Step 3: Add the Vegetables
Add the carrots, celery, green beans, potatoes, corn, and peas.
Reduce the heat to a simmer and cook for 20 to 25 minutes, stirring occasionally. The vegetables should begin to soften but still hold their shape, as they will continue cooking during the canning process.
Remove the bay leaves and stir in the chopped parsley.
Step 4: Prepare the Jars
Wash jars, lids, and bands according to the manufacturer’s instructions. Keep the jars hot until ready to fill.
Step 5: Fill the Jars
Using a canning funnel, ladle the hot soup into the hot jars, leaving 1 inch of headspace.
Remove trapped air bubbles with a non-metallic utensil, adjust the headspace if necessary, wipe the jar rims clean, and apply the lids and bands until fingertip tight.
Step 6: Pressure Can
Place the filled jars into a pressure canner with the recommended amount of water.
Process according to your pressure canner manufacturer’s instructions:
- Pint jars: 75 minutes
- Quart jars: 90 minutes
Adjust pressure and processing for your altitude and canner type as recommended by current canning guidelines.
Step 7: Cool and Store
Allow the pressure canner to depressurize naturally before opening.
Carefully remove the jars and place them on a towel-lined surface. Let them cool undisturbed for 12 to 24 hours.
Check that each lid has sealed properly. Store sealed jars in a cool, dark place for up to one year.
Serving Suggestions
Heat the soup until it reaches a gentle simmer before serving.
Enjoy it with:
- Crusty artisan bread
- Garlic toast
- Grilled cheese sandwiches
- Crackers
- Cornbread
- Green salad
- Baked potatoes
- Rice
- Cooked pasta
- Fresh herbs sprinkled on top
For extra protein, add cooked beans, lentils, shredded chicken, or cooked ground turkey after opening the jar and reheating.
Tips for Success
- Cut vegetables into similar sizes for even cooking.
- Use fresh, high-quality produce whenever possible.
- Avoid adding flour, cream, pasta, rice, or dairy before canning, as these ingredients are not recommended for pressure canning in this type of recipe.
- Leave the proper headspace to ensure a good seal.
- Label each jar with the date before storing.
- Always inspect jars before opening and discard any that show signs of spoilage.
Recipe Variations
Italian Vegetable Soup
Add Italian seasoning and stir in cooked pasta after opening and reheating.
Spicy Vegetable Soup
Increase the paprika and add crushed red pepper flakes or diced jalapeños before cooking.
Bean Vegetable Soup
After opening a jar, stir in cooked kidney beans, cannellini beans, or chickpeas while reheating.
Herb Garden Soup
Use fresh basil, rosemary, dill, and parsley for a fragrant twist.
Vegetable Barley Soup
Cook pearl barley separately and add it when reheating the soup rather than canning it.
Storage Instructions
Properly sealed jars can be stored in a cool, dry pantry for up to 12 months.
After opening, refrigerate the soup and use it within 3 to 4 days.
Frequently Asked Questions
Can I freeze this soup instead?
Yes. If you prefer not to can it, allow the soup to cool completely and freeze it in airtight freezer-safe containers for up to 3 months.
Why shouldn’t I water-bath can this recipe?
Because it contains low-acid vegetables, pressure canning is required to reach temperatures that destroy harmful bacteria. A boiling-water bath is not considered safe for this type of soup.
Can I add meat?
Yes, but if you plan to can meat with the soup, follow a tested pressure-canning recipe and recommended processing times for meat-containing soups.
Can I reduce the salt?
Yes. Salt is primarily for flavor in this recipe. You can reduce or omit it and season the soup after opening and reheating.
Estimated Nutrition (Per Serving)
- Calories: 145
- Protein: 4 g
- Total Fat: 3 g
- Saturated Fat: 0.5 g
- Cholesterol: 0 mg
- Carbohydrates: 28 g
- Dietary Fiber: 6 g
- Total Sugars: 8 g
- Sodium: 320 mg
- Potassium: 620 mg
- Calcium: 55 mg
- Iron: 2 mg
- Vitamin A: 110% Daily Value
- Vitamin C: 35% Daily Value