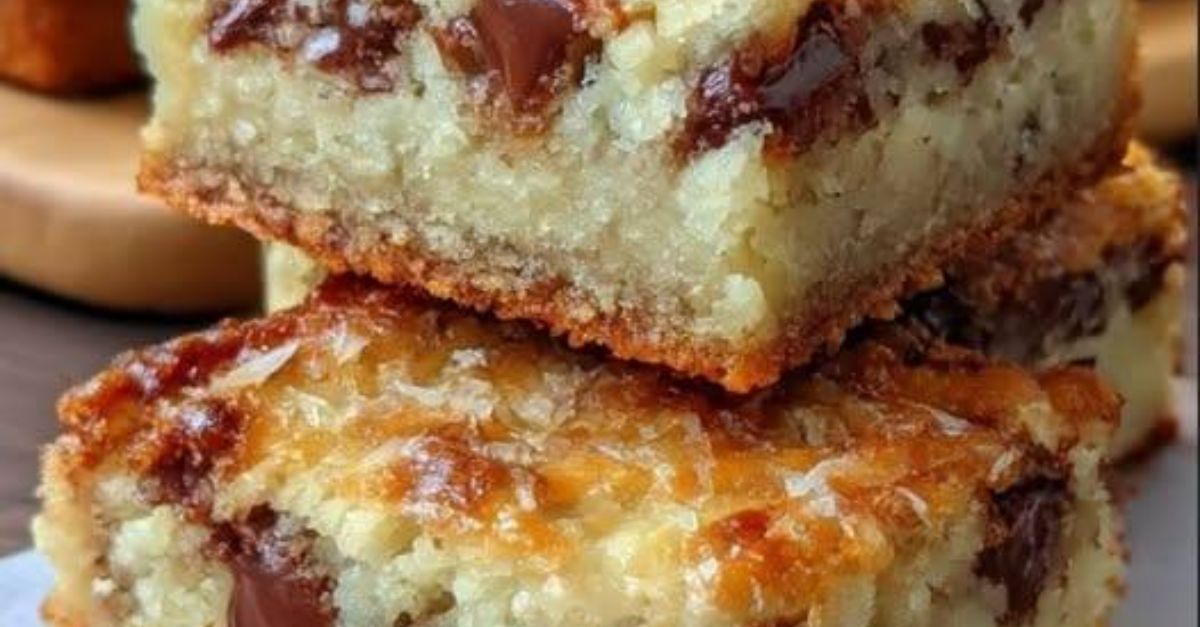
Congo Bars
Before you preheat the oven, understand what you’re getting into. Every recipe has a personality—here is the breakdown for Congo Bars.
Hands-On Time⚫⚫⚪⚪⚪ (15 min)Quick to assemble; no tempering or complex techniques.Waiting/Passive Time⚫⚫⚪⚪⚪ (30 min)Just the bake and a short cool-down.Mess Factor⚫⚫⚪⚪⚪ (2/5)One bowl, one spatula, one pan.Emotional Payoff⚫⚫⚫⚫⚫ (5/5)High.
| Intensity Factor | Rating (1–5) | Notes |
|---|---|---|
| Difficulty | ⚫⚪⚪⚪⚪ (1/5) | Basic mixing; no electric mixer required. |
| Minimal stickiness. | ||
| The aroma alone is worth the effort. |
Overall Vibe: Low stress, high reward. Perfect for beginner bakers or a last-minute potluck contribution.
⏱️ Timing Schema
Mixing5 minWhisk wet, fold in dry.Baking25–30 minHouse fills with butterscotch-toffee aroma.Cooling20 min (in pan)Resist the urge to cut hot; they will crumble.Total1 hourFrom empty counter to warm, gooey bars.
| Phase | Duration | What You Should Be Doing |
|---|---|---|
| Prep | 10 min | Measure dry ingredients, melt butter, chop chocolate. |
| Do not over-mix. | ||
📋 Ingredients
Use room temperature eggs for the best shine on your crust.
-
2 ⅔ cups (333g) all-purpose flour (spooned & leveled)
-
1 teaspoon baking powder
-
1 teaspoon kosher salt (use ½ tsp if using table salt)
-
¾ cup (170g / 1.5 sticks) unsalted butter, melted and slightly cooled
-
2 cups (400g) packed light brown sugar (dark brown will yield a stronger molasses flavor)
-
2 large eggs + 1 egg yolk (room temperature)
-
1 tablespoon vanilla extract (yes, a full tablespoon; do not skimp)
-
1 ½ cups (255g) semi-sweet chocolate chips
-
1 cup (120g) chopped walnuts or pecans (optional, but traditional)
🔪 Equipment Needed
-
9×13-inch baking pan (glass or light metal preferred; avoid dark non-stick, which burns bottoms)
-
Parchment paper (or foil + butter)
-
Medium mixing bowl (for dry)
-
Large mixing bowl (for wet)
-
Whisk
-
Silicone spatula
-
Cooling rack
👩🍳 Method (Step-by-Step)
Part 1: Preparation (Intensity: Low)
-
Position the rack in the center of your oven.
-
Preheat to 350°F (175°C). Note: This is lower than many cookie recipes because the bars are thick and need to bake through without burning the edges.
-
Line your 9×13 pan with parchment paper, leaving an overhang on two opposite sides. This creates a “sling” to lift the bars out later. If using foil, grease it lightly.
Part 2: Dry & Wet Mixing (Intensity: Medium)
-
Whisk the dry goods: In a medium bowl, combine flour, baking powder, and salt. Set aside.
-
Melt the butter: In a large microwave-safe bowl, melt the butter in 30-second increments. Let it cool for 5 minutes. Critical: If the butter is too hot, it will scramble your eggs.
-
Combine butter + sugar: Add the brown sugar to the melted butter. Whisk vigorously for 1 minute. The mixture should look like wet sand and start to slightly lighten in color.
-
Add eggs + yolk + vanilla: Add the eggs one at a time, whisking for 15 seconds after each. Then add the egg yolk and the tablespoon of vanilla. Whisk until the batter looks glossy and slightly thickened (about 30 seconds).
Part 3: The Fold (Intensity: Low – Be Gentle)
-
Add the flour mixture: Pour the dry ingredients into the wet. Use your spatula to fold the mixture. Do not use a mixer. Stir just until traces of flour remain. A few streaks are good.
-
Add the mix-ins: Add the chocolate chips and nuts (if using). Fold until the flour streaks disappear. Stop immediately. Over-mixing will make your Congo Bars tough and cakey, not chewy.
Part 4: Bake & Cool (Intensity: Patience)
-
Transfer to pan: Scrape the very thick batter into your prepared pan. It will be sticky. Use a lightly moistened spatula or your fingertips to press it evenly into the corners.
-
Bake for 25–30 minutes. Check at 25 minutes. The edges should be golden brown and pulling away from the sides. The center should look set (no jiggle) but a toothpick inserted should come out with moist crumbs—not wet batter, but not clean.
-
Critical cooling: Place the pan on a wire rack. Let cool for 20 minutes in the pan. Then use the parchment sling to lift the block onto the rack to cool completely (another 15 minutes) if you want clean slices. If you can’t wait, cut at 20 minutes for warm, messy, gooey bars.
✅ End Result (Sensory Check)
Your Congo Bars should have:
-
Top: Crackly, shiny, almost like the top of a brownie but lighter in color.
-
Edge: Slightly firm, chewy, with a caramelized crunch.
-
Center: Soft, dense, and moist. Not cakey. Not raw.
-
Flavor: Deep butterscotch from the brown sugar, amplified by vanilla, with pools of melted chocolate.
📦 Storage & Make-Ahead
Refrigerator1 weekTexture becomes fudgier.
| Method | Duration | Instructions |
|---|---|---|
| Room Temp | 5 days | In an airtight container, layered with parchment between bars. |
| Bring to room temp before eating. | ||
| Freezer | 3 months | Wrap individual bars in plastic, then foil. Thaw overnight in the fridge. |
💡 Recipe Notes & Swaps
-
Why “Congo Bar”? This recipe dates to the 1950s. It was named for the Belgian Congo, not the country code. It’s essentially a chocolate chip cookie baked as a bar, with a higher brown sugar ratio for chew.
-
Don’t have brown sugar? Make your own: Mix 2 cups white sugar with 2 tablespoons molasses.
-
No chocolate chips? Chop a 9oz chocolate bar (semi-sweet or milk) into chunks.
-
Nut-free: Omit the walnuts. Add 1 cup of shredded coconut or toffee bits for texture.
-
Gluten-free: Substitute a 1:1 gluten-free flour blend (like King Arthur Measure for Measure). Do not use single-flour substitutes (coconut/almond flour).
-
The egg yolk trick: The extra yolk adds fat and reduces protein, which inhibits gluten formation. This keeps the bars tender.
🧪 Troubleshooting (The “What Went Wrong” Guide)
Burnt bottom, raw middleDark non-stick pan + oven temp too high.No crackly topEggs were cold OR butter was too hot.Too greasyPan not lined correctly (grease slid under bars).
| Problem | Most Likely Cause | Fix for Next Time |
|---|---|---|
| Dry / cakey | Too much flour OR over-mixed the batter. | |
| Spoon & level your flour. Fold until just combined. | ||
| Lower to 325°F. Switch to a glass or light metal pan. | ||
| Use room temp eggs. Let melted butter cool for 5 minutes. | ||
| Always use parchment paper slings, no exceptions. |
🍽️ Suggested Pairings
-
Beverage: A tall glass of cold whole milk or a strong black coffee (the bitterness cuts the sugar).
-
Occasion: Bake sale, book club, or a rainy Saturday afternoon.
-
Serving style: Slightly warm with a scoop of vanilla bean ice cream and a drizzle of salted caramel.