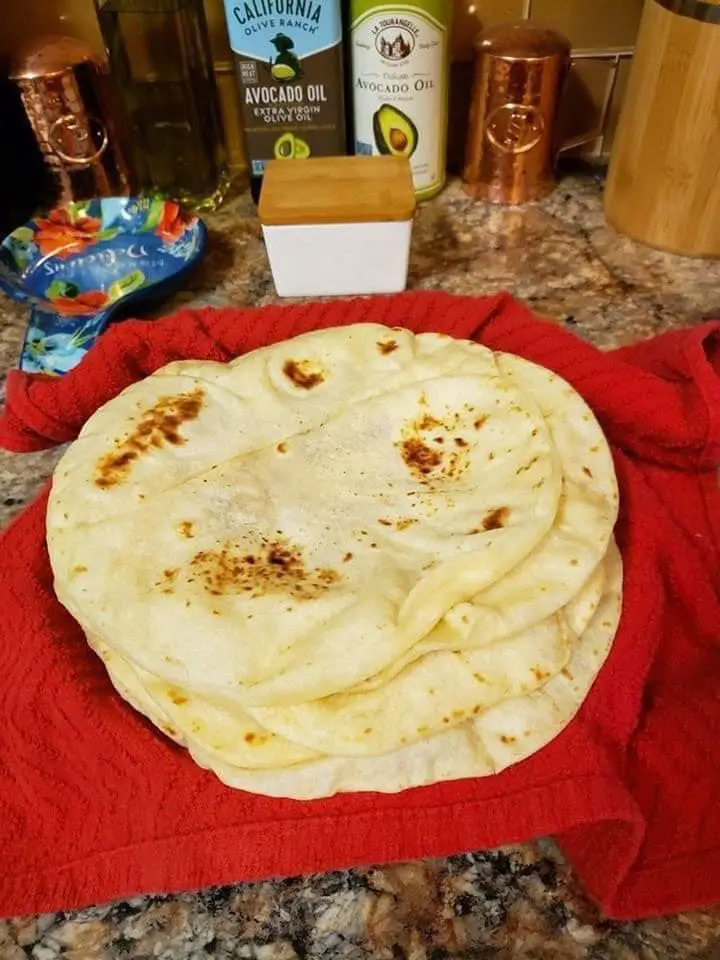
Fried Bannock
Preparation Time: 10 minutes
Cooking Time: 15 minutes
Total Time: 25 minutes
Serving Size: Makes 6–8 bannocks
Skill Level: Easy
Introduction
Fried Bannock is a traditional Indigenous bread that’s crispy on the outside and soft on the inside. Bannock has deep roots in the cultures of First Nations, Métis, and Inuit communities across North America. While bannock can be baked, grilled, or roasted, the fried version is arguably the most popular, beloved for its golden crust and fluffy texture. Whether eaten plain, with butter and jam, or as a base for tacos, Fried Bannock is a versatile and comforting dish that belongs in every home cook’s repertoire.
This recipe is simple and perfect for beginners, yet yields a result that’s rich in flavor and texture. Using only a few pantry staples, you can create this delicious bread in under half an hour. Serve it warm with honey or use it as a side to soups and stews for a hearty, rustic meal.
Ingredients
-
2 cups all-purpose flour
-
1 tablespoon baking powder
-
1 teaspoon salt
-
¾ to 1 cup warm water (or milk for a richer texture)
-
2 tablespoons vegetable oil or melted butter (optional, for a softer dough)
-
Vegetable oil for frying (about 1½ to 2 cups, depending on the pan size)
Equipment Needed
-
Large mixing bowl
-
Wooden spoon or spatula
-
Rolling pin (optional)
-
Large frying pan or cast-iron skillet
-
Slotted spoon or tongs
-
Paper towels
-
Plate or tray for draining
Instructions
Step 1: Prepare the Dough
-
In a large mixing bowl, combine the flour, baking powder, and salt. Mix well to evenly distribute the dry ingredients.
-
Slowly add the warm water (or milk), a little at a time, while stirring. You want a soft, pliable dough—not too sticky, and not too dry.
-
Optional: Add 2 tablespoons of oil or melted butter to the dough for a softer crumb and richer flavor.
-
Knead the dough gently in the bowl or on a lightly floured surface for about 2–3 minutes, just until smooth. Avoid over-kneading, which can make the bannock tough.
Step 2: Divide and Shape
-
Divide the dough into 6 to 8 equal-sized balls, depending on how large you want your bannock pieces.
-
Flatten each ball into a disk about ½ inch thick. You can do this with your hands or a rolling pin. The dough should be slightly thicker than a tortilla.
Step 3: Heat the Oil
-
In a large frying pan or cast-iron skillet, heat about 1½ to 2 cups of vegetable oil over medium heat. The oil should be about 1 inch deep.
-
To test if the oil is ready, drop a small piece of dough into the pan. If it sizzles and rises to the top, the oil is hot enough.
Step 4: Fry the Bannock
-
Carefully place 1 to 2 pieces of flattened dough into the hot oil, depending on the size of your pan.
-
Fry each side for 2 to 3 minutes, or until golden brown and puffed up. Turn them using a slotted spoon or tongs.
-
Remove and drain on a plate lined with paper towels.
-
Repeat with the remaining pieces of dough.
Serving Suggestions
Fried Bannock can be enjoyed in a variety of ways:
-
Sweet: Serve with maple syrup, honey, cinnamon sugar, or jam.
-
Savory: Top with butter, cheese, or eat alongside soup or stew.
-
As a meal base: Use bannock as the base for Indian tacos, topping it with ground beef, lettuce, tomatoes, and cheese.
-
Breakfast: Pair with eggs and bacon for a hearty morning meal.
Tips for Success
-
Don’t overwork the dough: This will make your bannock chewy. Gentle handling ensures a tender result.
-
Use warm liquid: It helps the dough come together more easily and creates a fluffier interior.
-
Control the oil temperature: Too hot, and the bannock will burn before cooking through. Too cool, and it will soak up oil and become greasy.
-
Use fresh baking powder: Old or expired baking powder can prevent the bannock from puffing properly.
Storage and Reheating
-
Storage: Store leftover bannock in an airtight container at room temperature for up to 2 days.
-
Reheating: To reheat, warm in a dry skillet or oven to restore crispness. Avoid microwaving, which softens the texture.
Nutritional Information (Per Piece, Approximate)
| Nutrient | Amount |
|---|---|
| Calories | 220 |
| Total Fat | 12g |
| Saturated Fat | 1.5g |
| Carbohydrates | 25g |
| Sugars | 0g |
| Protein | 3g |
| Fiber | 1g |
| Sodium | 320mg |
| Cholesterol | 0mg |
Note: Nutrition values will vary depending on the size of each piece, type of oil used, and any additional toppings.