Rustic Italian Bread
Preparation Time: 20 minutes
Rising Time: 2.5 – 3 hours
Baking Time: 30–35 minutes
Total Time: 3.5 – 4 hours
Servings: 1 large loaf or 2 small loaves (8–10 slices)
Difficulty: Moderate
Introduction
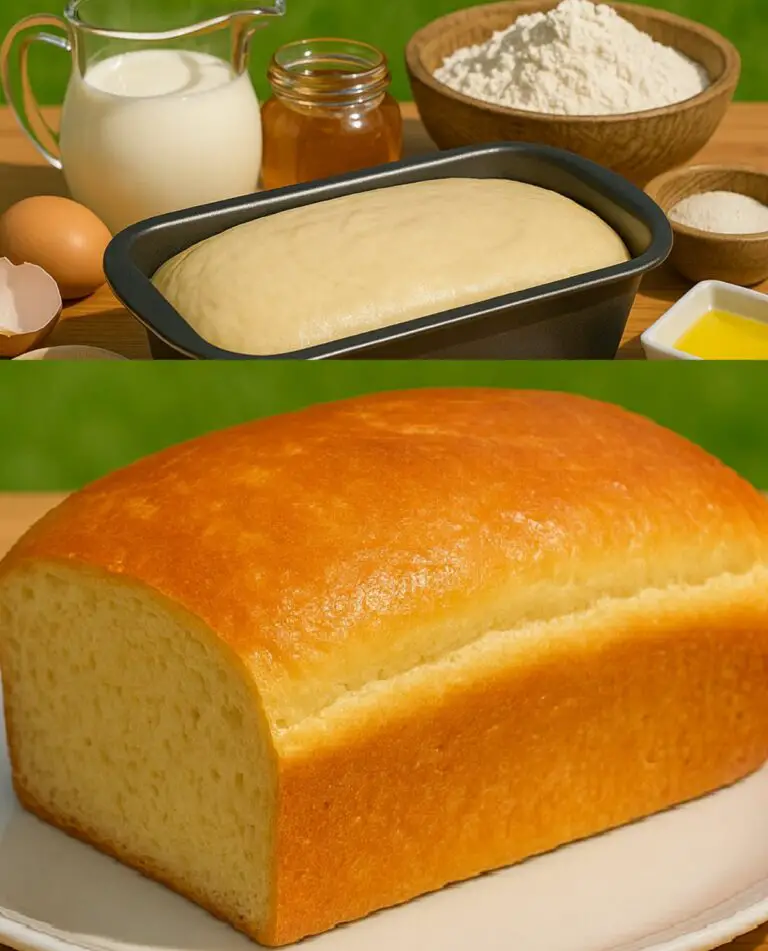
Rustic Italian bread is the kind of loaf you find on the dinner table in a cozy Italian kitchen—crusty on the outside, soft and chewy inside, with just the right amount of air pockets to soak up olive oil, soups, and sauces. This classic bread is made with simple ingredients and traditional techniques that let its pure, natural flavor shine.
It’s perfect for sandwiches, toast, dipping in olive oil and balsamic, or serving alongside pasta or hearty stews. This recipe doesn’t require a sourdough starter or a fancy bread machine—just a bit of time and love.
Ingredients
-
4 cups (480g) bread flour (or all-purpose flour in a pinch)
-
1 1/2 teaspoons salt
-
1 1/4 cups (300ml) warm water (about 110°F / 43°C)
-
1 tablespoon olive oil
-
1 tablespoon honey or sugar
-
2 teaspoons active dry yeast (or 1 packet)
Instructions
Step 1: Activate the Yeast
In a small bowl or measuring cup, mix the warm water, honey (or sugar), and yeast. Let it sit for about 5–10 minutes until the mixture becomes foamy on top. This means your yeast is alive and active. If there’s no foam, your yeast may be expired or your water too hot or too cold—try again!
Step 2: Mix the Dough
In a large mixing bowl, combine:
-
4 cups bread flour
-
1 1/2 teaspoons salt
Make a well in the center and pour in:
-
The yeast mixture
-
1 tablespoon olive oil
Mix everything together with a wooden spoon or your hands until a shaggy dough forms.
Step 3: Knead the Dough
Turn the dough out onto a lightly floured surface. Knead for about 8–10 minutes until smooth and elastic. You can also do this in a stand mixer with a dough hook for 6–7 minutes.
The dough should be soft, slightly tacky but not sticky. If it’s too dry, add a tablespoon of water at a time. Too sticky?Dust with a bit more flour.
Step 4: First Rise (Bulk Fermentation)
Place the dough in a lightly oiled bowl. Cover with a damp cloth or plastic wrap and let it rise in a warm, draft-free area for 1.5 to 2 hours, or until doubled in size.
Step 5: Shape the Loaf
Punch down the dough to release excess air. Turn it out onto a floured surface and gently shape it into:
-
One large round or oval loaf, or
-
Two smaller rustic loaves
You don’t need to shape it perfectly—this bread is meant to look rustic!
Place the shaped dough onto a parchment-lined baking sheet or into a lightly floured banneton or proofing basket if you have one.
Step 6: Second Rise
Cover the dough loosely with a clean kitchen towel and let it rise again for about 45 minutes to 1 hour, until puffed up and slightly jiggly when tapped.
Step 7: Bake
Preheat your oven to 425°F (220°C). If you want an extra crusty exterior, place an empty baking pan on the bottom rack while preheating. Just before baking, pour a cup of hot water into the pan to create steam—this helps develop a beautiful crust.
Before baking, you can also:
-
Score the top with a sharp knife or lame (optional but adds that artisan touch)
Bake the bread for 30–35 minutes, or until the crust is golden brown and the loaf sounds hollow when tapped on the bottom.
Internal temperature should be around 200°F (93°C) if using a thermometer.
Step 8: Cool Before Slicing
Let the bread cool on a wire rack for at least 30 minutes before slicing. This helps set the crumb and prevents it from becoming gummy.
Serving Ideas
Rustic Italian bread is incredibly versatile. Here are a few classic ways to enjoy it:
-
Dipped in olive oil & balsamic vinegar
-
Topped with bruschetta mix or fresh tomato & basil
-
As a base for garlic bread or crostini
-
Served with soups or stews
-
Sliced thick for paninis or grilled cheese
-
With cured meats, olives, and cheese as part of an antipasto board
Tips for the Best Rustic Bread
-
Use bread flour if possible—it gives better gluten structure and chew.
-
Steam is key for that crispy, crackly crust. If you don’t have a second pan, spray the oven walls with water just before closing the door.
-
No stand mixer? No problem. This dough is easy to knead by hand.
-
Want to level up? Try an overnight cold rise in the fridge after shaping—just bring to room temp for 30 minutes before baking.
Nutritional Information (per slice, based on 10 slices)
-
Calories: 160
-
Carbohydrates: 30g
-
Protein: 5g
-
Fat: 2g
-
Fiber: 1g
-
Sugar: 1g
-
Sodium: 200mg
Final Thoughts
There’s something deeply satisfying about making a rustic Italian loaf from scratch. With its chewy interior and golden, crisp crust, it’s a beautiful expression of old-world baking made simple for modern kitchens.
Serve it warm, toast it the next day, or turn it into croutons—however you enjoy it, this rustic bread always delivers.
Let me know if you’d like to try a herb-infused version, or a starter-based (sourdough) one next!