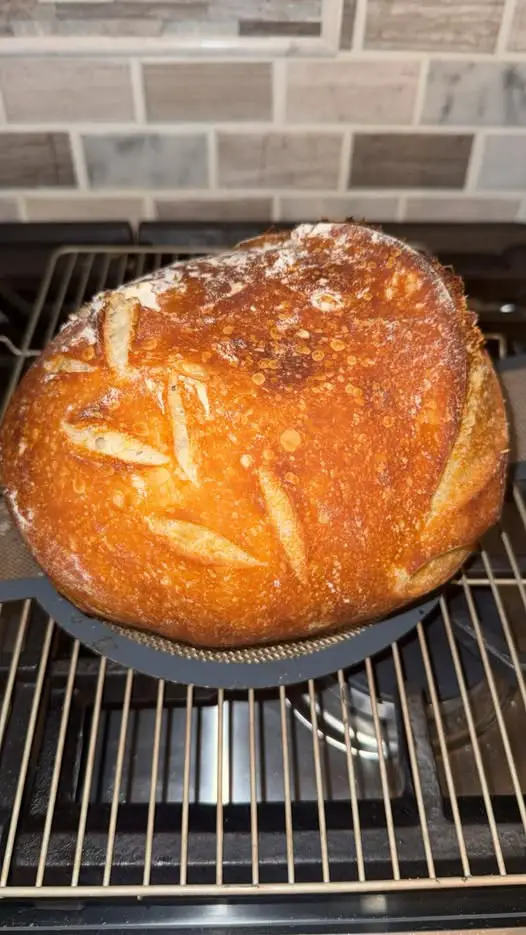
sourdough loaf
Crisp on the outside, soft and airy on the inside, this naturally leavened sourdough loaf is everything you want in homemade bread. Made with just flour, water, salt, and time—this recipe will guide you through every step of the process.
Prep Time: 30 minutes (active)
Fermentation/Rise Time: 10–14 hours (overnight)
Bake Time: 40–45 minutes
Total Time: 12–16 hours
Difficulty: Intermediate
Yields: 1 standard loaf (about 750g)
Recipe Summary
-
Name: Classic Sourdough Loaf
-
Difficulty: Intermediate
-
Flavor Profile: Slightly tangy, nutty, earthy
-
Texture: Crispy crust, chewy open crumb
-
Time Required: 12–16 hours (mostly inactive)
-
Best For: Toast, sandwiches, soups, gifting
Introduction
Few things in life are more satisfying than pulling a beautifully crusty sourdough loaf out of your oven. The tangy flavor, the chewy crumb, the crackling crust—it’s a baker’s dream. Unlike quick yeast breads, sourdough is naturally fermented with wild yeast from your sourdough starter, giving it unique flavor and character.
This recipe walks you through a simple country-style sourdough bread with a relatively high hydration (around 75%) for an open crumb and chewy texture. It’s ideal for toast, sandwiches, or just tearing and dipping into olive oil.
If you’ve already got a healthy sourdough starter, you’re ready to go!
Ingredients
Tip: Use a digital kitchen scale for best accuracy.
Dough:
-
500g bread flour (or a mix of bread + whole wheat flour)
-
375g water (75% hydration)
-
100g active sourdough starter (at 100% hydration)
-
10g fine sea salt
Equipment Needed
-
Mixing bowl
-
Bench scraper
-
Kitchen towel or plastic wrap
-
Dutch oven or baking stone
-
Banneton basket or bowl with cloth lining
-
Parchment paper
-
Lame (scoring tool) or sharp razor
Step-by-Step Instructions
Step 1: Feed Your Starter
Feed your sourdough starter about 6–8 hours before mixing your dough. It should be bubbly, doubled, and pass the float test (drop a small bit into water—it should float).
Step 2: Autolyse (Flour + Water Rest)
In a large bowl, mix:
-
500g bread flour
-
375g water
Mix until no dry bits remain. Cover and rest for 30–45 minutes. This helps build gluten before adding salt or starter.
Step 3: Mix in Starter and Salt
Add:
-
100g active starter
-
10g salt
Mix with your hand using the “pinch and fold” method until well incorporated. Dough will be sticky—this is normal.
Step 4: Bulk Fermentation & Stretch and Folds (4–5 hours total)
Let the dough rise at room temperature (72–76°F / 22–24°C) for 4–5 hours.
During this time, perform stretch and folds every 30 minutes:
-
Wet your hands, grab one side of the dough, stretch it up, and fold it over.
-
Rotate the bowl and repeat on all four sides.
-
Do 4–6 sets total over the first 2–3 hours.
After the last fold, let the dough rest undisturbed until it has risen by about 50% and shows air bubbles on the surface.
Step 5: Preshape and Rest
Turn the dough out onto a lightly floured surface. Gently shape into a round ball. Let it rest uncovered for 20 minutes to relax the gluten.
Step 6: Final Shape
Reshape into a tight ball (boule) or batard, depending on your preference. Place seam-side up into a lightly floured banneton or a cloth-lined bowl.
Step 7: Cold Proof (8–12 hours)
Cover and refrigerate overnight (or up to 16 hours). This slow fermentation develops flavor and makes scoring easier.
Step 8: Preheat Oven and Score
-
Place a Dutch oven (or combo cooker) in your oven and preheat to 500°F (260°C) for at least 45 minutes.
-
Remove the dough from the fridge, flip onto parchment paper, and score the top with a lame or razor (e.g., a simple slash or decorative pattern).
Step 9: Bake
-
Carefully place dough (on parchment) into the preheated Dutch oven. Cover and bake at 475°F (245°C) for 20 minutes.
-
Remove the lid and bake another 20–25 minutes, or until deep golden brown and crusty.
Internal temp should be around 208–210°F (97–99°C) when done.
Step 10: Cool
Let your sourdough loaf cool on a wire rack for at least 1 hour before slicing. This is essential—cutting too early can ruin the crumb!
Storage Tips
-
Room Temp: Store in a paper bag or wrapped in a towel for 1–2 days.
-
Freezer: Slice and freeze in airtight bags for up to 3 months. Toast directly from frozen.
-
Avoid plastic bags unless freezing—it can make the crust soggy.
Nutritional Info (Per Slice, ~1 of 12)
| Nutrient | Approximate Value |
|---|---|
| Calories | 160 kcal |
| Carbohydrates | 32g |
| Protein | 5g |
| Fat | 0.5g |
| Fiber | 2g |
| Sugar | 0g |
| Sodium | 180mg |
Note: Nutritional values vary slightly depending on flour type and hydration.
Variations
-
Whole Wheat: Replace 20–30% of bread flour with whole wheat flour for a denser, nuttier loaf.
-
Rye: Add 10–15% rye flour for deeper flavor and darker crumb.
-
Seeds & Nuts: Mix in sunflower seeds, pumpkin seeds, or walnuts after final stretch and fold.
-
Herb & Cheese: Add fresh herbs and grated parmesan to the dough before shaping.
FAQ
Why is my sourdough flat?
It may be overproofed (too long rise), underproofed (too short), or improperly shaped. Also, scoring and baking in a hot, preheated Dutch oven is critical for oven spring.
Can I shorten the proofing time?
Room temperature proofing is faster, but the cold overnight proofing enhances flavor and structure. Try not to rush this stage.
How do I make it more sour?
Use a longer bulk ferment, proof at cooler temps, or feed your starter less frequently for more tang.
My crust is too hard—what should I do?
Cool the bread fully and store it in a breathable wrap. You can also lightly mist the dough before baking to enhance steam inside the oven.
Final Thoughts
A well-baked sourdough loaf is more than just bread—it’s a labor of love. It reflects the time and care you put into every stretch and fold, every rise and bake. And when you slice into that golden crust to reveal a beautifully airy crumb, it’s all worth it.